General physical training is the basis of any sport, as it develops the strength and endurance of the athlete. In general physical training classes, experienced athletes improve their strength qualities, and beginners form a muscle corset. Traditionally, the general physical fitness complex includes a number of exercises with your own weight. These are squats, pull-ups, abdominal exercises. But push-ups are considered the most “favorite”. These exercises are excellent for developing strength qualities, but performing them tires even professionals, not to mention beginner athletes. And yet, many adherents of a healthy lifestyle want to increase the number of push-ups in one approach. You can really learn this, you just need to be patient, don’t chase quick results and listen to the advice of your coaches.
Stop procrastinating, it's time to start.
@bobbyatiedu_idk
If you keep promising yourself to start going to the gym to get closer to the appearance of Marvel superheroes, but for some reason you just can’t do it, we have a solution. This is a program of 100 push-ups in 6 weeks that will knock all the laziness out of you and restore the belief that you can punch a wall with your fist (but it’s better not to try).
The advantage of this program is that you never have to go to the gym, because you will do all the necessary exercises at home. Well, you can also impress your girlfriend and friends when, after the phrase “look, I can,” you do a hundred push-ups in one approach. When was the last time you performed something like this?
“But I practically can’t do push-ups.”
, - you will say and you will be more right than ever. However, fortunately for you, this program takes into account the fact that you are still a beginner athlete and you need to smoothly get into the rhythm.
All you need is a little persistence, a small piece of flooring and six weeks of strict adherence to all our instructions. In fact, not so much.
How to learn to do 100 push-ups: the very beginning
First of all, it is worth mentioning that push-ups are one of the most effective and versatile exercises created by man. They not only allow you to give your body an athletic shape and build muscle mass, but also very well increase endurance, which is useful for any physical activity.
More precisely, push-ups actively pump up the triceps and pectoralis major muscles. Plus, they positively stimulate the growth of many auxiliary muscles, including: the latissimus dorsi, lower back muscles, core muscles, small muscles of the hand, forearms, deltoids and, of course, everyone’s favorite biceps.
Before you take a lying position and start training, you should know how to do push-ups in general. To do this, first of all, you need to remember about proper breathing. Without it, all your efforts may not only be in vain, but also harmful.
Everything is very simple
: When we go down, we inhale, and when we go up, we exhale.
In addition, the most important requirement for proper push-ups is the technique of performing them. It all looks something like this:
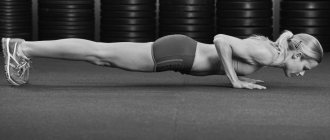
That is, first you need to take an emphasis lying on outstretched arms, and then bend them almost until your body touches the floor. To complete the push-up, you need to rise to the starting position until your arms are extended.
This way, you only use your arms to raise and lower your body weight. The legs and body should be a straight line, so to avoid injury and perform the exercises effectively, try not to arch in the lower back.
So, when we reminded you how to do push-ups, you can move on to the most important thing.
Anatomy and benefits of exercise for the pectoral muscles
So, let's talk a little about the structure of the upper body. When doing push-ups, the following muscles are simultaneously involved: pectoral, deltoids, triceps, serratus, abs.
Muscle groups involved in doing push-ups
Thus, push-ups have a complex effect on many muscles at once and allow you to strengthen the muscle corset as a whole. This not only makes the body fit, but also improves the body's endurance and increases strength. By devoting even 10 minutes a day to such loads, you can achieve good results. Push-ups can be done even at home. The most important thing is the right technique!
First week
To learn how to do push-ups 100 times in one approach, you need to practice regularly and very diligently throughout the entire program. It is best to train two days in a row and then rest for one or two days to allow the body to recover.
Plus, don’t forget about the minimum warm-up before starting exercises. Otherwise, there is a risk of injury and not swinging to the fullest.
Workout #1 (Ladder)
Surely you are familiar with the good old “ladder”, which all the boys used to play on the horizontal bars. Its essence is to do more repetitions with each new approach.
To assess your strength and find out what you are capable of, first try to understand how many times you can do push-ups from the floor. For example, if ten times, then you will need to start with one repetition and do ten approaches.
That is, first do one push-up, rest for 10-20 seconds, then two times, pause, then three and so on until ten.
If you are able to do 15 or 20 push-ups, add two push-ups to each new approach. Thus, in ten approaches you will reach 20 repetitions at a time. If you are ready to do 30 push-ups right away, do a step of three repetitions.
After you complete the ladder, your goal will be to stand in an upright position until you feel a burning sensation in your muscles. To do this, stand in a lying position, bend your elbows to 90 degrees and try to stay in this position until you are exhausted. Then you can hit the floor and congratulate yourself on completing your first workout.
Workout #2 (Static)
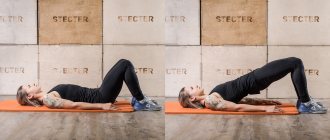
Don't be surprised, but during the second workout of each week you don't need to do push-ups. It will be devoted to static exercises that are no less effective than push-ups.
All you have to do is alternate standing positions while lying on straight arms and bent ones. The approaches should be one minute each, and you can rest between them for two to three minutes. To begin with, you will need to do six such circles - that is, 12 approaches.
Once you deal with all this, you can relax. The next day you can rest.
Workout #3 (Slow push-ups)
If you've never tried slow push-ups, now is the time to try it. Believe me, it's worth it.
In slow push-ups, you need to lower yourself for five seconds and rise back up for the same amount. That is, each push-up should take you ten seconds.
In this workout you will need to do five sets of six of these push-ups. You can rest for two to three minutes.
Workout #4 (Simple push-ups)
This is the last workout of the first week and we will devote it to classic push-ups. Only now it won’t be a “ladder”, but the maximum number of repetitions that you can do in one approach.
You should have five such approaches in total on this day, and you can rest for three to five minutes between each of them.
Types of exercises to warm up before push-ups
No workout begins without a warm-up; it is important to warm up and engage all the major muscles.
- Stretch your neck: tilt your head back and forth (10 times), turn in one direction and the other (10 times).
- Stretch your shoulders: Rotate your shoulders only 10 times forward and 10 times back. Next, connect your arms and repeat the exercise. You can also do lateral raises and extensions, as shown in the figure.
- Stretch your hands: palm facing the floor, hand going up, then down. Repeat 10 times.
- Clench your fists and rotate your hands away from you (10 times) and towards you (10 times).
- Next, twist your torso 10 times in each direction.
- Don't forget to stretch your legs. Perform rotational movements with your left and right legs alternately back and forth 10 times.
- The end of the warm-up will be calf raises. Do the exercise 10 times.
For a clear example, you can use this diagram:
Basic warm-up exercises
Second week
Workout #1 (“Ladder”)
In the second week, we return to our classic “ladder” and try to surpass the results of the very first workout. For example, this time let's try to add four repetitions with each new approach to eventually reach 40 repetitions. The break between approaches can be from 10 to 40 seconds (no more).
After the “ladder” exercise, you can rest for about three minutes and move on to static exercises, which completes the first training day of the week.
Stand in a prone position, bend your elbows to 90 degrees and try to stand longer than last time. Now drop down, training is over.
Workout #2 (Static)
This time you will do the same six circles in two stances - on outstretched and bent arms, only now your approaches will last not 60 seconds, but as much as 80. You can rest for two to three minutes between approaches.
After this workout, you deserve a day of rest.
Workout #3 (Slow push-ups)
Do you also remember slow push-ups for ten seconds each? Now, each push-up you do will take a full 20 seconds - ten when lowering down and the same amount when lifting to the starting position. However, they must be done for the same one minute (that is, only three push-ups).
You also need to do five approaches, but, as you already understood, they will last the same amount of time. You can rest for three to five minutes.
Workout #4 (Simple push-ups)
Everything is the same as in the first week, just try to do more repetitions in one approach. We remind you that there should be five approaches, and the intervals between them can be from three to five minutes.
Explosive Strength Development
Explosive strength is the ability to do maximum work in a minimum period of time. This quality is necessary when practicing CrossFit and many other disciplines. Explosive strength exercises already presuppose the athlete’s good endurance and developed muscles. Therefore, they are not recommended for beginners.
Plyometric exercises include clap push-ups, Spartan push-ups (one hand is placed slightly in front and the other slightly behind, changing their position as you jump) and any other variations that involve a dynamic change in posture during the movement.
A great example of a multifunctional plyometric exercise that combines jumping jacks with push-ups is the burpee.
Third week
Workout #1 (Ladder)
We do the ladder in increments of five repetitions, rest from 10 to 50 seconds, and then after a three-minute pause we get into a static position and remain in it for as long as possible.
Workout #2 (Static)
All the same six circles (12 approaches), but now we try to stand in planks for 100 seconds. Rest for two or three minutes after each approach.
Workout #3 (Slow push-ups)
This time you will do one push-up for 30 seconds - 15 to go down, and the same number to get up. That's a total of two push-ups per minute.
There should be five repetitions, and the intervals between them can last from three to five minutes.
Workout #4 (Simple push-ups)
We are trying to set a new record within five approaches. We rest between approaches for the same amount - three to five minutes.
General recommendations
To ensure the most effective results from push-ups, you must adhere to the following recommendations:
- the number of repetitions in the first lesson is no more than 10. As already mentioned, it is important to increase the pace gradually. At the end of the workout, you should feel pleasantly tired, without a feeling of overexertion;
- Before push-ups, we strongly recommend doing a short warm-up lasting about 10 minutes;
- classes must be regular. Do not allow long breaks, as all the results obtained will go down the drain.
Fourth week
Workout #1 (Ladder)
We welcome week four with the good old staircase, which forces you to increase your stride up to six repetitions. By the way, with such an impressive number of push-ups, you can rest longer between approaches - from ten seconds to two minutes.
After the “ladder” we rest a little and get into a classic plank position with the goal of breaking the previous time record. We fall.
Workout #2 (Static)
These are six circles of classical statics, but now each approach should last two minutes, and you can still rest the same - two to three minutes.
Workout #3 (Slow push-ups)
It would seem much slower? It turns out there is somewhere. Now you have to spend a whole 40 seconds on one push-up (20 down and 20 up), and you will have to do two of them, which will take not a minute, but 80 seconds.
There should be five approaches, and you can rest for two to three minutes.
Workout #4 (Simple push-ups)
We hope you already remember everything - five sets of the highest number of repetitions. We reach new heights.
Fifth week
Workout #1 (Ladder)
The number of repetitions in our favorite “ladder” will now be calculated from the maximum number of repetitions that you can perform at one time. Moreover, you can rest for three minutes between approaches.
Workout #2 (Static)
This time we won't add time to your static planks. Try to repeat the workout that awaited you in the fourth week of the program.
Workout #3 (Slow push-ups)
However, at this stage you will have to work hard. Now you have to do four push-ups within four minutes. That is, you should spend a minute on each push-up (30 seconds down and 30 seconds up).
Try doing five sets at three-minute intervals.
Workout #4 (Simple push-ups)
According to our forecasts, by the fifth week you should already be doing about 80 push-ups at a time. If this is the case, try with all your might to get closer to the coveted hundred within five approaches with a three-minute rest between them.
Strengthening your fists, hands and fingers
So, above we looked at three main groups of push-ups, differing in the width of the arms and the position of the body relative to the floor. But the scope of the exercise is not limited to training the chest, triceps and shoulders.
Now let's move on to narrower points, for example, targeted strengthening of the hands and fingers. This aspect is extremely important when practicing martial arts and any sports that involve striking with fists, palms or fingers.
To strengthen the striking surface of the fist and the ligaments of the hands, push-ups are used on the fists and on the back of the hands. Doing push-ups on your fingers will help make your fingers strong and strong.