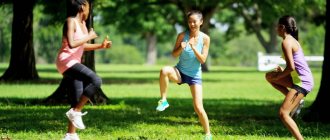
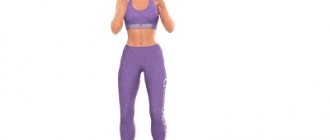
Many people, and runners in particular, periodically experience leg pain that is based in the foot and ankle area. Foot strengthening exercises can help relieve pain, improve overall health, and increase the flexibility and elasticity of muscle tissue.
The key to success and pain relief is regular exercise and proper stretching techniques for your feet and ankles. An integrated approach will allow the muscles to fully carry out their supporting function.
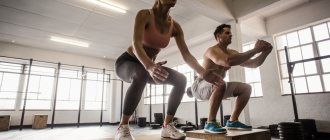
Most of the exercises presented are easy to perform and do not require the use of special equipment. They can be performed both at home and in the gym as part of your daily workout.
Complex execution time: 15-20 minutes.
Exercises for flexibility and mobility of the feet
These exercises are specifically designed to work on muscle flexibility and joint mobility.
Calf raises and crunches
This exercise consists of 3 stages and will help strengthen all parts of the foot and toes.
Sit on a chair, back straight, feet on the floor. Without lifting your toes off the floor, lift your heels. The top of the foot, near the toes, remains on the floor. Hold this position for 5 seconds before lowering your heels.
In the second step, lift your heel so that the tips of your big and second toe rest on the floor. Hold this position for 5 seconds.
marathon and half marathon training plans and start training today!
In the third step, lift your heel and curl your toes inward so that only your toes touch the floor. Hold this foot position for 5 seconds. Perform each step 10 times.
Thumb stretch
The big toe helps a person maintain balance when walking and standing, and special attention should be paid to its mobility. The following exercise also consists of three stages and was designed to provide flexibility and relieve pain in the toes, particularly due to ill-fitting shoes.
Sit on a chair, back straight, feet on the floor. Place your left foot on your right thigh. Use your fingers to gently pull your thumb up, down and to the side. Stay in this position for 5 seconds. 1 approach includes 10 repetitions. Then do the exercise on the other leg.
Content
- 1 Soleus stretch
- 2 Achilles tendon stretch
- 3 Calf stretch
- 4 Tibialis anterior stretch
- 5 Stretching the everting ankle muscles
- 6 Inversion ankle muscle stretch
- 7 Stretching the foot pronators
- 8 Stretching the foot arches
- 9 Metatarsal arch stretch
- 10 Toe Extensor Stretch
- 11 Toe flexor stretch
- 12 Big toe adductor stretch
- 13 Spreading fingers
- 14
Foot Strength Exercises
Flexible toe
The exercise allows you to develop well the mobility and strength of the muscles and tendons responsible for the movement of your toes. You can perform it on both legs at once or alternately, depending on your convenience.
Sit on a chair, back straight, feet on the floor. Spread your toes as far apart as possible, while avoiding unnecessary tension. Hold the position for 5 seconds. Repeat 10 times.
After performing this exercise regularly, try putting a rubber band on your fingers. This will provide resistance and make the exercise more challenging.
Rolling socks
Toe curls strengthen the flexor muscles, increasing the elasticity and strength of muscle fibers.
Sit on a chair, back straight, feet on the floor. Place a small towel on the floor in front of you, with the short side facing your feet. Place the toes of one foot on the short side of the towel. Try grabbing the towel with your toes and pulling it toward you.
Repeat the exercise 5 times on each leg. A more complex version of the exercise is performed with a towel with a small weight attached to it.
Exercise with balls
This complex is designed to increase the strength of the muscles located on the foot and toes.
Sit on a chair, back straight, feet on the floor. Place an empty bowl and a container of marbles in front of you (20 marbles will be enough to start with). Using only the toes of one foot, pick up each ball and place it in the empty cup. Repeat the exercise on the other leg.
Walking on the sand
Walking barefoot in the sand is a great way to stretch and strengthen your feet and calf muscles. This is a beneficial exercise in general, as the soft and pliable texture of the sand makes walking more physiological and uses all the muscles of the ankle.
You can go to the beach, to the volleyball court, or even buy a special set of sand for your home. Be sure to take off your shoes and socks and walk as much as possible. Increase your walking distance gradually to avoid straining your leg and calf muscles.
Benefits of leg stretching exercises
Stretching is useful for several reasons:
- Muscles become more resistant to injury.
- Blood circulation improves.
- Performing leg stretches at the end of your workout allows you to recover faster from other exercises.
- Helps restore the body to tone after injuries.
There are different types of stretching:
- Static. Usually performed after standard physical training to speed up recovery after it. The legs are stretched for up to a minute.
- Dynamic. All exercises are done dynamically with increased amplitude.
- Ballistic. Exercises for professionals. Performed with sharp swinging and high-amplitude movements.
Exercises for foot pain
Finger stretch
This stretch is useful in preventing or treating plantar fasciitis, a condition that causes pain in the heel when walking, as well as difficulty moving the toes.
Sit on a chair, back straight, feet on the floor. Place your left foot on your right thigh. Pull your toes towards your ankle. A stretching sensation should appear along the bottom of the foot, towards the heel. Hold the position for 10 seconds.
If you experience pain or excessive tension while stretching, massage the midfoot. Repeat the exercise 10 times on each leg.
Ball exercise for the arch of the foot
Rolling a ball with your feet can help relieve midfoot discomfort and reduce pain associated with plantar fasciitis.
Sit on a chair, back straight, feet on the floor. Place a small hard ball on the floor in front of you. Place one foot on the ball and move it around, pressing firmly without causing any discomfort. The ball should massage the bottom of your foot. Spend 2 minutes on each leg for this massage. If you don't have any suitable balls at home, you can use a frozen bottle of water.
Achilles stretch
The Achilles tendon is a ligament that connects the heel to the calf muscles. Unfortunately, it is not that difficult to overextend this important muscle unit. That is why it is especially important to maintain its strength and develop elasticity. This can help prevent injuries and relieve pain in the legs and ankles.
Stand facing the wall and raise your arms so that your palms rest against the wall. Place one leg back, keeping your knee straight. Then bend the knee of the opposite leg. Both heels are pressed to the floor. Move your hips forward until you feel a stretch in your Achilles tendon and calf muscles. Hold the position for 30 seconds, then switch legs.
Repeat three times on each side. You can also try another stretch by bending your back knee and pushing your hips forward.
Stretching the soleus muscle[edit | edit code]
Soleus stretch
What are you stretching?
: Muscles in the back of the foot (heel)
What are you abbreviating:
The front of the calves (dorsal ankle extensors, especially the tibialis anterior)
How many times to repeat:
10 per side
How long to hold:
2 seconds
Sit with the leg you are not using extended in front of you. Bend the other leg at the knee at an angle of 90°. Place your foot on the surface of the floor or table. Grasp the bottom of your foot with both hands and pull it towards your body as far as possible. At the end, help a little with your hands. If you cannot reach your foot with your hands, use a rope. Make a loop and place the foot you are working with in it, holding the ends of the rope with your hands.
One head it's good, but two better…
Assistant, sit next to the athlete. Let him do everything himself, but at the end help him a little. Grab your foot with both hands, your knee should be under your armpit. Pull slightly and hold for 2 seconds.
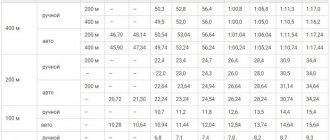
| Range | Position on the dial | Range of motion degree |
| Red range Too tight | 9.00-10.00 | 0-30 |
| Yellow range Normal | 10.00-11.00 | 30-60 |
| Green range Athlete's norm | 11.00-11.30 | 60”-75 |
| Blue range Hypermobility | 11.30-12.00 | 75-90° |
How then to take care of your feet?
If the foot is severely deformed, only surgery can cure it. But if the foot has just begun to change, the process can be stopped. The first step to take is to check if you are wearing the right shoes.
Instead of the one that did not pass the test, buy sneakers: they minimally restrict the movement of the foot and therefore cause the least harm to it.
Signs of the right shoes
- Does not hinder movement
. Stand on your toes. It should be simple. If not, the shoes are harmful to your feet. - Doesn't feel like a burden on your feet.
If you wear shoes all day and don't feel tired in your feet, you'll be fine. - The material is soft.
The denser the material of the shoe, the more it restricts the movement of the foot. - The sole is also soft.
If the sole of the shoe is hard, it completely disables one of the elements of walking - the heel-to-toe roll. Normally, we walk like this: first we touch the ground with our heel, then we roll onto our toes, and with the next step we push off from it. The softer the sole, the greater the roll and the better for the muscles. - The sole is wide.
The sole of the shoe must completely cover the plantar surface of our foot, otherwise the foot will roll inward. - The nose is not narrowed.
A narrow nose blocks the intermetatarsal muscles in the forefoot and contributes to their atrophy. - The heel is no higher than 3 cm.
When we increase the instep in the rear foot, that is, we stand on heels, the load on the forefoot increases enormously. Result: the foot is deformed.
The second step in taking care of your feet is to buy orthotics.
The insole will artificially support the arch of the foot - that part of the sole that should not touch the surface, but due to deformation it becomes flat. The load will be distributed evenly and the deformation will slow down. It is better not to buy ready-made insoles, but to make them according to your own measurements so that they best fit your foot. It’s also worth asking your doctor or a consultant at an orthopedic store how the insole is made: the most modern ones have a spring mechanism that helps to further train the foot muscles when walking.
The third step is to do isolated exercises to strengthen the muscles of the foot
. Isolated - because we target the muscles in the foot that have weakened, strengthen them and stop the progression of foot deformity [, ]. Actually, we do approximately the same thing during regular strength training, doing exercises either on the abdominal muscles or on the back muscles.
The set of exercises for the feet below is for plano-valgus deformation of the feet, which almost everyone who wears shoes has to one degree or another. You can add it to your regular workout. Or do this warm-up for your feet during a break at work: it just takes 20–25 minutes. For each exercise, do three sets of 12 repetitions. You need to perform the complex at least three times a week.
1. Circles
While sitting or lying down, stretch your legs out in front of you. Elevate them or lean lightly on your heels. Make circles with your toes while rotating your feet at the ankle. First, make 6 circles inward (thumbs together as you move from top to bottom), then 6 circles outward (reverse to the previous one). After this, do 6 circles with both feet in the same direction clockwise and 6 circles counterclockwise. Try to make the circles as wide as possible, moving your feet as far as possible in each direction. The center of the circle should not move.
Stretching the soleus muscle
This stretching exercise targets the area of the soleus muscle, which is deeper, underneath the larger gastrocnemius muscle. Bending the knee relaxes the calf muscle, allowing the soleus muscle of the leg to stretch.
- Stand in front of a wall and lunge back with one leg.
- Place your hands on the wall for balance.
- Bend both knees, focusing on the back knee.
- Then shift your weight to the toe of your front foot. Your heels should be in full contact with the floor.
- Stay in this position for 10-30 seconds. The back should remain straight.
Muscles involved: Tibialis posterior. Soleus.
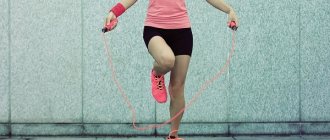
Don’t forget to warm up a little before the set of exercises: stretch and do simple exercises: jump rope, do squats several times, do a couple of arm rotations and leg lunges.
Stretching while standing
The lower leg is stretched all the way until a space is formed that resembles a wheel in shape.
- Stand straight with your feet shoulder-width apart.
- Bend your right leg to point your ankle toward the floor.
- Hold the position for 10 to 30 seconds.
- Switch legs.
Stretching is a way not only to stretch your limbs, but also to lose weight. When you exercise, you lose calories. Stretching can be practiced as an independent form of fitness, or along with more intense aerobic exercise.
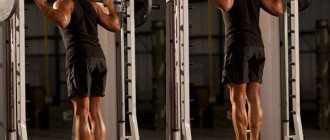
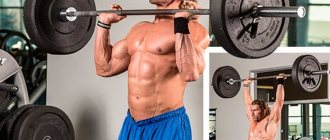
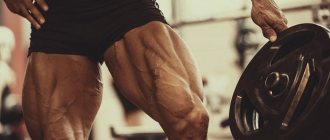
Anatomy of leg muscles
Legs are a voluminous group of muscles, which during training will help burn more fat and make the body sculpted. Pumping your legs will give an impetus to the growth of muscle mass and increase in volume.
There are 4 muscle groups in the legs:
- Buttock muscles.
- Anterior, located on the entire front surface of the thigh.
- Rear, located under the buttocks and above the knee.
- Shins.
Leg muscles are elongated muscles that, when contracted or relaxed, allow the body to move. Small ones, I help the big ones hold on, work their joints, maintain posture.
Let's look at each separately. 1. The butt consists of three parts: the gluteus maximus, the gluteus medius and the gluteus minimus. The first is responsible for the appearance of the buttocks and is one of the most massive muscles in the body. The other two are hidden under the large muscle. If they are pumped together, the “fifth point” looks toned and elastic. The buttocks are responsible for rotating the joints in the pelvis, moving the legs back and to the side.
2. The quadriceps muscle of the thigh, located in the front of the leg, is also called the quadriceps. This is the strongest of the leg muscles and occupies the entire front part. The quadriceps is a set of the following muscles:
- lateral – a large muscle on the outer side of the leg with a flat shape;
- the medial (teardrop-shaped) muscle, which runs along the inner line of the thigh to the patellar ligament;
- the intermediate muscle of the thigh, located between the first two;
- rectus muscle, the longest of all. This muscle has almost no effect on the knee joint.
The quadriceps femoris is one of the main, but not the only muscles in the front of the thigh. Its mission is to bend the knees, bend the body forward and extend the hips.
3. At the back of the legs there are three muscles responsible for the functioning of the hip and knee joints. These include:
- biceps femoris - a biceps muscle responsible for flexing the lower leg at the knee joint and abducting the hip back;
- semimembranosus – flexes the lower leg and extends the thigh;
- the semitendinosus is involved in the same processes as the previous ones.
4. The musculature of the lower leg consists of: gastrocnemius, soleus, plantar and anterior tibial. The main functions of the muscles are movement of the foot, ankle joint, and inward rotation of the knees.
Only knowing the anatomy of the body can you quickly pump up your legs. Of course, for this you need to choose the right set of exercises.
Big toe adductor stretch[edit | edit code]
Big Toe Adductor Stretch
What you stretch:
Thumbs (adductor pollicis)
What are you abbreviating:
Thumbs (abductor pollicis)
How many times to repeat:
10 each finger
How long to hold:
2 seconds
Sit on a flat surface with your legs extended forward. Bend the leg you will be working with at the knee at an angle of 90°, and place your foot on the surface on which you are sitting. Grasp the bottom of the foot you are working with both hands. Keeping your heel flat, lift your foot slightly. Move your thumb away from the rest. At the end of the movement, help a little with your hand. (If your big toe is too weak to move, it will tilt inward. This condition is called hallux valgus. This can lead to bunions.)
One head it's good, but two better…
Assistant, sit next to the athlete. Let him do all the work, but give him a little help at the end. Grab your working foot with one hand, and with the other, move your big toe away from the rest, holding for 2 seconds.
Exercise 2. Crawling forward with your fingers
A very simple exercise: you just need to crawl with your foot forward. To do this, sit comfortably on a chair, place your feet on the floor, rest your heel on the floor and move them forward with your toes. The toes crawl, the foot moves forward. Now repeat the same thing, only crawl backwards. And then - with the second foot. This is how you train the lumbrical muscles. They are located between the metatarsal bones and are especially affected if shoes have heels.
Spreading fingers[edit | edit code]
Finger spread
What are you stretching:
Toes (deep transverse ligaments, long toe flexor ligaments, and toe extensor ligaments)
What are you abbreviating:
Toes (abductors and adductors)
How many times to repeat:
10 each finger
How long to hold:
2 seconds
Sit on a flat surface with your legs extended forward. Bend the leg you will be working with at the knee at an angle of 90°, and place your foot on the surface on which you are sitting. Keeping your heel flat, lift your foot slightly. Spread your fingers apart. At the end of the movement, help a little with your hand, spreading them wider in pairs.
One head it's good, but two better…
There are no specific degrees of range of motion for the toes. Typically you should be able to spread each pair of fingers 45° apart.
Assistant, sit next to the athlete. Let him do all the work, but give him a little help at the end. Spread your fingers in pairs, holding for 2 seconds.
Tibialis anterior stretch[edit | edit code]
Tibialis Anterior Stretch
What you stretch:
Anterior calves (dorsal ankle-foot extensors, especially tibialis anterior, and digital extensors)
What are you abbreviating:
Back of the calves (plantaris, soleus, gastrocnemius and finger flexors)
How many times to repeat:
10 per side
How long to hold:
2 seconds
Note
. You can use a folded towel, placing it on your thigh, under the ankle of the leg you are working on.
Sit with your legs extended forward on a flat surface. Lift the foot of the leg you will be working with and place it on the thigh of the other leg above the knee. Lean forward and grab the foot of the leg you will be working on from the side of your other leg. With your other hand, apply slight pressure to the knee of your first leg to stabilize it. Straighten the foot you are working with. You can help a little with your hand at the end of the stretch. To modify this stretch, pull slightly at the end of the exercise to stretch the tibialis posterior muscle.
One head it's good, but two better…
Note
. When you imagine a clock face, start with the foot of the leg you are working on perpendicular to the other leg. The clock is next to the foot, the fingers point to 12.00.
One head it's good, but two better…
Assistant, let the athlete do everything himself, but help him a little at the end. Use one hand to grab your shin to stabilize your leg, and the other to grab the top of your forefoot. Push a little and hold for 2 seconds. You can modify this exercise by turning your foot inward as you push.
Note
. 0° = 12.00
| Range | Position on the dial | Range of motion degree |
| Red range Too tight | 12.00-10.00 | 0°-60° |
| Yellow range Normal | 10.00-9.30 | 60-75° |
| Green range Athlete's norm | 9.30-9.00 | 75°-90° |
| Blue range Hypermobility | 9.00-8.30 | 90°-105° |
Workout and diet
Even if you exercise at home, do not forget to warm up your muscles and joints. Just 5-10 minutes of running in place and jumping rope will help prevent injuries and prepare your muscles for productive work. But even here it is important to remember that the key to achieving any sports goal is nutrition. If you want to see the first results within a month, try to give preference to protein foods and complex carbohydrates.
Let the main products of fractional nutrition be porridge, lean meat, cottage cheese, eggs, vegetables and fruits. The ideal calculation of proteins should be 1.5 - 2 grams per kg of weight, carbohydrates no more than 2 grams per kg. Guys, unlike girls who always want to lose weight, can eat sweets and starchy foods, but only in limited quantities and in the first half of the day. After all, the main goal is to gain muscle mass, not a layer of fat.
It is important not to forget that just as you cannot lose weight in one part of the body, you cannot gain weight. By pumping your legs, your upper body will also become stronger. The legs are a large muscle and the more you load it, the more testosterone will be produced, which provokes muscle growth. Performing each exercise 15 - 20 times, 3 - 4 times 3 times a week, in a short time you will see excellent results, which will encourage you to continue training. After all, the main motivator is the interested glances of girls and the envious gazes of guys.
Watch the video:
Achilles tendon stretch[edit | edit code]
Achilles Tendon Stretch
What you stretch:
“Chord” connecting the heel and calf (Achilles tendon)
What are you abbreviating:
Anterior calves (dorsal ankle-foot extensors, especially tibialis anterior)
How many times to repeat:
10 per side
How long to hold:
2 seconds
Sit with the leg you are not using extended in front of you. The second leg should be bent at the knee. The foot is on the surface, the heel is as close to the buttocks as possible. With both hands, grab the bottom of your foot. Lift it up, keeping your heel on the surface. Give a little help with your hands at the very end of this movement.
One head it's good, but two better…
Assistant, sit next to the athlete. Let him do everything himself, but help him a little at the end. Grasp the front of the foot of the leg you are working on with both hands and place your knee under your armpit. Pull slightly and hold for 2 seconds.
| Range | Position on the dial | Range of motion degree |
| Red range Too tight | 9.00-9.30 | 0°-15° |
| Yellow range Normal | 9.30-10.00 | 15°-30 |
| Green range Athlete's norm | 10.00-10.30 | 30°-45° |
| Blue range Hypermobility | 10.30-11.00 | 45-60° |
Stretching the lower leg and ankle joint
- Get on your knees with your shins touching the floor. Socks point backwards.
- Slowly lean back, lifting your knees off the floor.
- If you do not feel the stretch in your legs, then throw your arms back, rest on them and repeat the exercise stretching the ankle joint until it stops.
Watch the video to see how to do this exercise correctly:
During exercise, you should feel a stretch in your legs, but not pain. Pain signals damage that should not be allowed to occur. Try to do the exercises smoothly and carefully to prevent injury.
While performing the exercise, make sure that your back remains straight at all times. Even if the exercise involves bending, try to straighten your back all the time. If you do not follow this, then efficiency is lost and muscle elasticity decreases.