How to do the longitudinal splits in 10 days at home ( 4 votes, average: 5.00 out of 5)
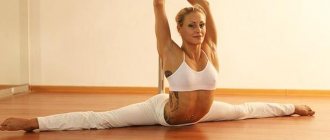
Not every one of us can boast of our achievements and a well-prepared body, but everyone wants to become more graceful and flexible. All these reasons inspire in us the desire to achieve our goal and do the cross splits. You can verify this by looking at the transverse twine photo .
How to do cross splits in 10 minutes or days
In addition to all of the above, cross twine will help to obtain excellent elasticity of ligaments and joints, and also has a beneficial effect on the menstrual cycle. If you perform splits exercises, your legs and abs will become more elastic and attractive, and the fat that appears in the problem areas of the buttocks and thighs will disappear. Below we have posted a small tutorial on how to do the cross splits - the most popular mistakes made by beginners are shown.
How to do the splits in 10 days.
You will need:
Lightweight clothing made from natural fabric for training. Rug. Persistence. Determination.
1 warm-up is necessary to warm up the muscles. For this, jumping, running in place, swinging your arms and legs, or simply walking intensely for 10-12 minutes are suitable. This time is enough to move on to stretching exercises.
2 Sit on the floor (on a mat) and stretch your legs. Use your fingers to touch your toes. The back should be straight. Reaching your toes, hold for 20-30 seconds and exhale. Repeat this exercise 10-15 times. Watch your back, don't slouch.
3 Sit so that one leg is extended straight in front of you, and the second is to the side, at a right angle (90\xB0) relative to the first. If a right angle does not work out, try to achieve this without fail, help your leg with your hands, stretch with your whole body. Change the position of your legs: right in front, left to the side, then vice versa - left in front, right to the side. Remember the right angle. The back must be straight.
4 in a lying position, raise your legs strictly at right angles to your body. Spread them apart and hold for 1 minute. Then connect, lower to the floor, rest for 10 seconds. Raise and spread your legs again, holding this position for 1 minute. Alternate with rest. Repeat the exercise 10 times on the first day of training, and in subsequent days increase the load at your discretion.
5 stand up, alternately lift your legs forward to 90\xB0. The back is straight. Do ma first? Hi kick 15-20 times, and then, raising your leg, try to hold it in this position for 20-30 seconds. The number of these exercises can be arbitrary, but the more, the better. Now this is the same exercise, only your legs should be raised and then moved to the side. First - swing, then - holding the leg in weight.
6 This exercise is performed standing. Make a sharp lunge forward with your right leg at a right angle. Make rocking, squatting movements (muscle stretching should be felt in the groin) for 20-30 seconds. Then lunge forward with your left leg and repeat the movements. The exercise takes 6-8 minutes to complete.
7 In a standing position, lift your right leg, bent at the knee, and press it to your chest. Move your leg to the side, fix it. Then use your hand to try to move your leg as far to the side as possible (you should feel muscle stretches. Change your leg and repeat the exercise.
8 in a standing position, throw one leg over the back of a chair, table or window sill (if you are doing the exercise at home) and, bending your leg at the knee, move your whole body towards the object on which your leg is thrown. 10-15 times. Change your leg.
Note?
During exercises, do not try to stretch the muscles as much as possible, until there are red circles in front of your eyes. Use moderation, otherwise you can injure not only your muscles, but also your joints, and then you can return to fulfilling your dream - you will be able to do the splits only after a few months.
Helpful Tips:
These exercises must be done regularly and diligently, otherwise the goal of doing the splits in a week will not be achieved.
All muscle stretching exercises should be done slowly and smoothly, avoiding sudden movements.
During exercise, all the muscles of the body should be relaxed; in a tense state, they will not be able to fully stretch, and then half of the energy you expended will be wasted.
In the first days after exercise, you will experience pain throughout your body, but this is not a reason to quit.
You can visit the sauna after exercise - this is a great way to relieve muscle pain.
And during exercise, it’s good to turn on rhythmic, positive music.
Only if you do not follow the lead of your weakness and continue to do the whole set of exercises daily, the pain will disappear on the 3rd day, your posture will become straight, your gait will be easy, and on the 7-8th day you will and do the splits with ease. Save it for yourself so you can do the splits soon?
Cross splits - a set of exercises
Before you start training muscles and ligaments and doing cross splits, you should remember a few rules:
- there is no need to hunch and slouch - the straighter the back, the better the back of the thighs are worked out (stretched);
- exercises should not cause discomfort - stick to a comfortable amplitude and do not try to act through pain;
- carefully study the technique of performing the exercises so as not to provoke injuries due to its violations.
There are dozens of exercises for performing cross splits. Here are the 15 most effective ones.
Exercise No. 1
Starting position: standing on the floor with your legs as wide apart as possible, your feet and knees turned out as far as possible. As you exhale, perform a squat, pulling your buttocks forward and moving your knees back. At the same time, you need to keep your back straight, the back of your head stretches upward. After a few seconds of being in this position, rest your elbows on the inner thighs closer to your knees, and lower your pelvis closer to the floor. To enhance stretching, you can perform springy rocking up and down.
Exercise No. 2
IP: standing on the floor, preferably next to a chair, so that in case of loss of balance you can hold on to it. Legs are straight, shoulder-width apart, toes slightly turned outward. While exhaling, lift the knee of one leg up and to the side as far as possible, and then straighten the leg along its entire length and hold it for 30 seconds. Do 10 repetitions on each leg.
Exercise No. 3
IP: standing on the floor with straight legs wide apart. Toes straight, knees straight. As you exhale, bend forward, trying to touch your forehead to your knee (first the right and then the left). At the lowest point, fixate for 10-15 seconds, make sure that the knees and hips are straight, and the body (back) remains straight. You need to reach your stomach towards your thigh.
Exercise No. 4
IP: as in a lateral lunge, the supporting foot rests its entire surface on the floor, the other leg is straightened and extended to the side, the foot is pulled towards itself as much as possible. The squat should be as deep as possible, with the foot and shin forming a right angle. To increase the effectiveness of the exercise, the hands are placed behind the back and clasped, the back is slightly bent. Repeat with the other leg.
Exercise No. 5
IP: sitting on the floor, legs bent, heels under the buttocks. Slowly open your hips without lifting your heels from your buttocks. At the same time, the back is kept straight, the buttocks forcefully lower down. When the tension in the muscles weakens, at the moment of exhalation, turn the chest to the right. Then make a left turn. The body and head are always in the center, looking straight ahead.
Exercise No. 6
IP: as in the previous exercise. After spreading the hips to the sides, the arms rest directly in front of the body on the floor, the body stretches forward and gradually lies on the floor. The hips, knees and pelvis are brought in line (frog position), the feet are closed slightly behind the buttocks. The head is slightly raised, the back of the head is up, and the gaze is straight ahead. Stay in this position for 30-40 seconds.
Exercise No. 7
IP: kneeling, thighs perpendicular to the back. One leg is extended to the side, and as you exhale, the knee of the bent leg is moved to the side until the pelvis drops to the floor. It looks like a cross split, but one leg is bent at a right angle. The back is slightly arched. You need to fixate in this position for a minute, then repeat with the other leg.
Exercise No. 8
IP: sitting on the floor, legs bent, feet brought together and moved as close to the body as possible. The back is held in a straight position, with the hands the knees are spread as wide as possible. Using springing movements, the knees are pressed to the floor and held for up to 2 minutes at the maximum stretch level.
Exercise No. 9
IP: lying on your back, buttocks moved as close to the wall as possible, legs raised vertically. As you exhale, pull your knees towards your stomach, place your palms on your knees and while inhaling, open your hips. They try to stretch the muscles to the maximum so that their knees touch the wall. The muscles must be kept as relaxed as possible, only the arms “work”.
Exercise No. 10
IP: sitting on the floor, legs straightened and spread as wide as possible. During exhalation, the body smoothly leans forward, hands rest on the floor in front of you. At this time, the feet are turned upward and held perpendicular to the ankle, the toes are pulled upward. After 10-15 seconds of fixation in this position, the body is carefully directed first to one knee and then to the other, fixing in bends for 10-15 seconds.
Exercise No. 11
IP: lying on your back on the floor, legs bent and brought closer to the stomach, hands on your knees. The right leg rises and moves to the side (diagonally), hold the foot with your hand, trying to straighten the leg as much as possible so that the toe is at ear level. The left leg is moved to the side simultaneously with the right, but remains bent. Remaining in the final position, maintain even and deep breathing, the muscles are as relaxed as possible.
Exercise No. 12
IP as in the previous case, hands on shins or knees. As you exhale, the legs rise vertically upward until there is an angle of 90 degrees between the body and the hips, then the legs are simultaneously spread apart, holding the inner surfaces with the hands. The feet are pulled towards themselves, the knees are straightened as much as possible. Breeding should be as high as possible. It is recommended to hold this position for at least a minute.
Exercise No. 13
IP lying against the wall, pressing your buttocks to its surface, legs vertically up, feet extended towards you, hands holding your knees so that your legs are constantly straight. During exhalation, the legs are slowly moved apart and spread apart, while the heels slide along the surface of the wall. After you feel tension in your legs, you should stop until the discomfort subsides, then spread your legs further with your hands and fixate in this position for a minute.
Exercise No. 14
IP: sitting on the floor with your legs bent, your knees together, your feet under your buttocks. Leaning on your hands, slowly tilt your body back and lie on your back. The legs remain in the same position, and the feet can be spread apart. The knees should be brought together in any case.
Exercise No. 15
This exercise helps improve balance when performing forward bends (which are present in many of the previously described exercises). Starting position: standing with a straight back, feet slightly apart, hands on the buttocks. The torso slowly bends back and slightly to the side (as if you want to look at your heels). If you feel tension in the muscles, you need to fixate for 15 seconds, then repeat in the other direction.
Each exercise described must be performed daily. This will significantly improve the flexibility of the body and will help you do the cross splits within a few months without pain or risk of injury. It's even better if stretching is done in the morning and evening. Remember, only hard training can increase the flexibility of your body. If you don’t have time, if you’re afraid of discomfort and the need to devote at least 2 hours a day to training, the cross split will remain a dream.
How do the splits?
1. The main condition for good stretching is regularity - you should exercise 5-6 times a week. And if you want to speed up the result, then do splits exercises every day or even 2 times a day. Taking long breaks from stretching will set you back several notches.
2. Morning stretching, when the body has not yet had time to warm up, is considered the most effective. But your joints and muscles will be most flexible by the end of the day, so it is very important to stretch both morning and evening.
3. Before training, take a hot shower, it will relax your muscles and make them more flexible.
4. Be sure to warm up your body before stretching: jump or run well. It is advisable for you to sweat slightly. Warm-up should last at least 10 minutes. The better you are warmed up, the easier the splits exercises will be.
5. Turn on some nice slow music. This will allow you to relax, let go of your fears and train more effectively.
6. In order to do the splits, you need an integrated approach to training. Don't just focus on developing, for example, the pelvic area and hamstrings. The body is a single organism, which means it is necessary to develop absolutely all muscles and achieve flexibility in all joints and tendons.
7. Start with a longitudinal twine, it is easier to achieve than a transverse one. After you sit on the longitudinal split, proceed to attempts to perform the transverse split. But you can also stretch in parallel into two splits at the same time.
8. Don’t set yourself up for quick results. The Internet is replete with articles “How to do the splits in one day, in 3 days, in a week,” but you shouldn’t be fooled by loud headlines. Listen to your body and don't force things.
9. Be prepared for pain. As you stretch, you will feel discomfort in your muscles and ligaments from time to time. Such discomfort during splits exercises will accompany you constantly, so your exercises are unlikely to be pleasant and relaxing.
10. You need to stretch with a relaxed body and deep breathing. Your muscles should not be tense! The deeper your breathing, the better your body can stretch, which means you can do the splits faster.
11. Don’t turn to strangers for help so they can try to stretch you. This is fraught with injury. Better slowly but surely.
12. You can perform splits exercises in several approaches. For example, we took a lunge position, reached maximum muscle tension, and stayed in this position for several minutes. Then we rested a little and returned to the lunge position.
13. The least traumatic stretch is static, which involves holding one position for several minutes. Use a stopwatch on your phone or wristwatch: you should be in a static position for at least 1-2 minutes.
14. If you want to do the splits faster, then the total duration of your workout should be at least 30 minutes.
15. Use ready-made training video sets if you don’t like to train on your own or want to diversify your splits exercises.
16. When stretching, pull the toe not away from you, as in ballet, but towards you. This will allow you to deepen the stretch even more.
17. If you want to quickly achieve results in splits exercises, then try to practice yoga regularly. Thanks to yoga, you will learn proper breathing, develop flexibility, stretch your muscles and open your joints. You can, for example, do yoga in the morning and stretching in the evening.
18. If you were able to do the splits, do not rush to relax and rest on your laurels. In order to maintain the result, you need to continue to exercise, otherwise there will be no trace of your flexibility left.
19. Remember that each of us has different genetics. For some, a week of regular training is enough to do the splits; for others, even a month is not enough. If you have natural flexibility, it will be easier for you to do the splits.
20. In childhood, it is much easier to work on stretching due to better joint mobility, softness of ligaments and muscles. Typically, children can do the splits without difficulty, and with regular practice they maintain good stretching until adulthood. Therefore, you can practice splits with children or younger brothers and sisters.
A few tips before you start
How quickly you can achieve the desired result depends on many factors. For some, good flexibility comes naturally, while for others it takes long training. But the most important thing in this matter is that, if desired, a positive result is guaranteed to everyone.
Valuable recommendations for beginners:
- Be patient. All the time before you decided to do the splits, the muscles and ligaments were in relative peace. They need time.
- Don't skip workouts. Stretch every day, each time moving towards your goal. One missed day takes you back a step.
- Don't neglect warming up. Working out at home is always more difficult, because no one can control and point out mistakes. But preparing for classes is not a waste of time, but a powerful catalyst for the process.
- Maintain drinking regime. 1.5–2 liters of liquid per knock will make the ligaments more elastic and pliable.
- Record your successes. This will make it easier to achieve results. Celebrate how far you have progressed. This will be great motivation.
And finally... Scientists have proven that mature people with regular training will be able to do the splits within 2 months. Young people will conquer this peak much earlier. And if others could do it, then why not you too!
How to do the splits for a man. Tip 11: How to do the sagging splits
In order to do the sagging splits, you need not only good stretching, but also strong legs. In addition, coordination and the ability to tune in to perform a complex exercise will be useful. From the outside it seems that everything is so simple - you sit on the splits between two chairs and smile. In fact, the muscles are subjected to serious stress, for which you need to prepare well.
Step one - learning to do the cross splits
The first step is to learn how to do the cross splits. There are many techniques for this. The most important thing is to breathe through the larynx, which allows the muscles to relax and quickly saturate them with oxygen. Before actually doing the splits, you should warm up slightly and do several preparatory exercises aimed at stretching the muscles that will be used during the cross split.
Step two - improve stretching
So, you can do the cross splits. Now you need to improve the stretch to achieve sag between two parallel supports. To do this, during stretching workouts, we place a surface under each leg (one leg is possible), which will allow us to increase the stretching amplitude. First, you need to lay low surfaces, gradually increasing the height by a centimeter. As a result, you need to ensure that you sit on the cross splits, placing your feet on a surface that is at least 5 cm above the floor level. The higher the surfaces, the better.
Step three - make your legs stronger
In order to do the sagging splits without causing damage to the body, you need to have strong legs. To do this, you will have to often squat, do jumping, run 2-3 kilometers, perform the “bicycle” exercise (lying on your back, rotate your legs, imitating riding a bicycle). A good exercise is rolling from foot to foot in a half-split. This is how the inner thigh and buttocks are trained. It is important that all exercises are dynamic. Finish each strength training session with stretching exercises to keep your muscles from clenching. Exercises with a punching bag, which requires kicking, are very suitable. But this lesson is available to those who have at least some knowledge of striking techniques. During an impact, the legs rise to different heights, the level of elevation gradually increases. Kicking the punching bag after training is especially effective in increasing strength in the legs.
We sit on the slack twine
Before doing the sagging splits, you need to do a long warm-up. Only after you calmly sit on the cross splits and warm up all your muscles can you begin to complicate the exercise. At first, you need to lean on something with your hands. In this case, the feet are placed on the surface in such a way that the toes point up, and the main emphasis when sagging goes to the groin and gluteal muscles. Under no circumstances should you place the main load on your knees, as they may be injured. After trial exercises with your hands resting on a bar or chair, you can try sitting with your hands away from the support. Watch your breathing. It should be across the larynx and even. The muscles do not tense up.
Beginning of work
To sit on a transverse split you will have to put in more effort than to do a longitudinal split. After all, to perform this exercise it is necessary to use not only muscles, but also ligaments.
Of course, to achieve your goal it is not necessary to visit fitness clubs or other expensive classes. This is quite achievable at home. Before training, it is important to get ready and create a favorable atmosphere.
The room where the classes will take place must be warm. The minimum air temperature is 18–20 °C. It would also be nice to fill the room with fresh air, you can leave the window open a little. Many people prefer to study with musical accompaniment. This is very good. The melody will set the rhythm.
After this, you can safely start training.
How quickly can you do the splits? Splits: how to do the splits quickly?
- Only a person himself can force himself to do classes and become better and more beautiful.
- The key to success is a clearly defined goal for yourself and an awareness of the upcoming stresses that need to be overcome.
- This is the only way to do the splits easily and quickly.
How to do the splits quickly?
This question is often asked by beginning athletes and those people who do not know what efforts need to be made to achieve their goal.
Important: Correctly assess your physical capabilities. There is no need to repeat after professional athletes, because they have many years of hard training behind them.
Tip: Don't do difficult tasks right away to avoid harming your body!
Twine exercise
Many people fail to do the splits even after several months of persistent self-preparation. Each person has their own body characteristics, so some things come easy to them, while others need to try hard to achieve good results.
Therefore, those people who do not have good flexibility by nature will not be able to do the splits quickly.
Twine is not only beautiful, but also very useful
Do you think good flexibility is purely aesthetic? Absolutely not true. Scientists have been able to prove more than once that people who can do the splits are much less likely to have:
- problems with the gastrointestinal tract. Food is better absorbed, the feeling of heaviness and discomfort disappears;
- phlebeurysm. Twine improves blood supply and strengthens the walls of blood vessels, which is very important in the prevention of this disease;
- dislocations, sprains, fractures and other injuries of the lower extremities;
- arthritis, arthrosis, osteochondrosis. Splits are a great way to get rid of spinal problems;
- disruptions to women's reproductive work;
- diseases of the genitourinary system. This is again achieved by actively influencing the blood supply systems;
- depression, blues, bad mood. Exercising promotes the production of happiness hormones. It has been proven that the simplest daily workouts lasting 30 minutes set a good mood for the whole day.
Just for the sake of so many positive moments, it’s worth setting yourself a goal to do the splits and achieve it.
How to do the splits quickly. How long does it take to do the splits?
- Genetics. Some people's muscles are naturally more flexible than others. This is due to the composition of the muscle fiber. For others, on the contrary, any stretching causes significant discomfort. If you are not flexible and cannot immediately reach your socks with your hands, do not despair. It’s just that your “fast” will be a little slower, be prepared for this. As a rule, plump and, as they say, stocky people stretch more easily. It is usually more difficult for people who are tall and have a slender physique. One way or another, you cannot influence your genetics in any way, so take this as a given and move on to the next factors.
- Age. I think everything is clear here. The earlier you decide to learn how to do the splits, the easier it will be. So don’t put it off, start working on your stretching today.
- Training is a thing of the past. If as a child you went to the rhythmic gymnastics section and could easily raise your leg to your head, but now you have slightly lost your shape and cannot place your palms on the floor when bending over - don’t worry. You can't unlearn how to do the splits. You will need much less time than those who are starting to stretch for the first time. But if you are a beginner, don’t despair – nothing is impossible. Your body has enormous potential, you just haven’t had the opportunity to discover it yet.
- Perseverance and patience. This is the key factor.
Technique for mastering cross splits in yoga Deepika
How to perform a cross split:
- Take the starting position - Tadasana. Place your hands on your hips and spread your legs as far apart as possible.
- Place your hands, palms down, on the mat, and as you exhale, spread your legs wider so that your limbs are extended along the same line. The back should be in contact with the floor.
- Place your palms in front of you and hold the asana for a couple of seconds, then lower them to the floor.
- Lift your hips and move them closer together to stand in Uttanasana.
- Return to the starting position and relax.
How to do the splits in a week. How to do the splits in a week
To achieve results, you need to allocate 20-30 minutes of free time every day for training. You should not approach this issue with fanaticism and immediately try to perform complex exercises, as they can cause more harm than good.
A good training program must consist of successive stages:
- warm-up;
- exercises to warm up the muscles and ligaments of the legs;
- stretching exercises;
- recovery measures, cool down.
We bring to your attention a set of simple exercises, which you can do the splits in 7-10 days if you do them regularly.
Exercise “Lunge touching the wall with the standing leg behind you”
- Stand near a wall with your back to it.
- Take a small step forward.
- Bend your standing leg at the knee and rest your knee on the floor, your foot with the outside of your toe against the wall. Bend your front leg at the knee as well. The body will be located between two bent legs, the back is straight.
- Make a “downward” movement with your body, the pelvis should tend to the floor, the muscles of the pelvis and hips should stretch. Get your pelvis as close to the floor as possible.
- You can also do a lighter version of this exercise without using a wall: classic lunges straight and to the sides plus springing downward movements of the body.
Exercise "Tin Soldier"
- Stand up straight, put one hand on your belt, leave the other free.
- Raise one leg high and grab it by the toe with your free hand. Right hand - right leg and vice versa, do it symmetrically.
Exercise “At the crossbar”
- Stand near a bar or some kind of hill located at the level of your waist. Raise your leg, place your foot on a hill. Much like in ballet class.
- Perform several long bends towards the raised leg. Try to touch the surface of your leg with your forehead, and reach for the toe with your hand.
- Do not forget that during the exercise both legs must be straight.
Exercise “Fold in half”
- Sit on the floor, straighten your legs, spread your feet slightly wider than shoulder width (the wider the better).
- Bend: your hands and hands reach toward your toes, your body reaches toward the floor. Ideally, your chest and forehead should touch the floor.
- If it is very difficult to do the exercise with your legs apart, you can bring them together and reach your forehead towards your knees. However, in the future you will still need to move to the spread position, since for the splits it is important to work the inner surface of the thigh.
Exercise "Corner"
- You need to rest your foot/toe on one leg and both palms/fingers on the floor.
- The free leg is raised with the foot up to the maximum possible height. The straighter it is, the better.
- When you lift your leg, perform several springing movements with it, as if you want to lift it even higher.
Exercise "Splits"
- At the end of the set of exercises, try doing the splits: sit on the floor, spread your straight legs as far as possible to the sides.
- Perform springy downward movements with your pelvis.
- Be sure to hold in the lowest position for at least a minute.
- To control and regulate the level to which you lower your pelvis, you can place a stack of books under it. Remove the top books as they approach the floor. Eventually you will remove the last one and do the splits.
How much and when to stretch
Scientific studies have proven that the effect of stretching lasts only 24 hours. That is, you must regularly conduct your training every day, preferably at the same time.
If the exercise is carried out with a frequency of more than 1 day, the effect will be weak, and your goal will become distant.
Now let's answer the question, when is it better to do cross split stretching? It has been scientifically proven that the best time for this activity is evening. Joints and muscles become 20% more flexible, which means there is less risk of injury.
Stretching is a long and hard journey. Only through persistent, regular training will you be able to achieve results that will please you.
How to do a cross split. What you need to know before doing the splits
- Warm up well. Only small, flexible children skip the warm-up without consequences. If you don't want to limp to the emergency room, warm up for at least 10-15 minutes.
- Don't rush things. Some people may take more than six months to do the splits. Others, due to the characteristics of the hip joint, will never be able to do this (but this happens quite rarely). In any case, take your time. If you have to endure severe pain, then your body is not ready yet.
Follow these rules and you can avoid injury while stretching, regardless of age.
How to do the splits at home. How to do the splits quickly and without injury at home?
- The first thing you need to take note of for home stretching workouts is that you shouldn’t rush and set yourself a strict time frame, for example, do the splits in a week or two weeks. Such short-term goals often lead to injuries; moreover, doing splits workouts at home without the supervision of a trainer and without having any experience in stretching, you can end up with a sprain or even a ruptured ligament. Therefore, if you decide to do the splits yourself at home, there is no need to rush, listen to your body, master the technique of doing the exercises and follow the recommendations for training for stretching at home and you will succeed as quickly as your body allows you, and well persistence of course.
- Before you begin stretching exercises, you need to thoroughly warm up your muscles, ligaments and tendons; for this, be sure to warm up for 10-15 minutes for all muscle groups, especially the leg muscles. By doing a warm-up at the beginning of the lesson, it will not only be easier for you to perform the exercises, which will allow you to do the splits faster, but also reduce the risk of injury during the stretching process. You can also take a hot shower to help your muscles and ligaments warm up and become more elastic.
- Spend 45-60 minutes stretching (including warm-up) about three times a week. Stretching days can be alternated with strength training, for example, if on Monday you had heavy strength or aerobic exercise, then on Tuesday you can safely do stretching, this will also help reduce pain in the muscles after training. If desired, stretching can be done immediately after strength and aerobic exercise, when the muscles and ligaments are more than warmed up. If you want to do the splits as quickly as possible, which is at home, I personally don’t recommend it, as they say, if you rush, you’ll make people laugh, you can do it more often, setting aside just one day for rest. You can use this training regimen once you get comfortable and perform the exercise technique correctly, and also learn to listen to your body.
- In order to do the splits without injury, you should perform the exercises at a slow pace without sudden jerks, making sure that the load is distributed evenly. A slight nagging pain should be felt. However, as a rule, when a person feels pain, he begins to tense his muscles in order to reduce and avoid this discomfort, because for the body, stretching is essentially not a natural process. When trying to do the splits, you injure your ligaments to some extent. You should learn to relax your muscles when you feel slight pain, try not to hold your breath, but rather breathe as evenly as possible, this will make the pain easier to bear. Turn on some light relaxing music, this is also a great way to take your mind off the pain. You should not bring the exercise to sharp and unbearable pain, this will certainly lead to spraining, everything should be in moderation.
- You should know that there are two types of splits: dynamic, when shock movements are performed (leg swings) and static, exercises performed while sitting on the floor at a slow pace, turning into static. So, these two types of splits complement each other, because it happens that a person can swing his leg to the state of a split, but he cannot sit in a split on the floor and vice versa. Therefore, in order to effectively train for splits, you should perform exercises both statically and dynamically. The best option would be to alternate them. For example, if you sat in a static split for 1-1.5 minutes, you should swing your legs for at least 30-40 seconds.
- When you perform static splits exercises, do not freeze completely, but continue small swings up and down, from side to side. You should not use too much amplitude with sharp pushes, it should be light rocking, while the ligaments should be stretched like a string, and the muscles should be as relaxed as possible.
- As for static exercises, no matter what you give yourself, take a timer (smartphone application) and start doing the exercise for 20-30 seconds, increasing the time with each session. This will also allow you to mark your progress towards the coveted splits.
- In order to properly develop and stretch the ligaments, especially the popliteal ligaments, pull your socks towards you while doing the exercises. Keep your back straight, do not hunch or droop your shoulders. If you have pain in your back or knees while performing splits exercises, most likely you are violating the technique of performing the exercise and the ligaments of your legs are not loaded enough.
- Make sure that during the stretching workout you have appropriate clothing that will not hinder your movements and allow your legs to glide on the floor. At home, these can be ordinary socks, which can easily slide both on the carpet and on the parquet.
- If you are seriously thinking about doing the splits, you need to watch your diet, because when you eat meat and meat products, the ligaments will be rougher and more resistant to stretching. Drink plenty of water, this will not only make your muscles and ligaments elastic, but also maintain a high level of metabolic processes in the body.
- The most effective stretching is, of course, in the morning, but in the first stages you should still do the exercises in the evening, when the body is already warmed up, so the workout will be easier and a little less painful.
- I would like to draw your attention to outside “help”. Unless, of course, this is a highly qualified trainer, then it is better to refuse such intervention. By putting physical pressure on you while performing this or that exercise, a person can cause injury, because he does not feel the degree of tension in your ligaments at all. Remember, in order to do the splits, you do not need any assistants or additional equipment, just you, the floor and your perseverance.
Preparatory stage - stretching
Stretching is a mandatory step on the way to cross splits. You need to start it with a classic muscle warm-up:
- running in place;
- swing your legs;
- squats;
- jumping rope.
During the warm-up phase, do not forget about the upper body and arms. They also need to be warmed up so that the stretching training takes place without technical difficulties and, especially, injuries. Heavy dumbbells or pull-ups will be unnecessary, but swinging and rotating your arms, pushing up from the floor are almost ideal. The main thing is not to overdo it and not finish warming up feeling very tired.
Note! You should not conduct cross-split training in a cold room or on a bare, cold floor. Under such conditions, the muscles are reluctant to relax and, as a result, stretch very poorly.
Warm-up time is about 10 minutes. During this time, it is advisable to bring yourself to such a state that beads of sweat appear on your forehead. This will indicate that the body is working and really warming up. After a short rest (2-3 minutes), you can begin to perform exercises to stretch the leg muscles, increase the mobility of the sacrum and hip joints.