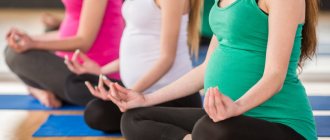
Author: Maria Smirnova, yoga instructor at the Mango fitness club. People often have questions: how to do the splits at home, how to quickly do the splits? Trainer of the Mango fitness club Maria Smirnova will tell you: how to learn to do the splits, how to do it correctly, what exercises to do, and how hatha yoga can help.
What is twine
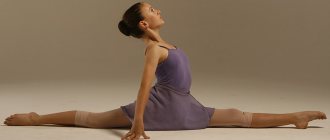
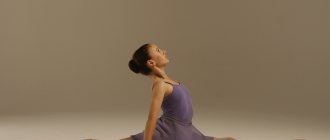
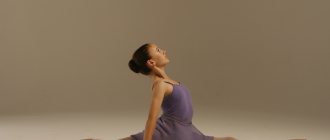
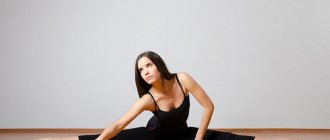
A split is a body position where the legs are placed in opposite directions and are in the same line. In this case, the inner line of the hips forms an angle of 180 degrees. It is one of the stretching exercises, used in yoga, gymnastics, figure skating, dancing, etc.
There are 2 types of twine:
- Longitudinal - legs spread back and forth. Depending on the leg extended forward, left or right are distinguished.
- Transverse - legs spread apart.
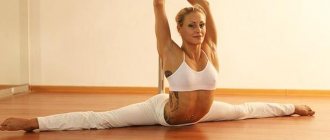
With good stretching, splits are performed on a sag, in a jump, in motion, on 1 leg, standing on your hands, etc.
Difficulties
Attention!
You cannot do the splits without first warming up and stretching your muscles. You also cannot do the splits quickly unless you have special training.
Trying to do the splits very quickly without warming up and preparing will lead to injury.
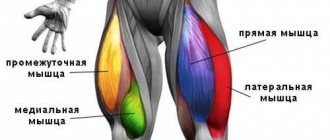
The ability to do the splits depends on the internal composition of muscle fibers and body structure. For some it will be easier to sit down, but for others it will take longer. Age also plays a role—it’s more difficult for adults than for children.
MUSCLE RELAXATION
When performing exercises, you need to learn to relax your muscles.
Otherwise, at best, you can get a muscle clamp, at worst, you can tear the clamped muscle. Therefore, if you want to quickly do the cross splits, remember that you don’t just need to fix each position for at least 60 seconds, it is much more important to relax your muscles. “The important thing is not how deeply you were able to bend over or raise your leg, but HOW you do it,” our teachers say. A muscle tends to tighten when it is painful and uncomfortable. This is a normal protective reaction of the body. Therefore, control the level of pain. Under no circumstances should there be sharp traumatic pain! Breathe evenly and calmly, without holding your breath, focus on the muscle that is being stretched at the moment and try to completely relax it. The muscles stretch perfectly after the massage.
Doing the splits correctly
So where to start? In order to do the splits independently, easily, quickly and without pain, you need to follow certain rules:
- Be sure to do a warm-up warm-up - 10-20 minutes of cardio training will do.
- Exercises should be performed smoothly - no jerking.
- It is necessary to apply equal force to each leg.
- Stretching regularly - about 3-4 times a week.
- Periodically give rest to muscles and ligaments after training.
- The workout should last at least 30 minutes + warm-up.
- Avoid pain - mild, short discomfort is acceptable.
- Stay in the pose for no longer than 30 seconds.
- Keep your back straight.
- Do half the exercises on the swing, half statically - with delays.
The most important thing is to take your time; the process can take from several days to several months. Depends on your level of training - whether you have done the splits before, as well as on your body characteristics, natural flexibility and age.
Final recommendations
Before you start training, you need to know that all stretching sessions should take place 2-4 hours after eating in order to avoid discomfort in the stomach and poor health. Also for training you will need a mat and light, comfortable clothes for exercise.
The host of a blog about training for women, Yulia Smolnaya, offers several useful video master classes on stretching, as a result of which, devoting only 5 minutes a day to classes, you can quickly master the art of the splits.
Exercises for Beginners
We present a set of exercises for every day - you can do them at home, by yourself, without the involvement of a trainer. The exercises are easy, performed in stages, without pain - step-by-step instructions and pictures are given. Suitable for those who are trying to do the splits for the first time - they allow you to quickly increase flexibility without harm to your health.
Bend forward with hands behind back
- Place your feet shoulder-width apart.
- Take your hands behind your back and join them in a “lock”.
- Lean forward slightly and stretch your arms up - your back will arch.
- Maintain the position and pull your chest towards your hips.
- Don't bend your knees.
- Stand for up to 30 seconds. Take 5 breaths and return to the starting position.
Bends towards the leg
Do it slowly and carefully. As you perform, you will feel a stretch in your lower back and under your knees.
- Sit on the floor.
- Bend your right leg at the knee and place it on your side. This will open up half of your thigh.
- With your right hand, try to touch the outside of your left foot.
- The torso should lie on the straightened leg.
- Stretch your left arm as well and relax your shoulders.
- Stretch for 5 breaths.
- Stand up, change legs and repeat.
Wide leg angle
Keep your back straight. Don't try to lie down on the floor right away.
- Sit on the floor and spread your legs to the sides, but not all the way.
- Move your pelvis forward slightly.
- Straighten your back.
- Bend slightly towards the floor.
- When you feel a burning sensation under your knees, stop for 5 breaths.
- Return to original.
Deep lunges forward
- Lunge forward with your right foot.
- Place your hands on the floor.
- If possible, lower yourself onto your elbows.
- Press your body against your right leg.
- Pull your hips towards the floor.
- Reach lower for 5 breaths.
- Switch legs and repeat.
Deep lunge with calf raise
- Go to the wall. Stop one step away from her.
- Turn your back.
- Get on your knees.
- Extend your right leg forward, bending it at the knee at a right angle.
- Raise your left foot up and press it against the wall.
- Pull your hips down until you feel a stretch.
- Place your hands on your knees - this will make your posture more stable.
- Keep your back straight.
- Hold for 5 breaths.
- Switch legs and repeat.
Stretching exercises
We offer a set of stretching exercises - they will allow you to painlessly stretch your leg muscles and ligaments.
Front thigh stretch
- Sit on your knees, your hands should rest on the floor, your buttocks should touch your heels.
- Back straight, head forward.
- Lunge – your foot will be under your knee.
- The foot of your right foot will rest on the floor.
- The second leg is pulled back all the way.
- Hold this position.
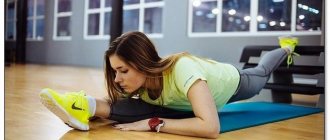
Hamstring stretch
- Get on your knees.
- Keep your body straight and your back straight.
- Hands along the body, look ahead.
- Kick your right leg out in front of you.
- Now lean towards your leg.
- Pull your foot toward you to tighten your calf muscles.
- Shoulders should be level 1.
- The left leg should be straight - the knee should be on the floor.
- The knee of the left leg and the foot of the right are at level 1.
- Change leg, repeat.
Foot adduction
- Get on your knees, sit with your buttocks on your heels. Hands along the body, lightly touching the floor. The back is straight.
- Extend 1 leg back. In this case, you need to sit on the heel of 2 legs.
- Bend 1 leg at the knee and grab it with your hand on the same side.
- Try to press your heel into your buttock - this will stretch the back of your thigh.
Fold
- Sit on the floor.
- Extend your legs straight in front of you.
- Pull your feet towards you and raise your arms.
- Bend over, while reaching forward with straight arms.
- The back must be straight - it cannot be rounded or hunched over.
This exercise stretches the hamstrings.
Half split on the back
- Lie on your back, stretch your arms along your body.
- Raise 1 leg, bending it at the knee. Place your heel on the floor.
- Now lift your 2nd leg. Grab it with your hands and pull it towards you.
- 1 leg should not leave the floor.
- The pelvic bones should be kept at level 1. Do not turn the pelvis.
- Change leg, repeat.
Wide angle tilts
- Sit on the floor. Keep your back straight.
- Spread your legs apart as far as flexibility allows.
- Don't bend your knees - keep them straight.
- Place your hands on the floor behind your back.
- Bend towards each leg one at a time.
- Both shoulders need to be turned forward and tilted behind straight arms.
- When bending over, place your hands on your feet.
- Pull your chest towards the floor - this will stretch the inner thigh.
Leg extension with lateral bending
- Sitting on your buttocks, pull your legs towards you so that your feet touch.
- Your knees should be turned out to the sides and your back should be straight.
- Grasp your feet with your hands.
- Extend 1 leg to the side, while the 2nd leg should be pressed to the floor.
- Bend sideways towards your outstretched leg. In this case, the raised hand should bow to the head.
- We place our other hand in front of us - it serves as a support.
This exercise stretches the hamstrings, as well as part of the lower back and obliques.
Benefit
Hanumanasana, or translated from Sanskrit as “longitudinal splits,” works well on the joints, muscles, and ligaments of the legs. In addition, when performed, processes are launched for the exchange of energies in the chakras - Muladhara and Svadhisthana.
Legendary meditation course without payment We recommend! The most popular meditation course for beginners in Russian. More than 100 thousand people have already learned to meditate. Try it yourself. Read more.
Proper execution of the asana, as well as combining it with other exercises, allows you to get rid of various diseases of the legs and pelvic organs, such as varicose veins, inflammation of the sciatic nerve, disorders of the pelvic organs, prostatitis, etc.
Twine in yoga
Sometimes people come to yoga to develop flexibility and do the splits quickly, without injury. It is important to note that developed flexibility is not a goal, but a consequence, a “side effect” of proper practice. By doing yoga and doing the splits, a person receives undoubted benefits: blood circulation improves, the functioning of the pelvic organs improves, and flexibility increases.
Samokasana pose
Samakonasana not only gives psychological satisfaction, but also has a good effect on the lower parts of the spine, and also serves as a kind of passport to the world of more difficult asanas, where sufficient opening of the hips is required.
The pose seems unnatural and difficult - a lot of muscles and tendons are pulled during execution. And the secret is hidden in the hip joints. Until they open, it is impossible to do the splits.
To open the hip joints, you need to spend a lot of time warming up. Samakonasana is started in the second half of the class, towards the end. Leading exercises can be considered various lunges, virbhadrasanas (hero poses), etc.
Virbhadrasana
If you don't do yoga, but are persistently interested in doing the splits, any high-quality leg warm-up will do. Also, to prepare for Samakonasana, practice prasarita padottanasana (wide-legged bending), upavishtha konasana (wide-legged seated bending), and baddha konasana (butterfly pose).
Butterfly pose
Virbhadrasana (Hero Pose)
Preparation
A set of exercises for Hanumanasana in pictures
Before proceeding to perform the asana, you need to warm up the body very well. As a warm-up, you can alternate asanas according to Surya Namaskar. To perform Hanumanasana, you need already trained muscles of the back and front of the thighs. In order to develop the muscles of this area, you can practice various other asanas, such as Virabhadrasana, Utthita and Parivritta parshavkonasana, parshvottanasana, Padahastasana, Kraunchasana, Bhekasana and many other poses from Hatha yoga.