Push-ups are perhaps one of the most common exercises in fitness, but at the same time quite difficult. It helps to pump up your arms well and is used both for training children in schools and for training elite soldiers. Everyone knows the classic push-up, but what if we take it a step further and make it a little more challenging?
The Men's Physicist prize-winner has collected all possible options for performing this exercise: from the usual to the most incredible, which not everyone can repeat.
Alexander Ivanov
medalist of the Russian Bodybuilding and Fitness Championship
Push-ups will differ in hand placement, different support variations, the ability to use TRX loops and the difficulty of maintaining balance.
Content
- 1 Variations of push-ups
- 2 Push-ups with wide arms
- 3 Push-ups with narrow arms
- 4 Push-ups on your fingertips
- 5 Diamond push-ups
- 6 Push-ups
- 7 Push-ups with clap
- 8 One-legged push-ups
- 9 One-arm push-ups
- 10 Push-ups with hands resting on a fitball
- 11 Push-ups with feet resting on a fitball
- 12 Push-ups with hands resting on medicine ball
- 13 Push-ups with legs elevated
- 14 Push-ups with hands on BOSU
- 15 Push-ups on an inverted platform BOSU
- 16 Alternating push-ups
- 17 Variations 17.1 Dips
- 17.2 Push-ups with legs raised
- 17.3 Superman push-ups
- 17.4 Lizard push-ups
- 17.5 Plyometric push-ups
- 17.6 Stretch push-ups
- 17.7 Jackknife push-ups
- 17.8 Diving push-ups
- 17.9 Diagonal push-ups
- 17.10 Board (plank)
- 17.11 Maltese push-ups
The main mistakes in the technique of classic push-ups
Push-ups are not as simple an exercise as it seems at first glance. Errors in technique are made not only by practitioners, but even by coaches! Improperly performing push-ups can lead to injuries to the wrists, shoulder and elbow joints, as well as pain in the neck, back and lower back. If you can't maintain proper form during push-ups, drop to your knees or reduce the number of reps! Train yourself to do this exercise correctly from the very first time you do it.
Elbows point in different directions
The most common mistake in push-up technique is the position of the elbows relative to the body . Keeping your elbows out helps compensate for lack of upper body strength. Of course, you can do this version of push-ups (which many people do). But the problem is that this method of execution increases the risk of injuries to the shoulders and elbow joints. Therefore, it is better to pay attention to the position of the elbows: they should be turned back 45 degrees, and not look in different directions.
Arms spread too wide
In classic push-ups, your hands should be strictly under your shoulders . Some practitioners practice push-ups with wide arms, but this is a weaker position in which your muscles do not work well enough. Additionally, wide-arm push-ups can cause shoulder pain over time.
Lifting the pelvis upward or bending the body
During push-ups, the body should form a straight line . But if you have a weak core, then there is a risk of poor push-up technique: lifting your butt up or, conversely, arching your lower back and lowering your hips towards the floor. Incorrect body position will put extra stress on the spine. To avoid this mistake, start practicing the plank exercise - this will help strengthen your muscle corset. We recommend reading: Plank – benefits and harm, 45 options for planks + training plan.
Insufficient range of motion during push-ups
A very common mistake in the push-up technique is performing the exercise with incomplete amplitude, namely, not lowering the body down enough. Naturally, at first it will be difficult for you to perform push-ups with the full range, but train yourself from the very beginning of practical training to lower your body to a right angle at the elbow .
For example, let's visually compare the correct and incorrect performance of push-ups.
1. Correct classic push-up:
The body forms a straight line, the pelvis does not rise up, the lower back does not bend. When doing push-ups, the body lowers low, the elbows are quite close to the body, the palms are under the shoulders.
2. Correct knee push-ups (simplified version of classic push-ups):
Similarly, the body forms a straight line, there are no deflections or bends in the back. We pay attention to the correct position of the palms relative to the shoulders.
3. Push-ups with an error:
The pelvis is lowered down, the lower back is curved, the straight line of the body is broken. Doing this exercise can cause back pain and even injury.
4. Push-ups with an error:
In this picture we see insufficient lowering of the body, the elbows barely bend. It is better to do 5 high-quality push-ups than 15-20 poor-quality ones, where the arms do not form a right angle.
Thanks to the YouTube channel Lais DeLeon .
Options for push-ups[edit | edit code]
Main article:
Push-ups
Below you will find detailed step-by-step descriptions of the most popular varieties of push-ups of increased difficulty.
The only difference from traditional push-ups will be that you will need simple sports equipment like a fitball or yoga ball, medicine ball or BOSU balance platform.
There is no limit to the strength and stability gains that can be achieved by regularly performing push-ups. Just like with most other forms of exercise, the key to success is consistency and continuity in the training process. However, if you get a little bored with traditional push-ups, the following movements of increased difficulty and complexity will help increase your interest in training and make it easier to stay motivated.
- Basic exercise: push-ups
- Basic exercise: push-ups
- Incline push-up
- Crossed shin push-ups
- 3-point push-ups and weighted push-ups
- Three-stop push-ups
How many repetitions should I do?
The number of repetitions and sets depends largely on the role push-ups play in your training program.
- If push-ups are one of the exercises you use to bulk up your chest or arms, then do 8-12 reps in 3-4 sets. When performing this volume freely, perform the exercise with additional weight or master more complicated variations.
- If you need relief and burning excess fat, perform 15-20 relatively fast repetitions in 3-4 sets, in combination with other exercises.
- If push-ups are your main upper-body training exercise, and the goal is not so much bulk as overall strength and endurance, do as many reps and sets as possible. There are various programs and techniques aimed at increasing the number of push-ups.
Summarizing everything said above, we can say that push-ups are far from being an outdated atavism from school physical education lessons, but a whole complex of various functional exercises that allow you to effectively work the muscles of the upper body, develop strength and endurance. Train with pleasure and the results will not take long to arrive!
Push-ups with wide arms[edit | edit code]
This option for positioning the arms changes the distribution of the load, allowing you to load predominantly the pectoral muscles, while the muscles of the arms and shoulder girdle are used to a lesser extent.
Initial position
: Take the “rest on straight arms” position, but place your hands at a distance exceeding the width of your shoulders by 20-30 cm. Make sure that your elbows do not go beyond the line of your hands. Tighten your abdominals to keep your entire body in line from your shoulders to your feet. Don't lift your pelvis up or let your back sag down.
- As you inhale, lower your body until the angle of your elbows is approximately 90 degrees and your chest is 3-5 cm from the floor.
- As you exhale, press your body up, straightening your arms. Imagine yourself rising up, trying to push the floor away from you. The pushing force should come primarily from the muscles of the shoulder girdle and chest.
The benefits of push-ups
Push-ups develop strength and stimulate the growth of muscle mass in the shoulder girdle, which is why they are included in the training plan of weightlifters, powerlifters and bodybuilders. The exercise increases endurance, helps to increase the speed of impact, and therefore is included in the training of martial artists.
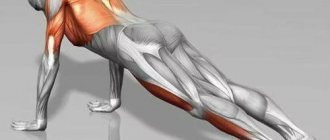
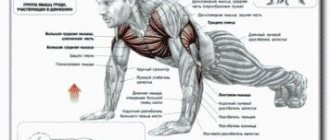
With the correct technique for performing push-ups, almost all muscle groups are involved:
- large pecs;
- anterior serrated;
- triceps and biceps;
- elbows;
- intercostal;
- deltoid;
- abdominals and back;
- gluteus maximus;
- calf.
Narrow push-ups[edit | edit code]
This variant of the placement of the hands allows you to work primarily the triceps and, to a lesser extent, the muscles of the chest and shoulder girdle.
Initial position
: Take a straight arms position, but place your hands directly under your chest, a few centimeters from each other. The feet can be slightly spread to the sides to make it easier to maintain balance.
- As you inhale, lower your body until the angle of your elbows is approximately 90 degrees and your chest is 3-5 cm from the floor. Keep your elbows close to your torso.
- As you exhale, press your body up, straightening your arms. Imagine yourself rising up, trying to push the floor away from you. The pushing force should come primarily from the triceps, shoulder muscles and chest.
Classical technique
The traditional version of the exercise looks like this:
- Take a lying position. Place your palms slightly wider than your shoulders and stretch your body into a string. The neck is an extension of the back, the stomach does not sag, the lower back is straight, the buttocks do not rise up. Place your feet at a short distance from each other on your toes.
- As you inhale, without changing the straight position of your body, lower your chest down by bending your arms at the elbow joints. There are a few centimeters left between the chest and the floor.
- As you exhale, straighten your arms and return to the top point.
This basic technique loads the pectoral muscles, triceps and slightly anterior deltoids. Additionally, the core stabilizer muscles work. It can be considered as a basis from which we will build when considering variations for accentuated training of specific muscles.
Fingertip push-ups[edit | edit code]
Main article:
Finger push-ups
This option strengthens the muscles of the chest, hands and forearms.
Initial position
: Assume a straight-arm position, but shape your hands into a bear paw shape so that only your fingertips are in contact with the floor. The distance between the hands should be slightly wider than the shoulders.
- As you inhale, lower your body until the angle of your elbows is approximately 90 degrees and your chest is 3-5 cm from the floor. Keep your elbows close to your torso.
- As you exhale, press your body up, straightening your arms. Imagine yourself rising up, trying to push the floor away from you. The pushing force should come primarily from the muscles of the shoulder girdle and chest.
One-arm push-ups
This is a very difficult exercise that requires impressive physical fitness and developed balance.
In order to do push-ups on one hand, you need to place it at the level of the center of the chest, and spread your legs wider than your shoulders.
Diamond push-ups[edit | edit code]
Related article:
Diamond push-ups
Very similar to push-ups with a narrow arm position, this option develops the triceps well and, to a lesser extent, the muscles of the chest and shoulder girdle.
Initial position
: Assume a push-up position, but place your hands so close to each other that your index fingers and thumbs touch each other and form a diamond-like figure.
- As you inhale, lower your body until your chest is as close to your hands as possible. Keep your elbows close to your torso.
- As you exhale, press your body up, straightening your arms.
Army exercises
Most people try to try all types at once, not paying attention to the degree of severity of the element and the technique of its execution. It is for this reason that after hard training there is no noticeable result, but only muscle pain and general weakness. Military push-ups will help prepare your body. They allow you to build muscle faster than the bench press and other difficult exercises for beginners.
The technique for performing the army look is the correct basic stance. The arms should be positioned slightly further than the shoulder line, and the feet should be pressed tightly together, with the greatest load in the legs placed on the toes. You should try to maintain ideal body balance without sagging your vertebrae or legs. The head, neck and back represent one line and are a continuation of each other. You need to bend your arms quickly, but without sudden movements, dropping almost to the floor. With a sharp movement, you need to straighten your elbows, returning to your previous stance. It is important to catch the moment when lifting, as the elbows remain slightly bent.
Alexander Shestov
TRX Certified Trainer
Ask a Question
The military push-up program for beginners is 3 sets of 15 reps for beginner athletes. Between approaches, you must give the body a rest; 30 to 60 seconds are allotted for this. When the body stops hurting after training, it is allowed to increase the load by adding the number of approaches and reducing the rest time.
Push-ups[edit | edit code]
Main article:
Fist push-ups
A surprising number of people complain that regularly doing push-ups causes discomfort in their wrists, but if you clench your hands into fists, the weight of your body will rest on your knuckles instead of your palms, which will help you avoid straining your wrists as you perform the movements.
Initial position
: Take a straight-arm position, but instead of your palms, press the knuckles of your fists into the floor, facing perpendicular to your body.
Note
. Please, when performing this type of push-up, place something soft under your fists: a gymnastic mat or a folded towel.
- As you inhale, lower your body until the bend angle of your elbows is approximately 90 degrees and your chest is 3-5 cm from your hands. Keep your elbows close to your torso.
- As you exhale, press your body up, straightening your arms. Imagine yourself rising up, trying to push the floor away from you. The pushing force should come primarily from the muscles of the shoulder girdle and chest.
Strengthening the hands and developing explosive energy
A simple set of push-ups will help make your arms stronger and stronger. It prevents the development of bone and joint diseases, as well as atrophy of the muscular system. Pain often accompanies people who rarely exercise. The complex consists of 4 easy to remember exercises.
Before starting the lesson, it is recommended to do a short warm-up for your hands. You need to warm up each finger separately, performing circular movements with them. To stretch, you should make slow circular movements with your joints.
- Finger push-ups require special preparation. First, you need to try to transfer the weight to your fingertips; if pain does not appear, do push-ups, leaning on your knees.
- To prepare for training, you need to perform a plank with emphasis on the phalanges of your fingers and knees. At the beginning, you need to lean on your entire palm, and then smoothly transfer the weight to your fingers.
- Using the back of the hand during exercise helps make the ligaments more flexible and stronger. The exercise should be performed with emphasis on the knees, gradually increasing the load on the palms.
The habit of regularly strengthening your hands allows you to avoid injuries during training, as well as improve the quality of doing push-ups. It is not always possible for beginners to do push-ups without pain in their hands from the first days. Often, after the first few workouts, a person is accompanied by nagging pain in the upper limbs or weakness.
Performing push-ups quickly and sharply helps develop endurance and prepares the body for heavy loads. All this has a positive effect on the growth of different muscle groups: chest, arms, shoulders and back. Explosive training can be performed in two ways.
- With hands being lifted off the floor. Starting position – lying down, feet together, palms on the floor at a distance of 30 cm from each other. During push-ups, the hands are lifted off the floor and then placed in their original place. In this case, you must try to reach your chest to the floor and maintain an even posture. Another option for performing explosive exercises is to clap your hands in front of you.
- Lifting the body off the floor. The starting position is the same as in the previous method. When performing, both hands and feet are lifted off the floor. After takeoff, you need to try to land on the same points you were at before. Another way is to lift your body during push-ups and sharply turn your torso 90 degrees. The most difficult method for generating explosive energy is the “Aztec” push-up, which is a professional type. They are not suitable for beginner athletes due to the high likelihood of getting weed. To perform this, you need to take the starting position with your palms shoulder-width apart and your legs almost together. When doing a push-up, the arms and feet are sharply lifted off the floor, and the pelvis is pulled upward. Ideally, your hands should touch your feet while flying. It is important to return to your previous position in time. If you cannot perform the exercise correctly right away, you can only pull your knees to your chest while lifting your arms and legs off the floor.
In order for the training to bring maximum results, you need to take into account some nuances. When doing push-ups, the pectoral muscles and triceps should be involved. The more tense they are, the longer it will take to clap or flip in the air. The technique also requires tension in the abs and arms, but it is recommended to relax the hands after the push. To develop fighting qualities, it is better to perform push-ups for 10 seconds and a minute of rest, and the number of approaches should be at least 3. When training for endurance, it is not the number of approaches that is important, but the time to perform the exercise without rest.
Push-ups with cotton[edit | edit code]
Main article:
Plyometric push-ups
This explosive, or plyometric, exercise further develops the muscles of the shoulder girdle, chest and triceps.
Initial position
: Get into a push-up position. Your legs can be slightly spread to the sides to make it easier to maintain balance.
- Lower your body until your elbows are at approximately 90 degrees and your chest is 3-5 cm from your hands.
- Without stopping, throw your body up with a sharp jerk. When your hands leave the floor, quickly clap your hands and return your hands to the starting position before landing.
For shoulder development
With the help of special push-ups, you can pump up the middle and anterior deltoid muscles well. To do this, you need to raise your pelvis and legs as high as possible, that is, stand upside down and press yourself off the floor. In other words, inclined and vertical handstand push-ups are aimed at developing the shoulders.
You should take on them only when you have already worked out the chest and triceps exercise options to perfection. Supporting your weight on your arms is much more difficult than on your legs, so you need to be especially careful here. When performing vertical push-ups, the legs are placed high on a support, which may well be a wall.
Single leg push-ups[edit | edit code]
Main article:
One-arm push-ups
The additional challenge of this type of push-up is the need to maintain balance, maintain core stability and apply more effort.
Initial position
: Take a straight-arm position, but place one foot on top of the other so that only the toe of the bottom foot is in contact with the floor.
- As you inhale, lower your body until the bend angle of your elbows is approximately 90 degrees and your chest is 3-5 cm from your hands. Keep your elbows as close to your body as possible.
- As you exhale, press your body up, straightening your arms. Imagine yourself rising up, trying to push the floor away from you. The pushing force should come primarily from the muscles of the shoulder girdle and chest.
How to learn to do push-ups from scratch: a ready-made plan
It's okay if you've never done push-ups before or had a long break from fitness and have lost this skill. Anyone can learn to do push-ups, regardless of gender or age! Of course, you will need regular practice, but learning to do push-ups is not as difficult as, for example, doing pull-ups.
The most important thing to remember if you want to learn how to do push-ups efficiently and effectively: you must always follow the correct technique from the very first repetition of the exercise. Even if you start with simple variations of the exercise, remember to use proper form and technique.
In order to start doing push-ups from scratch, we offer you a step-by-step program for beginners. Thanks to this scheme, everyone can learn push-ups!
A ready-made diagram of how to learn to do push-ups for beginners
In order to learn how to do push-ups, you will need to master 3 levels of push-ups. You need to exercise daily, you need to perform 3-4 approaches with the maximum number of repetitions in each approach. Perhaps your first attempts will not allow you to do more than 5-10 push-ups, but every day you will progress.
If you feel like you haven't made the progress you want at the end of the week, then continue doing the same push-up modification for another week. It is better to move to the next level of difficulty after you can do 30-40 push-ups without interruption . Don't forget about the correct push-up technique!
Week 1: Wall push-ups
Wall push-ups are an exercise that everyone can do. These vertical push-ups are a great introductory exercise that will help you master push-ups later on.
Week 2: Knee push-ups
The next level is knee push-ups. Please note that even when doing push-ups from the knees, the body should maintain a straight line, the pelvis should not go up.
Week 3: Push-ups
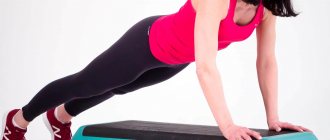
Once you have mastered knee push-ups, you can move on to bench push-ups. Attention, there is a nuance here. The higher the bench, the easier it will be for you to do push-ups. Therefore, you can change the height of the surface, thereby slowly preparing yourself for push-ups from the floor.
Week 4: Push-ups
After three weeks of regular push-ups, your body will be ready for push-ups. Remember that it is better to do fewer repetitions, but with full amplitude (elbows should bend 90 degrees).
You can continue to progress in push-ups by choosing the option with your feet resting on the bench . There are also various more complex modifications of the exercises, which will be discussed below.
How many times should you do push-ups: ready-made push-up patterns
We emphasize once again that you should never chase quantity while neglecting quality. In addition, you don't always need to strive for more repetitions. How many times you need to do push-ups depends on your goals.
So, there are several possible situations:
1. If you want to pump up and increase muscle mass in volume, then move towards increasing weight and complexity. For example, use barbell plates or elevate your feet on a bench. Training scheme: 10-12 repetitions of 3-4 approaches.
2. If you want to lose weight and get ripped, then move towards increasing the number of repetitions. Perform 15-25 repetitions in 5 sets. You can increase the total number of push-ups weekly or move on to more complex modifications.
3. If you want to develop endurance and functional strength, then also move towards increasing the number of repetitions and choose more complex modifications of floor push-ups, including plyometrics.
An example of a ready-made push-up scheme for increasing endurance and losing weight:
An example of a ready-made push-up scheme to increase muscle mass:
One-arm push-ups[edit | edit code]
This type of push-up strengthens the triceps, chest and forearms.
Initial position
: Get into a push-up position, but spread your legs slightly wider than shoulder-width apart. Lift one hand off the floor (the weaker one) and place it behind your back.
Note
. Don't attempt one-arm push-ups until you've gained enough experience doing regular push-ups.
- To maintain balance, turn your torso slightly in the direction opposite to your supporting arm. As you inhale, lower your body until your chin is a few centimeters off the floor.
- As you exhale, press your body up, trying to keep your back straight. Stop before your arm is fully extended.
On the uneven bars
A popular and accessible exercise for activating the muscles of the shoulders and chest. There are different types of dips, but the most common is this technique:
- Jump onto the projectile, then carefully tilt the body 30 degrees.
- You need to lower your body down while inhaling, spreading your elbows to the side.
- As you exhale, tighten your chest muscles and lift yourself to the original position.
The high load on the shoulders and arms makes the exercise dangerous. Therefore, if you have previously had injuries, it is better to refrain from independent practices. For exercise, it is better to go to the fitness center.
Push-ups allow you to constantly keep your body in good shape, maintain muscle definition, strength and endurance. Most often in practice, combined techniques are used to work all muscle groups. It is recommended to contact an experienced fitness trainer to create an individual training program.
Push-ups with hands resting on a fitball[edit | edit code]
To maintain balance and stability, this type of push-up works all muscle groups in the upper and mid-section of the body.
Initial position
: Kneel in front of the exercise ball and place your hands on it approximately shoulder-width apart. Walk your feet back and lean forward so that your chest is directly above the ball and your toes are on the floor.
- As you inhale, bend your arms, lowering your chest toward the ball until your elbows are at a 90-degree angle. Tighten your midsection without allowing your pelvis and hips to relax or sag. Hold the lower position for 1-2 seconds.
- Exhale and straighten your arms, returning your upper body to the starting position.
Focus on triceps
The triceps always works during push-ups, no matter how you place your arms, legs, etc. After all, you have to straighten your elbows in any case. But, like everywhere else, it has its own characteristics. The triceps is not the strongest or largest muscle in the body. And when there is an opportunity to “share” the load with stronger comrades - the pectoral muscles - he does it with pleasure. That is, the more the pectoral muscles are involved in the movement, the less the triceps tense.
Accordingly, to train the back of your arms, you need to turn off your chest as much as possible. Therefore, bringing the hands closer to each other is removed from the movement. The palms are not spread wide, but are placed shoulder-width apart or narrower, until the palms touch, and the elbows are pulled back and brought towards the body.
When doing push-ups with a narrow grip, just like with diamond push-ups (a variation of the previous ones), it is the triceps muscles of the shoulder that are best trained.
There is another type of triceps exercise that deserves special attention. These are reverse push-ups. With this technique, the hands are placed on a bench behind the body.
Push-ups with feet resting on a fitball[edit | edit code]
This option develops the muscles of the chest, back, triceps and abdomen.
Initial position
: Lie face down on the exercise ball with your arms straight on the floor. Move forward on the ball so that your pelvis and hips are supported, and the fitball is located under your feet. The wrist joints should be directly under the shoulder joints.
- As you inhale, lower your body down until your elbows are at a 90-degree angle. To maintain stability, engage the muscles in your midsection.
- Hold the lower position for 1-2 seconds, then exhale and straighten your arms, returning to the starting position.
Push-ups for girls
As mentioned earlier, both men and women can do push-ups. Universal exercises work almost the entire muscular system and allow you to achieve beautiful relief. With the help of push-ups, it is possible not only to increase the volume of the arms or shoulders, but also to develop body endurance and strengthen the body.
- Beautiful breasts. The benefits of push-ups for men are large, strong chests and strong arms, but what is this for the fairer sex? Simple and regular exercises will relieve a woman of sagging breasts over time. Another plus is that the muscles will give the chest additional volume.
- Relief press. If diet and exercise for a thin waist do not help, it is recommended to try push-ups.
- Fat burning. Intense training removes extra centimeters in the hips, abdomen and arms. Push-ups can be compared to a long run, since the number of calories burned is the same.
To perform the exercises effectively, you should follow the rules and breathe correctly when doing push-ups. Don't forget about warming up before class, especially for your hands. As a rule, women's hands are weaker, so you need to spend more time warming up. It is highly undesirable to exercise through force. If the body is not able to withstand the load, it is better to rest for a few minutes.
Push-ups with hands resting on a medicine ball[edit | edit code]
This push-up variation develops balance, midsection stability, and adds an extra element of strength to your workout.
Initial position
: Place a medicine ball in front of you. Grab it from the sides and take the position “emphasis on straight arms.” The feet can be spread apart shoulder width apart to make it easier to maintain balance.
- Inhale and bend your elbows, trying to fully control the downward movement of your body. As your chest approaches the top of the ball, tighten your midsection muscles to keep your body straight.
- Hold the lower position for 1-2 seconds, then exhale and straighten your arms, returning to the starting position. When performing both phases of the exercise, focus on maintaining balance.
Types of exercise
The result of classes depends on the selected elements and regularity. Some types of push-ups for beginners are aimed only at improving health and preventing diseases of bones or joints. Others exist to develop endurance, balance, strength and increase mass. In addition to the classic exercises, it is customary to highlight the following:
- with hands being torn off;
- clapping your hands in front of you and behind your back;
- with hands lifted at different distances;
- with a raised leg at a short distance;
- on your hands, with your legs raised on the wall;
- with an axis rotation of 90 degrees.
Push-ups are also good for your posture. To achieve a perfectly straight back, it is recommended to do push-ups from the wall or the floor, as well as from your knees on a support. Simple exercises do not require much strength, but have a beneficial effect on the muscular corset and skeletal system. Just 20 repetitions every morning will guarantee a straight back after several weeks of regular training.
T-shaped exercises are a complicated version of classic push-ups. Execution technique: starting position lying down, hands shoulder-width apart, legs closed together, knees straight. You need to do push-ups in the usual way, then return to the starting position and turn your body to the side, lifting one arm. The body should resemble the letter T. To achieve the desired result, you should not bend your back or arms. You can complicate the technique by picking up dumbbells. For a more challenging workout, there are advanced elements: push-ups on your fingertips, fists, one hand or on chairs.
With the help of push-ups, it is possible to increase testosterone levels, but girls should not be afraid of this. Its increase occurs exactly as much as the body requires. It is not allowed to start training immediately with difficult elements. Beginners need to learn how to perform classic push-ups correctly and only then move on to other types. If you can’t do push-ups correctly right away, you can do lighter exercises. For example, leaning against a wall, bench or step. It is also recommended to rest on your knees rather than your feet.
Elevated leg push-ups[edit | edit code]
Main article:
Leg-raised push-ups
This type of push-up strengthens the muscles in your arms and upper chest.
Initial position
: Assume a straight arms position, but place your toes on a stable stool or low chair.
- As you inhale, lower your body until your chest is an inch from the floor. Keep your elbows close to your torso.
- Hold the lower position for 1-2 seconds, then exhale and straighten your arms, returning to the starting position.
What can you achieve with push-ups?
If we approach the issue globally, then during push-ups almost all the muscles of our body work. However, when planning the training process, we can neglect the minor load that, say, the abs receive, and focus on those muscle groups that do the main work.
The most important factors involved in push-ups are:
- pectoral muscles (top, bottom or middle of the chest);
- triceps;
- deltoid muscles of the shoulders.
By changing the position of the arms and body, we can shift the emphasis of the load to any of the specified muscle groups. In addition to training muscles, push-ups are an excellent way to develop endurance, increase explosive strength (plyometric), train the cardiovascular system, strengthen ligaments and tendons.
In this article, we will first look at the classic exercise technique. Next, let's look at the following series of questions:
- What kind of push-ups should you use to train your pectoral muscles, arms and shoulders?
- How to strengthen your hands, fists and fingers?
- What types of plyometric push-ups are there (that develop explosive strength)?
- Complicated exercise options and work with additional weight for trained athletes.
- How to start a push-up training for beginners?
- How many repetitions and approaches should I do?
Most of the push-up options that will be listed below are covered in separate articles on our website. You can always read about the exercise in more detail by following the appropriate link.
Push-ups with hands supported on BOSU[edit | edit code]
This type of push-up develops a sense of balance, stability of the muscles of the midsection and introduces an additional element of strength training into the workout.
Initial position
: Place your hands on opposite sides of the BOSU dome and assume a straight arms position.
- As you inhale, bend your arms to lower your body as low as possible - ideally, your chest should be 3-5 cm from the surface of the platform. Make sure that your body is a straight line from head to heels.
- As you exhale, press your body back to the starting position using the muscles of your chest, arms, and upper back. To maintain balance, engage the muscles in your midsection.
How to pump up individual muscle groups
Not everyone needs to pump up all the muscles at once; sometimes you need to strengthen a certain part of the body. Therefore, it is important to learn more about the methods.
Triceps push-ups are the most popular among all men. To pump up these muscles, you should place your arms closer to your sides, and your core muscles should be well developed. You need to take a basic stance - a plank, and place your palms a little closer than shoulder level. During the load, the body remains straight and the core muscles are as tense as possible. You need to lower yourself smoothly without spreading your elbows, trying to touch your chest to the floor. Next, you need to return to the starting position and repeat at least 10 times.
Biceps push-ups from the floor require regularity. First you need to take the initial horizontal position and place your feet close to each other - this will ensure the load only on the chest, shoulders, and arms. The palms should be placed parallel to the shoulders and slightly turned to the side; during the exercise they should be bent at an angle of 90 degrees. You should also avoid bending the body in the neck and back. When performed correctly, other parts of the body are also felt - the abs, shoulders and chest.
To strengthen the shoulder girdle, it is permissible to perform several exercises, for example, push-ups “house” or upside down against a wall. The first option involves bringing your hands and feet as close as possible, trying to achieve an angle of 90 degrees with your body and legs. The emphasis should be on the toes. In this position, you need to do slow push-ups, feeling the shoulder girdle. A more difficult option is to stand upside down with support on the wall. With outstretched arms, you should do push-ups, touching your head to the floor, while trying to maintain your balance.
To pump up your back, you need to take the starting position for push-ups, your hands should be placed at a distance of 25 cm from each other and turned slightly inward. The back, as in other exercises, remains perfectly straight. You need to lower yourself down, trying to touch the floor with your chest, and come back. To make it more difficult, it is recommended to use weights by placing several books or a barbell plate on your back.
Don't forget about proper breathing during training. You need to bend your arms while inhaling, and straighten them while exhaling. The number of approaches for each exercise is up to 5. If you feel unwell when performing the elements, it is recommended to reduce the load. You also need to take into account: it is not the number of approaches or their speed that is important, but the quality of the training. The pace should be comfortable and not exhausting.
BOSU inverted push-ups[edit | edit code]
This type of push-up develops a sense of balance, stability of the muscles of the midsection and introduces an additional element of strength training into the workout.
Initial position
: Grasp the handles on opposite sides of the BOSU platform and assume a straight-arm position.
- As you inhale, bend your arms to lower your body as low as possible - ideally, your chest should be 3-5 cm from the platform. Make sure that your body is a straight line from head to heels.
- As you exhale, lift your body to the starting position using the muscles of your chest, arms, and upper back. To maintain balance, engage the muscles in your midsection.
The table below shows an approximate training program for 15 weeks.
| A week | 1 | 2 | 3 | 4 | 5 | 6 | 7 |
| 1 approach | 20 | 25 | 30 | 35 | 40 | 40 | 45 |
| 2nd approach | 20 | 25 | 30 | 30 | 35 | 40 | 40 |
| 3 approach | 15 | 20 | 25 | 25 | 25 | 30 | 35 |
| 4 approach | 15 | 15 | 20 | 20 | 25 | 30 | 35 |
| 5 approach | 10 | 10 | 15 | 15 | 15 | 20 | 25 |
| Total | 80 | 95 | 120 | 125 | 145 | 155 | 180 |
| A week | 8 | 9 | 10 | 11 | 12 | 13 | 14 |
| 1 approach | 45 | 50 | 50 | 55 | 60 | 60 | 65 |
| 2nd approach | 45 | 45 | 50 | 50 | 55 | 60 | 65 |
| 3 approach | 35 | 35 | 40 | 40 | 40 | 45 | 45 |
| 4 approach | 35 | 35 | 40 | 40 | 40 | 45 | 45 |
| 5 approach | 25 | 30 | 35 | 35 | 35 | 40 | 40 |
| Total | 185 | 195 | 215 | 220 | 230 | 250 | 255 |
This program of push-ups for weight gain allows you to achieve the necessary proportions of your figure. You should not chase popular and difficult exercises. It is better to stick to the correct execution in large volumes than to fast useless elements. You need to exercise slowly, feeling your body and every muscle. If it is impossible to do a large number of push-ups at once, it is allowed to take breaks between approaches or slightly reduce the number.
Alternating push-ups[edit | edit code]
This type of push-up strengthens the muscles of the shoulder girdle and triceps, and also introduces an additional element of aerobic exercise into the workout.
Initial position
: Take a plank position (lying on your elbows and toes). The entire body from head to toe should be a straight line. Maintain this position by engaging the muscles in your midsection. Make sure that your hips and pelvis do not sag.
- As you exhale, straighten your right arm, lifting the right side of your body up.
- Then straighten your left arm. You should now be in the standard straight arms position.
- Lower yourself onto your left elbow.
- Lower yourself onto your right elbow.
Simple options for beginners
In most cases, trained athletes, even without outside help, know what exercises to perform and how to ensure the load on certain muscle groups. But what should those who are just starting their journey do?
You can start by mastering push-ups from the “chest” and “triceps” points, just do them with emphasis on your knees and not on your feet. In this way, it will be much easier to hold your body and gradually your muscles will become strong enough to move on to the usual, and then to the more complicated technique.
Aim to increase the number of repetitions to 10-15 for at least three sets. Then increase the load, for example, by starting the first approach using the standard technique, and the next two from your knees.
Options[edit | edit code]
Source:
“Training zone. Bodyweight exercises." Author
: Paul Wade
Ed.
: Peter, 2013.
Push-ups have many modifications. As you carefully work through the ten levels, you'll likely want to experiment with different types of push-ups for various reasons: to find an option that will help you recover from an injury, or just for the sake of variety. This section describes some push-up variations that you can add to your workout.
Dips[edit | edit code]
Main article:
Dips
A classic exercise from school lessons. Grasp the parallel bars or any surfaces placed on either side of the body. Lift your feet off the ground, bend your elbows, lowering yourself down. Lower yourself until your shoulders (shoulders) are parallel to the floor. Push up. Try to keep your body straight at all times. The exercise can be made easier by placing your feet on a surface raised to hip level. You can lean your hands on a bed, table, bench, etc. - this exercise is called bench push-ups. Dips and push-ups are not exactly push-ups in the classical definition, but they work well on almost the same muscle groups. In particular, the pectoral muscles and large back muscles quickly develop.
Push-ups with legs raised[edit | edit code]
Sometimes these push-ups are also called bent-over push-ups. In this exercise, you need to place your legs higher than your body (roughly speaking, the height should be greater than the length of your arms). In prison, a bed was usually used, although you could use a table or a washbasin. Some guys push their feet against the wall, but this position requires a lot of tension. The higher you raise your legs, the harder the exercise. The fact is that the greater the angle of inclination, the greater the load on the shoulders and upper chest, although classic push-ups target other muscle groups. I usually do not advise my students to practice push-ups with their legs raised; it is better to do push-ups in a handstand, because they have more benefits. Handstand push-ups work your muscles more effectively. Plus, by doing push-ups with your legs elevated, you put yourself at risk of overexerting yourself.
Wide Push-Ups In contrast to narrow push-ups, wide push-ups place your arms wider than normal—twice as wide as shoulder width. This exercise removes most of the tension from the triceps, elbow joints and engages more of the pectoral muscle, especially the outer part located closer to the arm. Simply put, this exercise works the chest more than the triceps. Therefore, this type of exercise will not make you stronger, because the chest and shoulders are always stronger than the elbows. Doing the exercise will only increase this difference. It may be useful for those who want to develop their pectoral muscles.
Superman push-ups[edit | edit code]
In full push-ups, the hands are placed under the shoulders exactly shoulder-width apart. And in superman push-ups, you need to extend your arms far forward, actually at arm's length. When viewed from the side, the position is similar to that of a person flying in the air. As a result of the increased angle, this push-up technique works the pectoralis major and minor muscles, back muscles, and axillary ligaments. On the other hand, due to the complex position of the hands, the range of movement is very limited and does not provide sufficient stress on the shoulders and triceps, which is implied by classic push-ups. This is why superman push-ups (like wide push-ups) won't make you stronger, but they will help strengthen certain areas of your chest.
Lizard push-ups[edit | edit code]
There are four levels of difficulty for the lizard push-up. The first level involves the athlete performing full push-ups with one leg over the other.
That is, it turns out that only one leg is actually involved in the movement. These exercises are called three-point push-ups.
.
At the second level, the leg rises up and is fixed. This nuance increases the isometric load on the muscles - stabilizers of the legs, back, hips and waist. This exercise, more than classic push-ups, requires stabilization of body position. At the third level, the athlete raises his arm with both feet on the floor. In fact, this is a one-arm push-up
, with the only difference that the limb is not fixed on the back, but is pulled forward to the level of the head. The fourth level combines the second and third levels. That is, one arm and the opposite leg are raised, and push-ups are performed in this position. This exercise requires equally developed muscles of the upper and lower body. From afar, the athlete’s position resembles a lizard in the desert lifting its paw from the hot sand, hence the name of these exercises. This type of exercise will certainly add some variety to your workout routine. When performing these, make sure you do the same number of repetitions on both sides.
Plyometric push-ups[edit | edit code]
These exercises are also known as clap push-ups.
- standard, but explosive exercises. Group yourself, quickly lower yourself to the bottom point, forcefully push your body up so that your hands come off the floor. Bring your palms together in the air and quickly spread them out to the sides to return to the starting position. The harder you push, the higher you can lift your body and, accordingly, the more time you will have to clap. Many guys can clap not just once, but several times - three and four times. In the most difficult version of the exercise, the push is performed with only one hand. These push-ups are a good way to diversify your workout, but keep in mind that they are quite traumatic. And don’t even think about doing it until you’ve mastered the unequal push-ups.
Stretch push-ups[edit | edit code]
These are standard push-ups in which both hands are placed on elevated surfaces. You can purchase special stands, but regular chairs will give the same effect. The legs can either be lower than the arms or placed on a bed, table or other chair. In regular push-ups, the range of motion is limited to the floor surface. In these push-ups, you go lower than your arms, stretching your pectoral muscles. Stretching the muscles that bear most of the load of the exercise leads to micro-tears in the muscle tissue and, as a result, causes pain. Injured muscles will not make you stronger. I don't really believe that stretching push-ups do more good than harm, but if you want your chest to burn, do stretching push-ups. If you like muscles and strength, work on ten levels and don’t get carried away with stretching push-ups.
Jackknife push-ups[edit | edit code]
Socks on the floor, arms in front of you, so that the body and legs form a right angle (this position is called a “folding knife” for its visual resemblance to a pocket knife).
Hands clearly under your shoulders, keep your body straight. Maintain a slight bend in your knees. Bend your arms until your chin touches the floor between your hands. Next, begin to lift your chin up and lower your hips until they touch the floor. You should finish the exercise with your legs straight and your arms extended in a straight line, your shoulders up and your hips down. Keeping your arms straight and pushing your butt up, jerk yourself back to the starting position. Repeat.
This exercise is quite easy, as it does not load the upper body, but develops the hips, making them more mobile - for this reason, the exercise is popular among martial artists and wrestlers. Sometimes it is called cat push-ups or in the Indian style - dand.
Diving push-ups[edit | edit code]
A widespread exercise in the Marine Corps in the 1970s. Very similar to the previous type of push-up, except for the movement of the arms - the arms bend at the elbows when returning to the starting position (in jackknife push-ups, the elbows bend when moving down, and the arms remain straight when moving up). The second curl works the upper arms, reducing the effectiveness of the flexibility exercise.
Diagonal push-ups[edit | edit code]
Take the starting position as for jackknife push-ups. Your body should be bent at the waist, hips high, and arms and legs almost straight. Keeping your legs together will make the exercise more difficult. Bend over, bending your elbows, but do not throw your legs back, as in jackknife push-ups, but try to maintain a right angle between your legs and body. Bend down until your forehead touches the floor, then return back. It is important to maintain a right angle between your legs and body. Try resting your heels on the wall - this will make it easier to do push-ups. This exercise works your shoulders much harder than regular push-ups. As with the leg-raised push-ups, I recommend replacing these exercises with handstand push-ups as they are more effective.
Board (plank)[edit | edit code]
Main article:
plank
The plank is not actually a pushup. This static exercise, known since ancient times, was incredibly popular among the strongmen of the second golden era. Many people love this exercise - it uses every muscle in the body and requires coordination and balance. Moreover, it makes a great trick. Place your hands on the floor with your palms facing you, shoulder-width apart, bend your elbows and rest them on your body. Shift your body weight forward until your feet leave the floor. Hold your position. The legs and back form one straight line and from the side should look like a board - hence the name. It's not easy to do it the first time. Try - and everything will work out. The plank is popular among Canadian strongmen, so it is sometimes called the planche in French. In English-speaking countries it is known as the elbow lever.
Maltese push-ups[edit | edit code]
A little known push-up. Often performed by gymnasts because it imitates ring work. Maltese push-ups are similar to full push-ups, the only difference being that the palms are at hip level and the arms are placed wide. That is, if you draw two lines: one along the palms, and the second along the body, then the figure will look like a Maltese cross - hence the name. This exercise is quite difficult to perform, unless, of course, you are a gymnast. Maltese push-ups work both the biceps and triceps, but can be painful on the elbows.
High-intensity workout for gaining muscle mass and relief
Before the high-intensity training methodology (HIIT) came to the rescue of the legions of desperate muscle men who spent countless hours doing slow-tempo, low-intensity exercise, bringing them the desired fat-loss benefits while preserving muscle mass, for many, trying to maintain this balance ended up causing metabolic problems. collapse and disastrous results.
Now, by combining short, ultra-intense bouts with short periods of rest and/or active recovery in 15-20 minute periods, dedicated athletes can achieve phenomenal results in both maintaining muscle mass and losing weight quickly. And although cardio often plays a leading role when it comes to losing fat, for many it does not provide the desired effect when it comes to quality muscle volume.
By performing rapid series of strength exercises on different muscle groups to failure, one after another, interspersed with just enough rest to recover for the next set, the muscles are forced to work harder, more blood is supplied to the target muscle groups, and the metabolism receives a powerful boost. for overclocking. If you apply this approach wisely, you will certainly achieve a leaner and more muscular body.
The following workout uses HIIT principles to primarily target the chest/shoulders/triceps.
Give it a try. Get used to it. Use it wisely, and your pectorals will have no choice but to get stronger.
Push-up workout
Typically, you give your body 48 hours to rest before you begin strenuous exercise. During rest, the body has time to recover and become stronger. This is why in many training systems you train your upper body on Monday, Wednesday and Friday, and train your lower body on Tuesday and Thursday.
Some complexes allow up to 72 hours of rest before performing the same exercises. But in the army, push-ups were done every day, both as a daily exercise and as a punishment for bad behavior. And this arrangement usually improved the results. Over the years I spent in the military, first as a soldier and then as an instructor, I noticed that people become stronger by the end of the training season.
So I began experimenting with young people, between the ages of 18 and 30, who wanted to improve their push-up abilities. The program is a ten-day plan that requires daily exercise. It has some rules that give the body adequate rest. Below is a program that allowed people to complete 80 push-ups in two weeks, although previously they could do 50.
On odd days
We perform 200 push-ups. We perform as few approaches as possible. In addition to push-ups, we also do cardio. If you already have another program, you can do other upper body exercises if you wish. We try to do fewer approaches, performing the maximum possible number of push-ups in one approach (4 x 50, 8 x 25).
On even days
We perform 200 push-ups per day. You can do small sets of ten every half hour, or you can do fifty in four sets. How much is up to you.
Table of push-ups from scratch to results in 6 weeks
| Approach no. | Number of times for those who can do up to 5 push-ups | Number of times for those who can do 5-10 push-ups |
| First week | ||
| Workouts 1 and 2 (pause between sets 1 minute) | ||
| 1 | 3 | 6 |
| 2 | 4 | 7 |
| 3 | 2 | 5 |
| 4 | 3 | 6 |
| 5 | 5 | 7 |
| 3rd workout (pause between sets 1 min) | ||
| 1 | 4 | 8 |
| 2 | 5 | 10 |
| 3 | 4 | 8 |
| 4 | 4 | 8 |
| 5 | 7 | 10 |
| Second week | ||
| Workouts 1 and 2 (pause between sets 1.5 min) | ||
| 1 | 5 | 10 |
| 2 | 6 | 12 |
| 3 | 4 | 9 |
| 4 | 5 | 10 |
| 5 | 9 | 12 |
| 3rd workout (pause between sets 1 min) | ||
| 1 | 5 | 12 |
| 2 | 7 | 13 |
| 3 | 5 | 11 |
| 4 | 5 | 11 |
| 5 | 10 | 15 |
| Third week | ||
| Workouts 1 and 2 (pause between sets 2.5 minutes) | ||
| 1 | 8 | 12 |
| 2 | 10 | 14 |
| 3 | 12 | 11 |
| 4 | 8 | 12 |
| 5 | 15 | 15 |
| 3rd workout (pause between sets 1.5 min) | ||
| 1 | 11 | 13 |
| 2 | 13 | 15 |
| 3 | 15 | 17 |
| 4 | 13 | 15 |
| 5 | 15 | 17 |
| Fourth week | ||
| Workouts 1 and 2 (pause between sets 2.5 minutes) | ||
| 1 | 12 | 15 |
| 2 | 15 | 20 |
| 3 | 12 | 10 |
| 4 | 12 | 10 |
| 5 | 15 | 20 |
| 3rd workout (pause between sets 2.5 min) | ||
| 1 | 10 | 15 |
| 2 | 18 | 20 |
| 3 | 15 | 13 |
| 4 | 10 | 15 |
| 5 | 18 | 20 |
| Fifth week | ||
| Workouts 1 and 2 (pause between sets 2.5 minutes) | ||
| 1 | 10 | 15 |
| 2 | 13 | 20 |
| 3 | 10 | 15 |
| 4 | 15 | 15 |
| 5 | 20 | 30 |
| 3rd workout (pause between sets 1.5 min) | ||
| 1 | 10 | 10 |
| 2 | 15 | 20 |
| 3 | 12 | 15 |
| 4 | 10 | 10 |
| 5 | 25 | 30 |
| Sixth week | ||
| Workouts 1 and 2 (pause between sets 2.5 minutes) | ||
| 1 | 10 | 12 |
| 2 | 15 | 18 |
| 3 | 10 | 12 |
| 4 | 10 | 12 |
| 5 | 30 | 35 |
| 3rd workout (pause between sets 1.5 min) | ||
| 1 | 16 | 10 |
| 2 | 18 | 15 |
| 3 | 16 | 15 |
| 4 | 15 | 10 |
| 5 | 35 | 50 |
Rule
If your maximum possible number of push-ups is about 50, then do 200 per day. If it is above 75, do 300 per day.
Alternate days for 10 days. Then rest for three days and do not do any upper body exercises. Then, on day 14, take the Army Push-Up Test, trying to complete as many push-ups as possible in two minutes. It is not recommended to do this type of training more than twice a year, because it puts a lot of stress on the muscles.
So that the workout does not seem monotonous to you, push-ups can be done not only standard, but also wide, as well as narrow, for the triceps.
As you can see, the difference between these types of push-ups is only in the position of the hands. Standard push-ups distribute weight evenly between the pecs, shoulders, and triceps. Wide push-ups pump up the chest, while narrow push-ups work more on the triceps and shoulders.
How to do push-ups correctly: safety precautions
Push-ups, like most other bodyweight exercises, are relatively safe. This means that if more or less correct technique is followed and the practitioner has common sense and an instinct for self-preservation in his head, push-ups will not lead to any injuries. A curved spine (when you lift your head or butt) can lead to compression of the nerves by the vertebrae or other minor neurological problems, and if you position your hands in an awkward manner, you can strain your joints or even fall to the floor at the most crucial moment. Therefore, as always, approach the exercises responsibly, and sooner or later push-ups will become your favorite exercise.
I would like to mention two questions that often concern beginners.
- Question: Why does my lower back hurt, although the main load falls on my arms?
- Answer: most likely this is caused by weak lower back and abdominal muscles, which do not support the spine well. Over time, the lower back will get used to it, but it makes sense to pay more attention to these lagging muscles during training.
- Question: Why do my head and neck hurt?
- Answer: Most likely, this is caused by some problems in the cervical spine (for example, muscle spasm) or weak blood vessels. Consult your doctor and he can help you tailor your program to suit your case. Check whether you are holding your head correctly during the exercise.
Challenge with push-ups to pump up your arms and chest
Finish your chest workout with one exercise - at maximum intensity.
In order to effectively pump up your muscles with push-ups, you don’t have to go to a gym full of exercise equipment and equipment. So says Ebenezer Samuel, director of fitness at Men's Health. If you want to get a quality workout for your arms and chest, you don't have to use heavy equipment. Just start doing push-ups.
This challenging push-up challenge will max out your upper body—and not all of your work will go to just your hands. Since you will change the position of your arms, you will be able to strengthen your chest muscles, shoulders, triceps, serratus muscles, and torso, which will be an effective method to train many muscle groups at once.
The simplicity of this challenge makes it an easy option for any athlete. “Extreme bodybuilders will find this a good way to end their workout,” says Samuel. “And for beginners, he can put together an entire workout.”
You can do this challenge anywhere because you don't need any equipment or equipment - only your own body weight works. If you have a few minutes to spare and plenty of room to do push-ups, there's no excuse not to do this workout.
