Warm-up is the most important and integral part of any workout. By warming up, the likelihood of injury during exercise is significantly reduced, and your performance in training will be better . Warm-up takes about 15 minutes. Warm muscles are more productive, and exercises during the main workout are performed with greater pleasure, since the body is already prepared for them.
The warm-up described below should be performed intensively and treated as a workout :
Torso bends
Initial position:
- Feet shoulder width apart
- When performing the entire exercise, do not bend your knees.
Exercise : REPEAT 40 TIMES
- Count the bends as 1 towards the left leg, 2 towards the right leg and straighten the body as 3.
- Then put your feet together and try to touch your forehead to your knees (try to hold it for a few seconds).
An approximate set of exercise therapy exercises for cervical osteochondrosis (non-acute stage)
Exercise 1. Pre-warm-up.
As a warm-up, it is recommended to walk in place - on your full feet, then on your toes and heels. At the same time, the arms are relaxed, hanging freely, the shoulders are straightened and slightly lowered down. Duration - 2-3 minutes.
Exercise 2. Relaxing the neck muscles
Stand up straight with your arms hanging freely along your body. Clench your fists and tense your arms, while lowering your shoulders and shoulder blades and straightening your back. Hold the tension for 30 seconds, then relax and let your arms swing freely.
Exercise 3. Head tilts to the side.
Performed standing or sitting.
Gently tilt your head to the side, lowering your ear to your shoulder - feel the muscle stretch. Hold this for 10-15 seconds. Slowly return to the starting position. Tilt your head to the other side. Perform the exercise carefully, do not allow the pain to increase.
Exercise 4. Turning the head to the side.
Performed standing or sitting.
Tilt your head down, trying to touch the jugular cavity with your chin. As if sliding your chin along the upper part of the sternum, turn your head to the right and hold it for 3-6 seconds. Then slowly turn it the other way. Repeat 5-7 times.
Exercise 5. Raise and lower your shoulders.
Performed standing or sitting.
Raise your shoulders as high as possible without moving them forward. Lower it, pulling it back slightly, as if straightening your shoulders. Repeat 6-8 times
Exercise 6. Moving your shoulders back and forth.
Performed standing or sitting.
Starting position - shoulders freely straightened and lowered. Raise your shoulders and move them forward. Return to starting position. Pull your shoulders back, trying to close your shoulder blades. Return to the starting position and repeat 6-8 times.
Exercise 7. Head tilts forward.
Performed standing or sitting.
Gently lower your chin to your chest, bending your neck forward. Keep your shoulders straight! Slowly straighten up. Repeat 6-8 times.
Exercise 8. Swing your arms back.
Performed standing or sitting.
Stretch your arms to the sides. Shoulders slumped. Press your shoulder blades toward your back. At the same time, the outstretched straight arms will move slightly back. Return to the starting position. Repeat 6-8 times. Don't move your arms, try to work only your back muscles.
Exercise 9. Circular rotations in the wrist joint
Performed standing or sitting.
Stretch your arms to the sides. Shoulders slumped. The arms are bent at the elbows, the hands are clenched into fists. Perform circular rotations in the wrist joint without lowering your elbows - 4 times in one direction, 4 times in the other. Repeat 4-6 times
Exercise 10. Circular rotations in the elbow joint.
Starting position - as in the previous exercise.
Perform circular rotations in the elbow joint without lowering your elbows - 4 times in one direction, 4 times in the other. Repeat 4-6 times
Exercise 11. Circular rotations in the shoulder joint.
Starting position - extend your arms to the sides. Shoulders slumped.
Perform circular rotations in the shoulder joint - 4 times in one direction, 4 times in the other. Repeat 4-6 times.
Exercise 12. Circular rotations in the shoulder joint.
Relax your shoulders and arms. Raise your arms up, hands relaxed. Drop your arms freely downwards. Breathing is free and deep. Repeat 4-6 times.
Read more about NANOPLAST forte
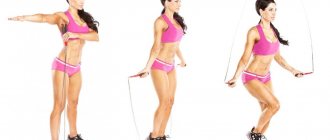
Abdominal muscles
Initial position:
- Lying on your back, legs raised about 15 cm above the floor.
Exercise : REPEAT 2 TIMES FOR 30 SECONDS
- Perform scissors horizontally for 30 seconds.
- Break 5 seconds.
- Perform the scissors vertically for 30 seconds.
How to do the exercises?
All movements are performed with straight legs standing shoulder width apart.
Forearms
The arms are positioned at right angles to the body. The movement is carried out in a circle, the center is at the elbow. The number of repetitions is 30 times towards yourself and away from you. Do not do the exercise in jerks, start smoothly and speed up a little towards the end.
Hands
In this variation, the arms rotate completely with maximum amplitude relative to the body. The brush rotates 360 degrees. You should perform 20 repetitions from yourself and to yourself, as well as a similar number of simultaneous rotations in different directions.
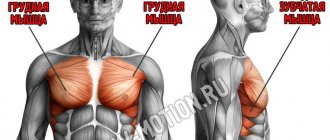
Shoulders
The arms are parallel to the body and motionless; only the shoulder muscles work. Repeat 20 times in the direction away from you and towards you.
Are head rotations harmful to the cervical spine?
Good afternoon I heard an opinion here that rotating the head in a circle, including neat and leisurely ones, is harmful to the cervical spine. Tell me, please, is this true or a myth? And, if it’s not difficult, I would be happy to read a brief rationale from the point of view of biomechanics.
In the process of evolution, the human neck was formed in such a way as to quickly turn the head, allowing you to instantly react to the changing environment around you. Seven movable cervical vertebrae and strong short muscles ensure tilting or turning of the head within a fraction of a second. The only thing the neck was not adapted to was static load. Sitting for a long time in one position without moving your head puts an unusual load on the neck muscles, so they are easily overloaded and get tired quite quickly.
If a tired muscle is forced to continue working, it becomes overstrained and can go into spasm (contract strongly and for a long time), limiting the movement of the neck. A person feels stiffness, numbness or even pain when moving. The best prevention of such muscle fatigue is movement. Gymnastics, which includes rotating the head and bending it forward, left, and right, is useful because it allows you to use almost all the muscles of the neck. It must be performed smoothly, without sudden movements, so as not to injure tense muscles.
However, performing gymnastics has one important feature : the head should not be thrown back. The vertebral artery passes through the foramina located one above the other in the cervical vertebrae. Throwing the head back leads to compression of the head at the entrance to the skull. The blood supply to the head deteriorates so much that in some cases this even leads to short-term loss of consciousness and fall. Moreover, a person most often falls backwards and hits the back of his head due to the thrown back of his head.
The injury can be quite serious . In addition, with the head tilted back, the cervical spine is very vulnerable to vertebral displacement, especially if there is instability in the cervical spine. A displaced cervical vertebra can injure the spinal cord passing through it with very serious consequences: from complete paralysis to death. That is why head restraints have become mandatory in cars, and in airplanes during an emergency landing, it is recommended to bend your head to your knees and, just to be sure, press it with your palms on top.
Thus, rotation of the head with a tilt should be carried out without throwing the back of the head to the back, i.e. in a semicircle from one shoulder to the other .
It should be taken into account that normally, when performing gymnastics, the angle of rotation of the head to the side can be up to 80-85 degrees, i.e. the tucks do not reach the shoulder by about 5-7 centimeters. When you tilt your head forward, your chin should reach your sternum. And the normal angle of tilt of the head to the side during exercise is approximately 45 degrees (the ear does not reach the shoulder girdle, approximately the width of the palm).
Why you can't make circular movements with your head
The person often began to overload the spine with different turns. In this regard, the cervical region is especially successful, which is the most mobile, because a person needs to quickly and a lot turn his head. But even remaining motionless in one position, the neck muscles quickly become overtired, which leads to their spasm.
By throwing your head back or making circular movements with your head, the artery that runs in the vertebra is pressed. The blood supply to the head is disrupted, which can lead to poor health, fainting, or stroke. A fall usually occurs backwards because the head has been thrown back, and this will result in a bruise to the back of the head.
You cannot make circular movements because the cervical vertebrae are displaced, especially when the head is thrown back. Displaced vertebrae can injure the spinal cord, which can lead to serious consequences, ranging from real estate to death.
ALSO READ: How to get rid of unpleasant symptoms after a coffee overdose
Applications [edit]
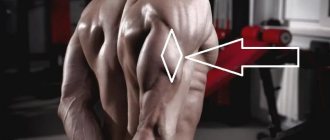
Solving applications involving irregular circular motion involves force analysis. In uniform circular motion, the only force acting on an object moving in a circle is the centripetal force. With uneven circular motion, additional forces act on the object due to non-zero tangential acceleration. Although there are additional forces acting on an object, the sum of all forces acting on the object must be equal to the centripetal force.
F net = ma F net = mar F net = mv 2 r F net = F c {\displaystyle {\begin{aligned}F_{net}&=ma\,\\F_{net}&=ma_{r}\ ,\\F_{net}&={\frac {mv^{2}}{r}}\,\\F_{net}&=F_{c}\,\end{aligned}}}
Radial acceleration is used when calculating the total force. Tangential acceleration is not used when calculating total force because it is not responsible for keeping an object on a circular path. The only acceleration that causes an object to move in a circle is radial acceleration. Since the sum of all forces is the centripetal force, drawing the centripetal force on a free-body diagram is not necessary and is generally not recommended.
Using , we can draw free body diagrams to list all the forces acting on an object and then set it equal to . We can then decide what is ever unknown (it could be mass, velocity, radius of curvature, coefficient of friction, normal force, etc.). For example, the image above showing an object at the top of a semicircle would be expressed as . F net = F c {\displaystyle F_{net}=F_{c}\,} F c {\displaystyle F_{c}\,} F c = n + mg {\displaystyle F_{c}=n+mg\ ,}
In uniform circular motion, the total acceleration of an object along a circular path is equal to the radial acceleration. Due to the presence of tangential acceleration in uneven circular motion, this is no longer true. To find the total acceleration of an object in a non-uniform circle, find the vector sum of the tangential acceleration and the radial acceleration.
ar 2 + at 2 = a {\displaystyle {\sqrt {a_{r}^{2}+a_{t}^{2}}}=a}
The radial acceleration is still . Tangential acceleration is simply the derivative of the velocity at any given point: . This sum of the squares of the individual radial and tangential accelerations is only valid for circular motion; for general motion in a plane with polar coordinates, the Coriolis term should be added, while the radial acceleration becomes . v 2 r {\displaystyle {\frac {v^{2}}{r}}} at = dvdt {\displaystyle a_{t}={\frac {dv}{dt}}\,} ( r , θ ) {\displaystyle (r,\theta )} ac = 2 ( drdt ) ( d θ dt ) {\displaystyle a_{c}=2({\frac {dr}{dt}})({\frac {d\theta }{dt}})} at {\displaystyle a_{t}} ar = − v 2 r + d 2 rdt 2 {\displaystyle a_{r}={\frac {-v^{2}}{r}} +{\frac {d^{2}r}{dt^{2}}}}