Boxing bandage
By the end of this article, you should know everything to bandage your hands correctly the first time, as well as choose a quality pair of bandages without wasting money on low-quality products.
Like us on Facebook
Why trust me
During my athletic career, I have trained in MMA, Muay Thai and boxing gyms in many countries around the world, using many different hand wraps from at least 12 different brands. I used bands in both training and sparring. I've also tried other wraps that didn't have velcro and loops (old school) to newer brands you can buy, so I have a pretty good idea of what's good and what's not. This article is my experience and will give you a detailed guide on how to choose the right hand wraps.
Why use bandages
A good pair of boxing/muay thai wraps will protect your hand, fingers and wrist when impacted. Never put on gloves without wrapping them, as you could sprain your wrist, damage your knuckles, cause serious injury and be out of training for a long time. Properly protecting your hands is key, especially if you exercise regularly. That's why it's important to know how to properly wrap your hands before training. A good pair (actually several pairs) of hand wraps, besides your boxing gloves, is the most important piece of your Muay Thai equipment. And that's why you have to buy the RIGHT bandages. A bad pair of wraps will waste your time, provide poor protection, and chafe your joints.
Best Muay Thai - Boxing Bandages
If you are looking to purchase a new pair of hand wraps, I suggest you get stretchy cotton hand wraps. These are the best wraps for boxing and muay thai. They are a little more expensive than non-stretch cotton ones, but they don’t cost a lot of money and they can be bought at any sports store or ordered online.
Your hands will still be useful to you, so it won’t hurt to learn how to protect them.
Photo pixabay.com
If you decide to take up martial arts such as boxing, MMA or Muay Thai, then in addition to practicing various strikes and stances, you will also have to learn how to wrap boxing wraps. By the way, this process is correctly called taping
.
Not every trainer devotes special class time to teaching this skill, and you may be embarrassed to ask someone from the gym to teach you this skill (especially if you just started going there).
Fortunately, mastering this skill is not so difficult - the main conditions are: a little practice, understanding why it is needed, and what mistakes should not be made, as well as how to choose the right hand wraps for boxing.
In this material we promise to answer all these questions.
Boxing bandages
If you intend to get confused specifically, then here are my TOP 5 hand bandages:
Fairtex bandages
Firetex
is the leading Muay Thai brand in Thailand because they offer quality products that are built to last. Fairtex bandages are elastic cotton that allows the bandages to stretch.
Top King bandages
Top King is another Thai brand that makes excellent hand wraps at a reasonable price.
Winning bandages
Another good recommendation is bandages from the Japanese factory Winning. Winning is an established boxing brand and they make very good hand wraps.
Ultimatum Boxing gauze bandages
UltimatumBoxing is a good Russian boxing brand. More expensive than fabric ones, but superior in every way, providing better wrist support and a stronger grip on the hand and knuckles. This is what professional boxers use before training and before fights. Gauze feels like a second skin, providing excellent support to the joints and wrist area. You will need your trainer or assistant to secure the bandage with tape.
Ultimatum Boxing Bandages
Good bandages are excellent value for money. Suitable for both beginners and experienced boxers.
How to wrap bandages
In my experience, there are three effective ways to wrap bandages. The first method of hand wrapping is the traditional Boxing method.
Yulia Kovalevich Muay Thai coach
Boxers usually wrap their hands with extra support around the wrist, creating the feeling of one solid fist. The second method of hand wrapping is the traditional Muay Thai method that many Thais use.
This method involves making a special pad/cushion for the knuckles and then wrapping a bandage around the pad. Although this wrapping method takes a little longer, it provides excellent support for the hand and wrist joints. The third way for the pros is to use gauze bandages and taping. As a rule, this method is used by experienced fighters. To save your hands as much as possible during the preparation for battle. Instead of writing down step-by-step instructions on how to wrap your arms, see three methods and choose yours. Keep in mind that every fighter has their own variation of arm wrapping, so don't try to count the number of turns, etc. follow the technique, catch the meaning. Because the length of your bandage determines how to wrap your arms.
Method number 1 - Boxing method
You will notice that special attention is paid to securing the wrist, hand, and thumb. This is one of the easiest effective ways to wrap bandages that I use.
Method number 2 - Muay Thai method
The main point of the Muay Thai method is the initially prepared fist pad. When you make this pad, it will provide you with an extra layer of protection when hitting a punching bag or wall pad. One of the reasons for the extra protection on the front of the fist is that many Muay Thai fighters use small 8-10 ounce gloves. And using small gloves does not provide sufficient protection when working closely on heavy punching bags. If you learn how to wrap your arms this way, you will never have problems with your arms after training.
Method number 3 - the pro method
For this method, you will need a Cutman assistant - a person who knows how to make a special tape. My wife became this person, since she is always there and there is no need to attract a person from the outside. In order to make a tape correctly, you will need to make special blanks in the form of tapes from adhesive tape. Prepare a gauze pad for the front of the hand. And also have medical scissors to remove excess parts of the tape.
Watch a video,
- How to apply tape before a professional fight in Thailand. Video
How do you know if your hands are wrapped correctly?
If you wrap the bandages correctly, everything should feel comfortable. If you are punching a punching bag wearing only wraps, you should not feel your wrist bending under the impact. It is important that everything is neat, but not squeezed too tightly, otherwise blood circulation in the hands will be disrupted.
Common mistakes:
- Wrapping bandages too tightly. After a while, you will feel that your hand is going numb, this is a sign that blood circulation is becoming difficult. Remove the bandages and re-wrap them, try not to tighten the bandage so much this time.
- You are not wrapping the bandage tightly enough . In this case, your bandages will simply dangle and unravel very quickly. Unwind them and tighten them a little tighter.
- Wrapping the bandages with the wrong side down - each bandage has a side that you wrap up and down. If you start winding from the wrong side down, you will notice at the end that the Velcro is upside down. Then you will have to turn the bandage the right way to fix the Velcro.
- Don't clench your fist (at certain points) during the wrapping process - If you watch the first and second wrapping videos, you will notice at what point you need to clench your fist. This helps to press the bandage tightly in the fist position and ensures a good fit.
- Insufficient wrist support. If you don't wrap enough around your wrist, you won't have the support you need at impact and could end up spraining your wrist.
- Forgetting to wrap around your thumb - It is important that you wrap the bandage around your thumb to secure it. Since the most common injuries are to the thumb when it hits the elbow or forehead.
- The choice of cheap bandages is made from rough material. Low quality bandages, when wet, can chafe your knuckles to the point that the skin abrases, causing open sores. This can be avoided by using longer bandages made from soft materials.
How many pairs of bandages should you have?
The minimum number of bandages you should have is at least 2 pairs, preferably more. The reason you need multiple pairs is because you should always use a fresh pair of bands when you train. Don't use hand wraps that stink that are not fresh, because they will transfer the bad smell (sometimes mildew) to your gloves. Have as many pairs of bands as you train during the week. If you train 5 days a week, you should have 5 pairs of bands. If you are in Thailand and train 6 days a week, 2 times a day, you will need 12 pairs of bands. Using fresh hand wraps during every workout will ensure that your gloves stay clean and won't deteriorate after months of use.
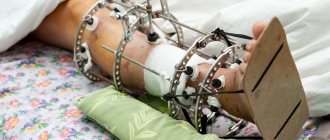
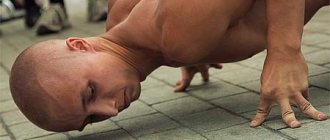
Broken knuckles
If you use short wraps or small gloves when using the punching bag, you may find that your knuckles will be bruised and bruised. If it's worse, you'll be peeling the skin off your knuckles. Soreness is common because your bandages are not thin, stretchy material, but thick, cottony material that rubs against your skin when your joints get wet. This happened to me in Thailand. It hurts and can take you out of training for a few days or a week (this will leave you unable to throw with your hands). There are several things you can do to soothe a bruised fist:
- use 4.5 meter long Mexican style wraps and remember to wrap the joint area 5 to 7 times for extra support;
- use 12 ounce gloves to hit a heavy punching bag;
- choose high-quality soft hand bandages;
- using a quality pair of boxing gloves known for their padding, such as Winning or Ultimatum Boxing gloves;
- use gel inserts under bandages or gel hand bandages.
Winding methods
There are many different methods for wrapping a bandage. Each athlete chooses the one that is convenient for him. But the most popular methods are highlighted:
- classical;
- cross;
- soft;
- with a ring;
- American.
Classical
This is one of the simplest and most convenient methods. It requires a ribbon with a finger loop. For high-quality winding, just follow the instructions:
- Attach the loop to your thumb. Wrap the bandage around the hand away from you.
- The first turn should firmly fix the wrist.
- Next, you need to throw the canvas over your thumb.
- Then bandage below the thumb.
- After this, you need to wrap it above the thumb, grabbing the phalanges.
- Cross the ribbon from the back and roll it over your wrist.
- After this, you should tie your thumb and repeat everything again.
The winding ends on the palm, below the first phalanx.
Cross
This method is more complicated, but it preserves the small joints in the fingers much better. You can wind it according to the instructions:
- Secure the loop on the first finger of the hand.
- Then make two turns slightly below the fingers.
- After this, you should bandage each finger, starting with the little finger.
- Fix the tape through the first finger.
This wrapping of boxing bandages gives a feeling of protection to the entire hand.
Soft
This method is well suited for athletes who have already had hand injuries. The soft winding method can be performed according to the following instructions:
- First, wrap the bandage around your fingers, then remove the resulting ring and fold it lengthwise.
- The resulting pad is placed under the bandage on the knuckles.
- Next, the tape is fixed with a double turn on the wrist.
- After this, it is passed to the base of the fingers.
- Then each finger should be bandaged separately with two turns.
This method makes the blows less painful for the athlete and the opponent.
With ring
This method will require experience achieved through repeated training. To do this you must follow the instructions:
- The ring is attached to the thumb.
- After this, they wrap the wrist twice.
- Next, the tape is passed onto the knuckle of the second finger and all knuckles are rewound.
- Similarly, wrap all the finger joints separately.
- This is followed by tight fixation.
- The winding ends with two turns on the wrist.
When using this option, it is important to avoid bends or folds in the tape.
American
This method is often used by professionals and requires wrapping boxing wraps through your fingers. Instructions:
- The loop must be fixed on the thumb.
- Next, wrap the brush several times.
- Secure your thumb tightly with a piece of tape.
- Then you should wrap the knuckles and hand and secure the bandage.
- And after that, each finger is wrapped, starting with the little finger.
This method allows you to completely wrap your palm.
The best accessories for bandages
Good but optional bandage wrapping items that will save you a lot of time and effort. I have each of them and some I recommend you buy.
Meister Mounted Easy Hand Wrap Roller
Roll up your bandages in less than 30 seconds with this device. It may take 2 to 5 minutes to roll 4.5 meter bandages. At best, it will take you 1-2 minutes. If you are confused - 5 minutes. A HUGE time saver is to buy a packaging roller. It's basically a small device that allows you to insert one end of a bandage and roll it up by turning a handle in less than 20 seconds. I have this video and it's the best 1500 rubles I've ever spent. I spent about 10 minutes at a time fussing with my bandages, either trying to untangle the curled ones or unroll the washed ones to straighten them. Now I just use the device to roll the washed bandages and within 30 seconds they are rolled. There are two types of videos - portable (portable) and stationary , for fight clubs. The stationary one is even faster and is good to install in the gym or at home.
A portable one is more convenient to carry or store near the washing machine or dryer.
Wash your bandages in a special bag and do not allow them to get tangled with each other or other laundry. Saves a lot of time. If you have ever washed your bandages, have you seen the result, how they were tightly wrapped around various things, each other and the washing drum? It can be even worse if you wash several pairs of hand wraps at once. You'll spend five to ten minutes trying to untangle and untie the bandages from other laundry items and from each other. Why this waste of time? This can be avoided by using a laundry bag. This is a special mesh bag in which all dirty bandages are stored. You simply fill it with the bandages you want to wash, zip it up, and turn on the washing machine. The bandages will wash well and will not get tangled in other laundry items. This prevents them from being stretched and damaged by other clothing. And the bandages will last you much longer.
Gel bandages
I don't like the feel of these bulky wraps, the way they fit on my arm. But if you have damaged your knuckles and still want to train, then you need these bandages. To give them a few days to heal. I wouldn't recommend using them all the time. If your hand joints hurt when hitting the punching bag, then these gel bandages may come in handy.
Gel pad
Used together with a bandage. An excellent device that creates additional protection for your fist and knuckles. Using a pillow is somewhat reminiscent of the second method of wrapping bandages, where we made an overlay from a bandage. And with this gel pad there is no need to prepare a pad, it is very easy to use. You simply put it on the brush and wrap it with a bandage on top, pressing the gel pad. It's worth purchasing and having one in your equipment.
Models and brands
There are simple products. They have been used since the beginning of the 20th century. Their material is cotton. There are also gauze options. They are also called Mexican.
Professional fighters use elastic gauze products. They tightly wrap around all the fingers and the whole hand, duplicating the contours of the hands. When tightening, the athlete feels whether he has pinched them or not, whether blood circulation in this area has been disrupted.
When tugging, it is dangerous to hit with your fist; you can immediately injure several fingers, stretch or tear ligaments.
The choice of bandage depends on the level of the fighter. Below are some examples of well-known brands:
- Everlast. These are high quality products with a long service life. They meet optimal parameters to achieve maximum comfort and safety.
- Title. This is also one of the leaders in the production of boxing bandages. Like point 1, it complements traditional products with a shock-absorbing gel layer. Some models received strengthening of the first 40 inches. For this purpose, a corresponding gasket has been introduced.
- Ultimatum. Their elastic products with a length of 3 - 4.5 m are especially popular. There are versions with gel pads.
Results
In conclusion, consider a few tips that will definitely come in handy when winding:
- try to wrap the bandages yourself - don’t trust anyone. This is because it is difficult for another person to feel the optimal degree of tension;
- After removal, take care of the bandages. At a minimum, they need to be dried and folded correctly;
- When winding the bandage, make sure that the product does not put pressure when you unclench your hand. When the hand is clenched, the product should fit tightly around the fist.
The figure eight method
It began to be actively used during the Soviet Union. The wound bandage resembles a glove. Thanks to this method, the blows are stronger and harder, since the hand is firmly fixed, and the product fits better to the hand.
With this method, the joint of each finger is treated separately. This significantly reduces the risk of injury. The beginning and end of the technique are identical to the classic version.
The differences are as follows: after wrapping the knuckles in two circles around the circumference, you should pass the bandage sequentially between all fingers except the thumb. First between the index finger (IP), then the middle finger (SP), then the ring finger, and finally the little finger.
During the tying process, the fingers spread to the sides. The turnover starts from the zone opposite to the BP.
Each turn ends with a transition to the wrist. This provides additional fixation. Then there is a return to the next finger.
Why do you need to bandage your hands?
Then, the purpose of wraps is to protect a boxer's most important weapon, his hands! Hands are made of many small joints and small bones that can easily break from repeated impacts. Bandages are used to hold the arm together, providing support to the wrist, fingers, knuckles and the entire hand.
Many people mistakenly believe that bandages are needed to provide additional cushioning or protection to the knuckles.
The purpose of bandages is NOT to soften the blow; That's why you have boxing gloves.
Bandages are needed to ensure the safety of all your relaxed joints and moving bones. Bandages hold all your joints together, so the impact is better distributed throughout your entire hand. Your joints should not move freely and independently when your hand strikes an object. You can get a fracture if the joints move in their own directions.
A properly bandaged hand will form a tight fist when you clench your hand.
If your hands are relaxed when you strike, it is very easy for the small joints in your hand to run into each other and break. Even if you don't break your hand, you shouldn't risk a hand injury that will prevent you from doing other things in your life, such as typing on a computer, holding a pen, or carrying things. Save your arms for life after boxing!
Classic method
There are different ways to tie bandages. But there are only two main ones: classic and eight. The first one is the simplest. They usually bandage the hands of children and beginners. There is no complicated algorithm here, but it is necessary to bring certain actions to automaticity.
The classic bandaging plan is as follows:
- Fixing the power supply in the loop. The rest of the process follows from there.
- The product is wrapped around the circumference of the wrist, goes to the BP and with just one turn makes its final fixation.
- Wrapping the attacking surface. Move to the inside of the hand. And each new skein overlaps the previous one by 50%.
The process starts with the dominoes. They require enhanced protection. And those places where the hand is less covered with a bandage are covered with the last two turns.
- Fixation of all structures in the wrist area. Velcro or ties are used.k4
The trainer shows you how to tie bandages correctly in the first stages and helps you in this matter. Using the indicated instructions, you can hone the process to create the perfect home. It is better to remember it on a mechanical level and continue to act “automatically” than to try to remember the correct order of actions.
For this method, products whose length is 2.5-3 m are usually used. For beginners, these are the optimal solutions.