“Tada” means mountain, “sama” means vertical, straight, motionless, “sthiti” means standing quietly, stillness. Tadasana, therefore, is a pose in which one must stand firmly and straight, like a mountain. This is the basic standing pose. All standing poses that will be described below begin with this stand in Tadasana with arms down.
Mountain pose in Sanskrit is called Tadasana. Photo and description of this pose is published by Sri B.K.S. Iyengar in his book “Yoga Deepika. Clarification of Yoga." This is a standing pose. Feet on the floor, heels and big toes touching, toes pointing forward from the heels. Straight legs, torso and head in the same vertical plane, the spine is vertical, the top of the head is in line with the spine. The arms are straight, extended down to the sides of the body, palms facing the body. The gaze is directed forward parallel to the floor. Beginners are recommended to practice this pose from the very first Iyengar yoga class. The pose teaches us to stand correctly, distributing weight evenly on the right and left feet and on the feet themselves: on the inner, outer, front and back of the feet. The health of the spine depends on this. When the weight of our body is unevenly distributed on the feet, curvatures and deformations of the spine occur.
Description of the asana
Shavasana is performed lying on the back, as if the person were dead, which is why it is called the corpse pose in yoga. The name comes from the combination of two words. Translated from Sanskrit, shava means “dead,” and asana means “position.” The history of the practice dates back to the 14th century. Then it was first mentioned in a treatise describing Hatha Yoga, shown in pictures, yogis performed it on bricks.
Gradually, the relaxation pose of Shavasana became famous throughout the world. But calling it a corpse did not catch on among Europeans; an association immediately arises with a dead body, death. Therefore, the asanas simply retained their original Sanskrit name – Savasana. During its implementation, a person must lie still, completely relaxed, but the brain continues to work actively.
This practice is called snow globeing by some. During meditation, energy activation occurs progressively, and at the end there is calm. During the performance of the asana, the accumulated energy is quickly absorbed, the neural connections of the central nervous system and its peripheral part are renewed in the brain, and motor functions are renewed.
Asana Shavasana is suitable for everyone - for practitioners, beginner yogis, people who are not interested in it at all, women and men. The sequence of actions is simple, even a child can quickly learn it. The asana helps relieve tension after a busy day, intense physical training or hard work. You can feel completely rested in just 10 minutes.
If the practice is performed regularly (daily), it will bring significant benefits. The asana improves mood, stabilizes the psycho-emotional state, and restores sleep. At the same time, the body is filled with energy, and the person learns calm contemplation and meditation.
Another feature of the Shavasana corpse pose is its physiological effect. When the spirit and body begin to work together, harmoniously, it has an overall healing effect. Initially, you can practice with the help of instructors.
Recommendations
- "Yoga Magazine - Mountain Pose." Retrieved April 11, 2011.
- Ranjini 2012, p.आसन entry.
- Sinha 1996, para. 18.
- Ranjini 2012, p.समा entry.
- ^ a b
Steiner 2012, p. Samasthitih. - Ranjini 2012, p.स्थिति entry.
- Sjoman, Norman E. (1999) [1996]. Yoga Tradition of Mysore Palace
. Abhinav Publications. pp. 54–55, 100–101. ISBN 81-7017-389-2. - ^ a b c
Iyengar 2005, paragraph 41. - Fitz-Simon 2010, p. Standing pose: Tadasana (mountain pose).
- Kaminov 2007, paragraph 39.
- ^ a b
Ramaswamy 2005, para. 3. - Steiner 2012, p. Urdhva Vrikshasana.
- Majumdar, Sachindra Kumar (1968). Yoga for Physical and Mental Health
. Stravon Educational Press. P.. - Rhodes, Darren (15 February 2013). “Yoga Sequence for Change: 5 Steps to Parivritta Paschimottanasana.” Yoga Magazine. Retrieved February 8, 2022.
- Kline, Sarah. “Backbend • Anuvittasana.” Yoga today. Retrieved February 8, 2022.
- McGregor, Cinema (2017). The Power of Ashtanga Yoga II: A Practice that Opens the Heart and Purifies the Body and Mind
. Fenugreek. p. 205. ISBN 978-0-8348-4124-6. - Fitz-Simon 2010, p. Supta Tadasana.
- Iyengar, Geeta S. (2000). Yoga in Action for Beginners
. Mumba I: Yogi Mumbai. pp. 13–14. ISBN 81-87603-01-1. - Iyengar 2005, paragraph 131 (Appendix: asana courses).
- Mehta, Silva; Mehta, Mira; Mehta, Shyam (1990). Yoga: The Iyengar Way
. New York: Dorling Kindersley. n.. ISBN 0-679-72287-4. - ^ a b c
Ramaswamy 2005, pp. 1-34. - Maehle 2011, paragraph 880.
- Ramaswamy 2005, para. 2.
Benefits of Shavasana asana
The shavasana pose in yoga is one of the most important and necessary; it is not recommended to skip it, especially for beginners. In Hatha Yoga, the asana is performed to calm the mind and relieve fatigue. Books on this topic can be ordered from the Ashanti store. But Shavasana gives a positive effect not only to yoga practitioners, anyone can perform it and the result will be similar. Benefits of performing Shavasana exercise:
- relieves anxiety, stress;
- reduces blood pressure;
- restores sleep, copes with insomnia;
- improves posture;
- relieves back pain;
- normalizes heart function;
- starts the process of tissue and cell restoration;
- helps with women's diseases;
- relaxes muscles, relieves stress;
- improves memory, concentration, eliminates negative images;
- slows down the aging of the body;
- helps in the treatment of mental and nervous disorders;
- improves the functioning of the digestive tract.
Helps get rid of psychosomatic diseases - Hatha yoga Shavasana shifts attention from everyday worries to the inner world. The brain unloads, rests and begins to work more efficiently, in a calm mode.
The body recovers and uses the released energy to solve health problems. Some simple disorders go away without medication and do not require medical intervention.
Many teachers note that the effectiveness of Shavasana increases when combined with other yoga techniques. You can choose the appropriate ones in Ayurvedic books on the Ashanti website.
If you suffer from insomnia, then perform Shavasana for sleep. But the last meal should be at least 2-3 hours before class. First you need to ventilate the room well, then perform the exercise following the step-by-step instructions. This is the best asana to combat insomnia; it will help you completely relax, eliminate anxiety, tension, and restlessness. The body quickly falls asleep.
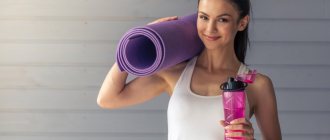
Where to start doing yoga
Deciding to do yoga is the first step. Now you need to find the right yoga class or practice at home. Let's figure out what steps you need to take next to start enjoying and benefiting from your classes.
Select yoga type
As you'll see later, there are many varieties of yoga, some simply won't be suitable for you and your fitness level.
Take a few minutes to become familiar with the different styles of yoga. For most beginners, Hatha or Vinyasa will be the best choice, depending on whether you want to practice at a slower or faster pace. These are the basic styles, you can later try something more intricate.
Despite the huge number of books and videos available, nothing can replace a good teacher in a yoga class. If you are unable to attend classes, start with video lessons, as videos give a more complete understanding of the technique, unlike a book.
Find a class
You can find yoga classes in your city, just look at specialized resources on the Internet and local magazines and find the most convenient class for you. If you go to the gym, note that many fitness centers offer yoga classes with a membership. Start with the basics. Find a good instructor who will motivate you. If you don't like the instructor, try another one and search until you find the one that suits you best.
What to expect from yoga classes
On the first day you will not have to take anything with you except comfortable, breathable clothing. Most classes have their own equipment that you will need for your classes.
Typically, students place their mats toward the instructor, sometimes in a checkerboard pattern. This is due to the fact that you need to leave space next to you so as not to embarrass your neighbor; some poses will require more free space than others.
Students typically sit in a cross-legged position while waiting for class to begin or do some light stretching.
Usual order of practice:
- The instructor may begin the class by humming “ommm” three times. Some instructors start with breathing exercises or meditation.
- This is followed by warm-up poses, active poses, then stretching and final relaxation. If you are tired, take child's pose at any time during class.
- Sometimes the teacher will walk around his students during the final relaxation and give a little advice, at the end there may be another round of chanting “omm”.
- Remember that the day after your first class you may experience muscle pain.
30-day at-home yoga program for beginners
Yoga has been very popular lately, but it can be difficult to grab a mat and start doing poses in class together. The 30-day home training program is designed to give a start to your studies and reinforce the correct order of performing poses, which are arranged in order of difficulty. Once you start doing yoga, over time you will feel all the benefits of the classes and will no longer be able to quit; this will be the first month of your new life as a yogi.
Some useful tips
- You should spend about 15 minutes doing daily stretching and 30-45 minutes for an extended workout.
- Feel free to add new poses to your daily routine if you have time for them.
- You can take a group class instead of a long home workout if you prefer.
- Don't worry if you miss a day in your program, just pick up where you left off.
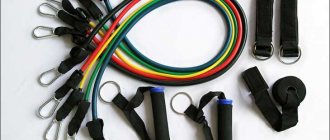
Yoga classes do not require a lot of additional equipment, but there are a few things that it is advisable to purchase in advance. First of all, this is a mat; also, to start practicing at home, it is advisable to have blocks, a belt and a comfortable blanket.
Sun salutations will form the basis of your longer sessions. This may be unusual at first, but over time, performing this complex will become more natural.
The first day
- Start your session with stretching.
- Add three cycles of sun salutations.
- Rest for a few minutes in the dead man's pose.
Week 1
During the first week of classes, stretch every day and do Sun Salutations every other day. Combine standing and sitting poses during your workouts for a longer session at least three times a week. Remember to rest in Repose Pose at the end of each session.
Think about what time works best for you to study. A good opportunity to do yoga in the morning, you can start the day with stretching, find the best time.
Procedure for the first week:
- Day 1: stretching + 3 times Sun Salutation complex.
- Day 2: stretching + 3 times Sun Salutation complex + stretching in a sitting position.
- Day 3: Stretching.
- Day 4: stretching + 3 times Sun Salutation complex + stretching in a standing position.
- Day 5: Stretching.
- Day 6: stretching + 3 times Sun Salutation complex + stretching in a sitting position.
- Day 7: Stretching.
For the remainder of the month, you will perform short stretches daily and add variations to longer sequences of poses.
Week 2
- Day 1: Stretching.
- Day 2: stretching + 3 times Moon Salutation complex + sitting stretching + standing stretching.
- Day 3: Stretching.
- Day 4: stretching + 3 times Moon Salutation complex + standing stretches + balance poses.
- Day 5: Stretching.
- Day 6: stretching + 3 times Moon Salutation complex + standing stretching + yoga for the abs.
- Day 7: Stretching.
Week 3
- Day 1: Stretching.
- Day 2: stretching + 3 times Surya Namaskar + sitting stretching + standing stretching.
- Day 3: Stretching.
- Day 4: stretching + Surya Namaskar + standing stretching + balance poses + sitting stretching.
- Day 5: Stretching.
- Day 6: stretching + 3 times Surya Namaskar + standing stretching + yoga for the abs.
- Day 7: Stretching.
Week 4
- Day 1: Stretching.
- Day 2: stretching + 3 times Surya Namaskar + sitting stretching + standing stretching + arm yoga.
- Day 3: Stretching.
- Day 4: stretching + Surya Namaskar + standing stretching + balance poses + sitting stretching.
- Day 5: Stretching.
- Day 6: stretching + 3 times Surya Namaskar + standing stretching + abdominal yoga + sitting stretching.
- Day 7: Stretching.
By completing this 30-day routine, you will acquire the habit of practicing yoga every day. Continue to stretch daily and do longer stretches three times a week. This routine will allow you to get into the workout routine, develop an exercise habit, and will improve your fitness and tone in the long run.
Some tips to prepare yourself for yoga classes in the classroom or at home.
Not recommended:
- eat heavily before class (try eating lightly a few hours before the start of class);
- drink water during class, drink enough fluids before and after class;
- wear shoes or socks during class.
Recommended:
- at the first lesson, inform the instructor about your level in yoga;
- contact the instructor for help if necessary;
- come back for the next session of your yoga class.
Breathing during asana
Yoga teachers teach that energy flows through the lungs. Therefore, correct breathing is important in all practices. This is a mandatory part for the dead man's pose in yoga. During the exercise, you can only breathe through your nose. The person will feel the body fill with warmth, starting from the head and moving to the stomach.
Below the navel (2 cm below) there is a point of an important energy node in which prana circulates. As soon as the heat reaches this place, you need to imagine how it further spreads in waves throughout the body, reaching the tips of your fingers and toes. Repeat the exercise several times.
There are no contraindications for performing the asana; it will be useful for every person, regardless of the list of diseases and health problems. This method will help you get rid of tension and fatigue and restore peace of mind in 10 minutes.
Technique
- Stand straight with your feet together so that your heels and big toes touch. Lower the heads of the metatarsal bones to the floor, and extend all the fingers flat on the floor.
- Tighten your knees, pull up your kneecaps, contract your upper thighs, and tighten your hamstrings.
- Pull your stomach in, push your chest forward, stretch your spine up, keep your neck straight.
- The weight of the body should not fall only on the heels or only on the toes, but be distributed evenly between them.
- In the ideal version of Tadasana, the arms are extended upward above the head, but for the sake of convenience, you can keep them lowered to the sides.
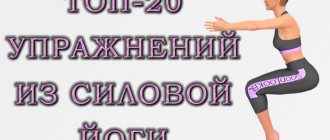
Yoga Poses You Should Do Every Day
Warrior Pose I (Virabhadrasana)
This asana is often underestimated due to its apparent simplicity, but it has many benefits. And my first yoga teacher said that the warrior pose is our everything!
Why: strengthens the muscles of the legs and abs, opens the chest; increases the connection between body and mind, thereby helping to recognize and feel your body; Helps build strength and self-confidence.
How to do:
- Place your feet a little more than a meter wide, turn your right foot 90° to the right so that it stands parallel to the length of the mat, turn your left foot in the same direction 60°.
- Turn your pelvis towards your right leg.
- As you inhale, bend your right leg at the knee so that you form a right angle between your thigh and shin. At the same time, raise your arms up, palms facing each other.
- Point your shoulder blades down, your chest up, and your tailbone toward your left heel. Either look forward, or tilt your head back slightly and look up between your palms.
- Stay in the asana for 5-8 breaths, as you exhale, exit the asana and repeat on the other side.
Yogi tip: Try not to lift your left heel off the floor.
Extended Triangle Pose (Utthita Trikonasana)
One of the basic poses in yoga, present in almost any practice. Thanks to it, the body becomes flexible and strong. And most importantly: the elongated triangle pose greatly contributes to the rejuvenation of the entire body!
Why: gives energy, balance and focus at the same time, relieves stress; stimulates the abdominal organs, strengthens the whole body, especially the legs and back; has a beneficial effect on hormonal balance, which significantly affects the rejuvenation of the body!
How to do:
- Place your feet approximately 1 meter wide, turn your right foot to the right so that it stands parallel to the length of the mat, turn your left foot in the same direction by 45°.
- Place your arms at your sides, palms down
- As you inhale, stretch your sides up, and as you exhale, bend to the right, resting your palm on your right foot or on the floor at its edge. The left hand is raised up and opens the chest to the left. As a variation, the left arm can be directed parallel to the floor.
- Stretch your spine and direct your gaze to your left hand. Hold this position for 5-8 breaths.
- As you inhale, slowly rise up and repeat on the left side.
Yogi tip: It is important to ensure that both legs are actively working and that the weight is distributed evenly, and not just on the front leg.
Downward Facing Dog Pose (Adho Mukha Svanasana)
This asana is one of the fundamental ones in yoga. In any practice, in any yoga class, in any yoga lesson there will be a downward-facing dog, believe me! If you don't know how to stretch your entire body, then this pose is ideal for you.
Why: strengthening the arms and shoulders, gently stretching the spine and relaxing the back, strengthening all the muscles of the body (including the abs), improving blood supply to all organs. And most importantly - an immediate effect on mood: a surge of vigor and positivity, a new and calm outlook on life)))
How to do:
- Start on all fours, with your wrists under your shoulders, your fingers open and supported, your knees under your hips, your toes curled, your heels pointing up, your back completely straight.
- Stand on your toes and lift your knees off the floor, pushing your pelvis up so your body forms an inverted V.
- Keep your knees slightly bent if you feel tightness in your hamstrings, otherwise try straightening your legs while maintaining hip alignment.
- Push firmly with your palms and turn your elbows towards each other (the palms do not move). The neck and head are a continuation of the straight line of the back (under no circumstances lift your head up).
- Hold this position for 5-8 breaths before lowering to your hands and knees to rest.
Yogi tip: Be sure to engage your legs, trying to plant your heels on the floor so that your torso moves back toward your hips. Make sure that the weight of the front part of the body is distributed between the shoulders, elbows, wrists and fingers of the palm.
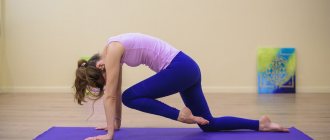
Cat pose + cow pose (marjariasana)
Despite its apparent simplicity, this pose is very important for both the body and the mental. And it is especially important for women!
Why: tones the digestive tract, normalizes the functioning of the female reproductive and hormonal systems, relieves pain during menstruation and in the back, improves the flexibility of the spine.
With all the physical benefits, the cat/cow pose also has an amazing effect on our mentality: it improves coordination, emotional balance and mental stability.
How to do:
- Start from a position on all fours, with your hands directly under your shoulders and your knees under your pelvis (a right angle should form between the body and hips and between the thighs and shins). The heels should point up.
- As you inhale, stretch your crown and tailbone up, and bend your spine down. Elbows are as straight as possible, move your shoulders away from your ears, and focus all your attention on the arch of the thoracic region (although, of course, all the muscles along the spine work here).
- As you exhale, stretch your back up, pull your tailbone in, and point your chin toward your chest. The legs and arms are actively involved, that is, as if pushing off with your palms and knees (but of course, they do not rise from the mat). Try to spread your shoulder blades and relax the muscles of your upper back and neck.
- Alternate between a cat as you inhale and a cow as you exhale, try to breathe evenly and coordinate the movements of your spine with your breathing.
Yogi tip: Try starting from the tailbone, imagining it as a stream of energy flowing through the spine, neck and head to create a smooth, undulating motion that helps awaken the chakras.
Plank Pose (Kumbhakasana)
Probably everyone has heard about this pose. And everyone knows that this miracle pose can replace a dozen different exercises to strengthen the entire muscle corset. And so it is! If your goal is to tone your entire body completely, then this is what you need.
It has a lot of variations that are just as effective, but will add a little variety and won’t let you get bored)
Why: the plank pose strengthens the entire muscle corset, both large and small back muscles, so pain in the spine and lower back will go away, the waist will be shaped, the stomach will be tightened, the buttocks will be strengthened, and the arms will be transformed. The whole body works in this pose!
How to do:
- There are two options for entering this asana:
- Ideally, the plank should be done from the downward-facing dog pose (see above), with a roll straightening the body in one line.
- You can also perform another variation for proper adjustment: lie on the floor with your stomach down, feet shoulder-width apart. Place your hands under your shoulders and lift your body, straightening your arms (at first, if it’s difficult, you can lean on your knees, and then straighten them).
- Support yourself only on your palms and toes. The hands should be directly under the shoulders.
- Keep your body as straight as possible, with your abdominal muscles tense. Your body should form a straight line from the top of your head to the heels of your feet.
- You need to keep your lower back straight - do not round or arch your spine.
- Stay in the pose for 5-8 breaths
If time permits, it is highly advisable to rest in Shavasana (corpse pose). At this time, all the energy that you gained during the lesson (even if it was 5 minutes, but that’s already a lot!) smoothly spreads throughout your body. Many people underestimate the importance of this pose, but it is the one that accumulates all the important energy and stores it in our body.
I really hope that you will find just 5 minutes a day for your loved one and you will become even more beautiful, slimmer and calmer!
And if you are seriously thinking about finally becoming fresher, lighter and more vibrant, then I invite you to the “Fresh START” detox marathon!
Together with you, in 21 days we will cleanse ourselves, become lighter and, of course, do yoga. Join us!
What are your favorite and important asanas? And how often do you practice them? Share!
This article and all information contained herein does not constitute medical advice and does not provide treatment and/or diagnosis. Please consult your physician for any questions related to your health.
Best wishes to you, Sofia