The bridge is a very simple exercise that shows your level of fitness and flexibility. However, to learn how to stand on a bridge, you need to have good stretching and take time to prepare and warm up. In our article we will tell you how to correctly stand on the bridge from various positions in order to evoke admiration and surprise among people looking at you.
To get onto the bridge from a supine position, you need to do a good stretch. This is a mandatory part of the warm-up, as otherwise you may injure your back, ankle or bone. First, you need to stretch your ankle. To do this, sit on the floor, take your leg in your hand and twist your leg for several minutes, writing out various movements. Do the same with the other leg.
Secondly, you need to stretch your hands. To do this, take the brush in your hand and twist it, repeat the same with the other hand. You can also stretch your wrist with your palm facing outward by pulling your fingers toward you with your other hand.
The third part of the warm-up consists of stretching the back. To do this, you can lie on your stomach and raise your straight arms and legs at the same time, then come to the starting position. It is necessary to repeat 10-15 times. You can also lie on your stomach, clasp your ankles with your hands and bend your back. You need to raise your head, chest and legs at the same time. It should also be repeated 10-15 times.
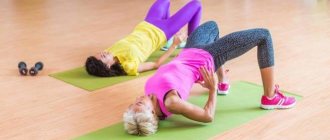
Now you can move on to the main part and learn how to learn how to stand on a bridge from a lying position. To do this, you need to lie on your back, bend your legs and arms. Then place your hands close to your shoulders and, pointing your elbows and legs up, bend at the lower back. Thus, you will gradually learn how to do a bridge from a lying position. Of course, this exercise may not work out the first time. In this case, you need to linger at the maximum point for a few seconds, when you feel that you cannot bend further. By correctly following all our recommendations and with a small level of preparation, you can get on the bridge in a day.
How to learn to make a bridge
The bridge is a very simple exercise that shows your level of fitness and flexibility.
However, to learn how to stand on a bridge, you need to have good stretching and take time to prepare and warm up. In our article we will tell you how to correctly stand on the bridge from various positions in order to evoke admiration and surprise among people looking at you. To get onto the bridge from a supine position, you need to do a good stretch. This is a mandatory part of the warm-up, as otherwise you may injure your back, ankle or bone. First, you need to stretch your ankle. To do this, sit on the floor, take your leg in your hand and twist your leg for several minutes, writing out various movements. Do the same with the other leg.
Secondly, you need to stretch your hands. To do this, take the brush in your hand and twist it, repeat the same with the other hand. You can also stretch your wrist with your palm facing outward by pulling your fingers toward you with your other hand.
The third part of the warm-up consists of stretching the back. To do this, you can lie on your stomach and raise your straight arms and legs at the same time, then come to the starting position. It is necessary to repeat 10-15 times. You can also lie on your stomach, clasp your ankles with your hands and bend your back. You need to raise your head, chest and legs at the same time. It should also be repeated 10-15 times.
Now you can move on to the main part and learn how to learn how to stand on a bridge from a lying position. To do this, you need to lie on your back, bend your legs and arms. Then place your hands close to your shoulders and, pointing your elbows and legs up, bend at the lower back. Thus, you will gradually learn how to do a bridge from a lying position. Of course, this exercise may not work out the first time. In this case, you need to linger at the maximum point for a few seconds, when you feel that you cannot bend further. By correctly following all our recommendations and with a small level of preparation, you can get on the bridge in a day.
Causes of breech presentation of the fetus
The etiology of breech presentation is still unclear. The frequency of breech presentation remains virtually unchanged and over the past 100 years has fluctuated between 3-5%. Despite many years of controversy, breech presentation of the fetus is currently considered a pathological position, because the frequency of complications during childbirth is much higher than with cephalic presentation. The causes of breech presentation are divided into maternal, fetal and placental.
- Maternal factors include:
- Abnormalities of the uterus
- Tumors of the uterus and ovaries
- Narrow pelvis
- Decreased or increased uterine tone in multiparous women
- Scar on the uterus after a previous operation
- Hypertonicity of the lower segment of the uterus
- Inflammatory diseases of the genital organs
- Fruit factors include:
- Prematurity
- Multiple pregnancy
- Congenital fetal anomalies
- Immaturity of his vestibular apparatus
- Placental factors include:
- Placenta previa
- Little or polyhydramnios
- Pathology of the umbilical cord (relatively short as a result of entanglement or absolutely short)
It is possible to influence only some of these factors, especially the hypertonicity of the lower segment of the uterus, which is often achieved with the help of exercise therapy. Due to potential complications during childbirth, many studies have been conducted on the problem of fetal rotation from breech to cephalic presentation. For example, the mother was asked to place headphones on her lower abdomen and play light, pleasant music several times a day so that the child would turn his head down. In many Western countries, external prophylactic rotation of the fetus is performed according to Arkhangelsk under ultrasound control. In our country, this method is not currently used because it is considered to have no fewer complications for mother and child than a preventative caesarean section. Therefore, the midwife and doctor have only exercise therapy methods to correct a breech presentation to a cephalic one.
How to learn to do a bridge from a standing position.
If you do not have the appropriate level of flexibility and development of the abdominal, back and leg muscles to learn how to do a bridge in a day, then you need to devote a little more time to preparation. Do muscle stretching exercises every day, then you can get on the bridge in a week.
To learn how to stand on a bridge while standing, you need to practice daily. If you don’t know how to do a bridge from a standing position, then here’s an action plan:
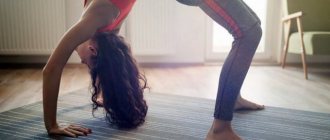
When you have already learned how to do a bridge from a lying and standing position, you can move on to the next stage and learn how to do a bridge yourself. To do this, you need to take the starting position: stand straight, feet shoulder-width apart, and arms pointing straight up. Now you need to slowly bend back, moving your hips forward. Gradually lower yourself lower until your hands reach the floor. At the same time, your legs should remain in place, and you should look between your hands.
We draw your attention to the fact that you should not rush into the question of how to learn how to do a standing bridge. This may cause injury. Before moving on to the next stage, it is necessary to perfect the first.
You can master the back flip from a bridge only if you are already confident in doing the bridge yourself. In order to learn how to do a bridge with an inversion, you need to stand on the bridge from any position convenient for you, and then do the following:
After following all our recommendations, you will stand in an even position and learn how to turn back from the bridge.
Exercises to get on the bridge.
Also, in order to learn how to quickly stand on the bridge, you can perform special exercises.
Exercise 1. To perform this exercise you will need a fitball. Lie on your back on the fitball. Place your feet shoulder-width apart, and try to reach the floor with your hands.
Exercise 2. Starting position: lying on your stomach. Performing the exercise: grab your ankles with your hands and bend over. It is necessary to lift the chest, legs and head. Hold at the maximum point for a few seconds.
Exercise 3. Starting position: lying on your back, place your hands in front of you. Performing the exercise: arching your back and bending your knees, you need to touch your toes with your head. Hold at the maximum point for a few seconds.
How to learn to stand on the bridge: video.
Source
What will help speed up skill acquisition?
In order for a child to acquire the skill of successfully turning over on time, it is necessary to pay attention to the following recommendations:
- Do a daily finger massage, which has a positive effect on the body. You can do it yourself on the advice of a pediatrician or massage therapist;
- Swimming also helps improve the condition of muscles and strengthens them productively. Typically, children who swim in a circle almost from birth master flips quite quickly;
- hardening also plays an important role, as it strengthens the immune system. They can be carried out in parallel with massage or gymnastics;
- Exercises on a fitball (as recommended by a pediatrician) will help strengthen the entire muscular system and bring a lot of joy to the child.
There are many gymnastic exercises and methods for teaching a child to flip. But usually the main factor is the desire and mood of the little one.
If the child does not like such activity, then parents need to do everything possible to attract his attention.
It doesn’t matter whether it’s an invented game or a toy, the main thing is that the child is in a good mood and interested in learning. Every mother worries about her baby when his skills are even slightly behind the development of other children
Every mother worries about her baby when his skills are even slightly behind the development of other children.
The period for mastering rollovers is considered the norm from 2 to 4 months, but do not forget that each child is individual. And what doesn’t work out for him today will definitely work out tomorrow. The main thing is to help him with this in time.
Read also
How to learn how to do an inversion bridge. You can master the back flip from a bridge only if you are already confident in doing the bridge yourself. In order to learn how to do a bridge with an inversion, you need to stand on the bridge from any position convenient for you, and then do the following:
After following all our recommendations, you will stand in an even position and learn how to turn back from the bridge.
Exercises to get on the bridge.
Also, in order to learn how to quickly stand on the bridge, you can perform special exercises.
Exercise 1. To perform this exercise you will need a fitball. Lie on your back on the fitball. Place your feet shoulder-width apart, and try to reach the floor with your hands.
Exercise 2. Starting position: lying on your stomach. Performing the exercise: grab your ankles with your hands and bend over. It is necessary to lift the chest, legs and head. Hold at the maximum point for a few seconds.
Exercise 3. Starting position: lying on your back, place your hands in front of you. Performing the exercise: arching your back and bending your knees, you need to touch your toes with your head. Hold at the maximum point for a few seconds.
When to start training
The speed of development of each child is individual.
Some babies make their first attempts to roll over as early as two months.
Parents very often worry if they notice that the baby is slightly behind the development of his peers.
Pediatricians have a special turnaround schedule that determines how developmentally appropriate the child is:
- at 4 months, turning from back to side;
- at 5 months, rollover from back to stomach;
- at 6 months, rollover from stomach to back.
In this way, you can understand what is normal and does not hide any physiological problem
Parents should also pay attention to the baby’s other skills, which will show how ready the child is for this.. The best period for the development of a revolution will be the time when:
The best period for the development of a revolution will be the time when:
- the tone in the child’s muscles decreases;
- the baby can control his movements;
- the child holds his head independently and already knows how to pull his legs towards his stomach without anyone’s help;
- The baby confidently rests on his forearms, lying on his tummy.
It is during the period when the above skills have been mastered by the child that you can begin to learn flips.
If a child has learned to roll over independently from the age of two months or four months after birth, this is not considered a deviation.
Second step. We train to stand on the bridge from a standing position
For those who have become comfortable with the exercise from a horizontal body position, you can try to perform a more complicated version - from a standing position. Just like before a simpler bridge, you need to warm up and warm up your muscles. It is not advisable to immediately try to stand on a bridge while standing, since not everyone will be able to complete this exercise the first time. For training you will need a Swedish wall or a regular wall.
After you can easily bridge with the help of a wall, you need to proceed to the next stage of mastering the exercise. For subsequent training you will need a gymnastic mat. It is best that, in addition to the mat, there is a person who can provide backup when performing the element.
How to get on the bridge from a standing position:
The most common mistake among beginners is to use only the lumbar and shoulder regions for the bridge, forgetting about the arms. They are the main ones in this exercise.
Benefits of a one-leg bridge
The exercise will include all three bundles of the buttocks: the middle, small and large gluteus. Plus, the back of the thigh and lower back are being finalized. Due to this, the load in the exercise increases and makes it more intense.
The bridge builds functionality and aesthetics of form. It is suitable for desk-bound sedentary jobs because it improves hip mobility and lower back strength. A sedentary lifestyle actually weakens the gluteal muscles and can lead to back problems.
The single leg bridge exercises the muscles sufficiently without any weight. But if the goal is strength and muscle growth. You can gradually add weight - dumbbells or barbells on your hips are usually easiest and most comfortable.
Read : Glute bridge exercise in Smith
Make single leg bridges part of your workout.
Start doing single-leg glute bridges two to three times a week without weights. As you develop strength and quality in the movement, you can begin to gain weight. At the same time, reduce the number of exercises to once a week to improve the shape of the gluteal muscles and give them time to recover.
To make it more difficult, you can do a super set. Combine this exercise with counter movements, a superman style will do, or perform all three sets separately along with other leg and glute exercises.
Want to try a full workout that includes glute bridges?
Try this set of exercises:
Read : Training programs for butt enlargement
We are doing a warm-up
Before developing spinal flexibility, be sure to do a good warm-up that will help warm up your muscles and joints.
Stretch the shoulder girdle
Warm up the lumbar region
It is very important to thoroughly stretch all parts of the body involved in the workout. The lower back muscles play a significant role in the bridge position as they must be strong and elastic.
After a thorough warm-up, you can practice standing on the bridge. Below we will discuss the basic principles, following which you will certainly join the bridge.
It is recommended to conduct classes near the wall bars. By gradually bending backwards, you can fix your hands on the wall, thereby allowing your spine to get used to such a deflection.
If you do not have a wall bars, you can use a regular one. Bend backwards and move your palms to get as low as possible. After this, you should return to the starting position. To make this task easier, break your workout into several approaches.
What muscle groups work?
So, the main load falls on the following muscles:
- muscles of the forearm;
- deltoid muscle;
- biceps muscle;
- press;
- thigh muscles
- and latissimus dorsi muscles.
Therefore, in order to do a normal “lift-over,” you will first have to strengthen all these muscles. You will also need sufficient flexibility to lift your straight legs straight up. And one more thing – a trained vestibular apparatus is necessary.
After all, many fairly strong and developed athletes literally begin to feel dizzy after just a few inversions.
Advantages and contraindications of the bridge exercise: why you need to do it
By actively taking care of your body and pumping up your muscles, you can make your appearance attractive, fit and sexy. However, ease of movement and that unique plasticity that is called “the grace of a cat” cannot be achieved this way. When the muscles are “wooden” and the joints and ligaments are not particularly flexible, movements become cumbersome and the person becomes clumsy. Having figured out how to learn how to do a bridge, you can achieve that unique dynamism of your figure, lightness and grace, and at the same time acquire correct posture, which will only benefit your health.
Before you start training to stand on a bridge, it doesn’t hurt to check your spine for flexibility. For this you don't need anything other than a wall. Attach a mark to it, approximately at the level of your shoulders. Turn your back to the wall and take one or two steps back. Lean back and throw your head back as far as possible without holding on to anything. If you were able to see the installed mark, then everything is in order with the spine and muscle corset. If it is not in your field of vision, you will have to work hard before you can do this exercise easily and naturally.
There is also an additional test for spinal flexibility. To do this, you will have to stand sideways to the wall, with a mark placed on it. Raise your arm above your head and straighten it. Then, by tilting, without lowering the limb, try to touch the designated place with your fingers. Repeat the same with the other hand. If everything works out well, then there are no problems with flexibility, you can immediately move on to the bridge. If you didn’t succeed in doing everything as it should, you will have to work on this moment more intensively.
Benefits of bridge exercise
This exercise is not limited to a positive effect on a person’s appearance, posture and figure. For example, eastern sages and healers believed that it was the main “core” of life, the basis of health and longevity. At the same time, Indian yoga is also permeated through and through with just such stances and asanas that train the flexibility and mobility of the spine.
Deflections strengthen the muscular corset of the back, which supports all internal organs. Flexibility and mobility increases, which greatly simplifies the task of feeding bone and interosseous tissues with oxygen and nutrients. They get all this not from the blood, but from a special synovial fluid. Moreover, its influx is ensured precisely by the movements of the vertebrae. That is why people with physical inactivity and leading a sedentary lifestyle may develop degenerative diseases of cartilage tissue at a fairly early age. During bending and bending, the spinal discs are constantly compressed and then unclenched. This creates the effect of a kind of internal massage. As a result, synovial fluid flows to them, nourishing and rejuvenating. Strength training without a strong back completely loses its appeal. After all, they can be extremely traumatic
Please note that the training of strength athletes necessarily includes bridges and other stretching and flexibility exercises. In addition to the spine, new potential opens up in terms of expansion of the chest. This helps to increase the elasticity of the abdominal muscles, and at the same time increase the volume of the lungs.
In addition, one should not lose sight of the effectiveness of this seemingly simple exercise. Standing on the bridge in the hall, you can easily attract the admiring glances of everyone around you. For many, this is also an additional motivation.
Contraindications for performing a bridge
Increased blood or intracranial pressure.
Bridge exercise. How to learn to make a “bridge”?
“Bridge” is a difficult exercise that requires good physical fitness. Strong arms and legs will make this practice much easier to master.
To get on the “bridge”, beginners need to warm up properly. A whole range of exercises is provided for warming up.
Lying hyperextension
"Half Bridge"
"Camel"
Having warmed up, we proceed to the “bridge” itself. But before performing its classic variation, you will have to go through a thorny path of “bridges” of varying complexity (with emphasis on the shoulders, side, reverse and others). Let's start, of course, with the easiest one.
Recommendations
Key recommendations that will help you quickly master all elements of the exercise and avoid injuries:
- Start with the easiest option, regardless of your fitness level. Do not try to immediately stand on the bridge while standing, this is almost guaranteed to lead to injury.
- Control your breathing. During the movement, a strong load is placed on the body, which will make breathing difficult. Take deep breaths and exhales.
- When reaching the peak point, the arms and legs should be almost completely straight (minimal bend at the knee and elbow to reduce stress on the joint).
- Regardless of the technique, the pelvis must be carried as high as possible; this is a key element of the exercise.
Aug 12th Turn back. Lesson 14
The flip is one of the most famous movements not only in gymnastics and acrobatics. It can often be found in acrobatic dance and in dances with elements of acrobatics. Yes, by the way, these are two different things.
Acrobatic dance is a purely sports dance with its own rules.
Dance with elements of acrobatics can be based on a variety of styles. But what unites them is precisely the presence of acrobatic elements that make it more spectacular and attractive to the viewer.
Many gymnasts find that the back flip is much easier to perform than the forward flip.
If you ask an inexperienced person (a person who does not practice this sport), then most likely he will say that, in his opinion, a back flip is much more difficult.
bridge
In fact, its difficulty lies only in the fact that we bend back over the passing bridge. And despite the fact that we understand perfectly well that there, behind our backs, there is nothing dangerous and there cannot be, that there is no glass at hand, we look back with caution for a long time in order to check again and again what we already know. And when we are on the bridge, we are completely lost. After all, no matter which way you look, up or down, you still can’t see your legs.
How to do a standing bridge correctly. Flexibility exercises
To quickly learn how to stand on a bridge, you need to perform various exercises daily to develop flexibility. Without them, it will be difficult for your body to accept this position, which, in principle, is unnatural for it.
We immediately warn you that most of the exercises are very difficult and will not work out the first time. But with each workout, the muscles will become more and more firm and elastic.
As soon as you begin to get the hang of the exercises, you can make your first attempts to stand on the bridge from different positions - lying, sitting, standing.
Warnings
First of all, it should be noted that the technique of performing somersaults forward and backward will not work correctly if you eat or drink before training. Ingesting food or liquid while turning the body will cause severe discomfort, which often leads to nausea, vomiting and more serious consequences.
In addition, it should be said that excessive repetitions are prohibited. This can lead to poor health, as beginners and more experienced people simply get motion sickness.
Source of the article: https://www.syl.ru/article/313837/tehnika-vyipolneniya-kuvyirka-vpered-i-nazad
Correct technique
There are a large number of variations of this exercise. The classic version of the exercise is performed on a gymnastic mat while lying on your back. This option is completely safe for the athlete’s health, so it can be practiced not only by professionals, but also by beginners who have recently decided to play sports. In addition, the “bridge” is often included in the training program for pregnant women. In general, the technique for performing this exercise is as follows:
As you exhale, you push your heels off the floor surface, and then the buttock muscles smoothly finish lifting. The highest point of amplitude in this exercise will be considered the maximum height to which you can raise your buttocks.
It is very important to take a short pause at the top point, further straining the working muscles, and then return to the starting position.
The required number of repetitions is performed.
Most likely, you may think that the exercise is too simple. To make it a little more complicated, you need to use the following tips:
Increase range of motion. The buttocks will work even better if your feet are placed on any elevation: a bench, a step platform or a regular chair.
You can perform lifts with one stretched forward, while the other remains on the floor. The gluteal muscles will receive alternating, but high-intensity load.
Source
Variations
Experienced athletes divide the exercise into two phases. First, they do a lift on the bar, and then raise their legs, or vice versa - they raise their legs, and then pull themselves up and rotate. This execution looks more impressive, but it is only possible after long training. It is much easier to carry out two phases at the same time.
There is also a lightweight execution technique, the difference in which is preliminary swinging in order to increase the force of inertia. This technique is considered incorrect, so it is better to abandon it immediately.
Another complicated option is called “nine”, or “feather”. The point is that the athlete must not just twist over the horizontal bar, but do this without touching it with his stomach. It turns out that the hands are the only part of the body that in this case is in contact with the horizontal bar. This exercise is much more difficult than the classic version, so before you start it, you need to work well on a simple inversion lift.
What is this element for?
In general, the flip does not resemble any of the elements known in the gymnastics program - somersault, float, cartwheel.
To perform it, you need to do a headstand one by one, with your legs spread horizontally, almost in a split, then make a bridge, and only then turn over. Despite the rather childish exercise, you need to have good gymnastic training and acrobatic skills, the body must be flexible and physically prepared. Acrobatics is a very spectacular part of the gymnastics discipline. Various elements and complex exercises can be done both statically and in musical dance. They show very interesting performances at competitions; this is a difficult sport.
conclusions
The gymnastic bridge has been known for a long time; it is found in yoga, some martial arts, such as kung fu, and Taoist systems. Its regular implementation will relieve the load on the spine, strengthen it, and make the figure chiseled, which is especially important for girls and women.
The exercise does not require much physical preparation and is ideal for practicing at home. All this together makes the exercise one of the leaders in terms of ease of implementation and benefits.
Start getting on the bridge right today - and in a couple of months you will experience excellent results in the form of a thinner, toned, flexible body and improved mood!
See you soon on the blog pages! Read, share on social networks and always stay in shape.
Learning to do a headstand
The headstand for this exercise is special; the legs should be wide open, so it is more difficult to maintain balance. You not only need to be able to do everything dynamically, you need to have gymnastic endurance and fix positions at certain points. To learn, you need:
This training in the gymnastics program must be repeated until the abdominal and back muscles become stronger and a stable position can be maintained without much effort, then the inversion will be more impressive.
Learning to make a bridge
The bridge for the shifter element should also be special, but first you need to learn how to make a regular bridge and get up from it without any problems. Have gymnastic flexibility and this and other elements will be easy for you. But you need to be careful, do not forget that we are doing back exercises, the neck is also involved, place something soft under your head and do not make sudden movements, everything should go smoothly and with feeling. For our special revolution we need to do the following:
Let's flip forward
It’s already difficult to do a coup, but in our case it is done with even greater effort, since first you need to stand on your head, open your legs almost in a split, and in a symmetrical one, and then get up from a complex bridge.
While the body is not sufficiently trained, you should always put a pillow under your head, then you can get by with a soft hat. Also, at the initial stage, you need to support the athlete and secure them with your hands. Gymnastics is a sport where, to be successful, you need to start training from childhood, when children are very flexible, plastic and have good stretching, and only after consolidating these qualities and strengthening the muscles, you can move on to acrobatics. You can only do simple exercises at home, but more complex elements can only be done in the gym and only under the supervision of a trainer.
Source
Training place
Ideally, training should take place in a spacious gym with gymnastic mats and under the guidance of an instructor. But if this is not possible, lay out more mattresses and blankets at home and exercise.
It is important not to forget that good physical shape is like a foundation, without which you cannot even try to perform tricks. To make the exercise easier, start doing wall flips, then front and back flips. Having brought the technique to automaticity, then it will be possible to deftly demonstrate good preparation on the street, beautiful somersaults in the air and cork of any complexity!
THESE ARTICLES WILL HELP YOU LOSE WEIGHT
