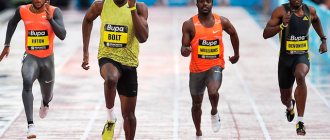
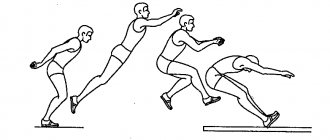
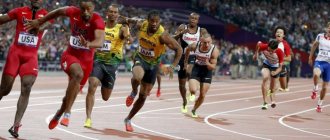
Training in sprinting is somewhat different from training in other types of athletics, since running is a natural ability of a person, genetically embedded in him. Most children have a rational movement pattern. However, they have deviations from the correct technique (torso bending, foot spread, etc.) associated with the disproportion of their anthropometric and physical development. More serious shortcomings that negatively affect running results appear in the case of improper training or imitation of some type of technique.
It is advisable to teach short-distance running techniques in the sequence given below.
Task 2. Teach the technique of running in a straight line
Means: demonstration of running technique; running with acceleration 3-4 x 40-50 m; running at different speeds in segments from 30 to 60 m; standing still, moving your arms as if running at different speeds 3-4 x 6-10 s; perform the remaining exercises 2-3 x 30-40 m: mincing run; running on straight legs; running with high hip lifts; running with jumping steps; jumping on one leg.
Methodical instructions: while running with acceleration, athletes should gain maximum speed towards the end of the segment, and after gaining speed, continue running by inertia; achieve the correct tilt of the body, free and wide running, monitor the placement of the foot; control the movement of the hands, switch to maximum work of the hands only after mastering the correct movement; Perform special exercises at an average pace, ensuring that they are performed correctly.
Indications for use
Beginners should definitely warm up before running, so as not to damage ligaments and joints or clog muscles . Warm-up is also recommended for people with a sedentary lifestyle, as it helps keep the body in good shape and promotes slow aging.
Warming up will help warm up the body and prevent possible injuries during any activity. Running load helps improve the functioning of the respiratory system, stabilize the functioning of the heart and blood vessels.
General and running warm-up exercises will help:
- improved breathing;
- increasing the oxygen capacity of the blood;
- decreased shortness of breath during any physical activity;
- strengthening the musculoskeletal system;
- hardening of the body;
Task 3. Teach the technique of running around a turn
Means: running on the turn on the 8th track 3-4 x 60 m; running from the middle of the turn and entering the straight line 3-4 x 60-80 m; running from the middle of the straight and entering a turn 3-4 x 60-80 m; repeat the same on the 2nd track; running at different speeds in a circle with a radius of 15-20 m.
Methodical instructions: running should begin along the turn of the track with a large radius, and then with a smaller radius; when entering a turn, tilt your body towards the center of the turn; monitor the correct placement of the feet and the work of the hands; when exiting a turn, look at the finish line, this will allow you to smoothly exit the turn; remember that the inward tilt of the torso depends on the running speed and the turning radius.
The essence and basic principles of exercises
Why you need to warm up before every run:
- The work of the lungs and heart accelerates, which allows you to rebuild the body’s activity for further stress.
- Metabolism in the body accelerates, ensuring the flow of necessary hormones into the blood.
- The rate of breakdown of chemicals increases, giving the body energy for muscle contraction.
- Muscles and tendons become toned, joints are strengthened, thereby reducing the risk of injury.
- Warming up prevents acidification in the muscle fibers, which reduces the likelihood of muscle clogging.
Warm-up before running for beginners usually takes 15-20 minutes, this time is enough to adjust breathing, warm up all the muscles and comprehensively prepare the body for a run.
If you lack time, it is better to reduce the number of exercises and shorten the warm-up to 5-8 minutes, but you should not completely neglect the warm-up before jogging, so as not to increase the risk of sprains, tears and fractures.
The warm-up should begin with the upper parts of the body and end with the lower parts. It is best to first do general warm-up exercises in order to prepare the body for the load, and then running exercises in order to warm up the muscles and ligaments of the legs. All general warm-up exercises are done with a straight back and feet shoulder-width apart.
Warm-up before running for beginners includes exercises for all muscle groups involved in jogging , it is necessary to warm up not only the legs, but also the muscles of the arms, pelvis, back and neck, this will allow you to fully warm up the body and protect it as much as possible from possible injuries: the better warm-up, the safer and more effective the workout.
Task 4. Teach low start techniques and starting acceleration on a straight line
Means: talk about the basic positions of the runner at the start and the installation of starting blocks; running from various high start positions for 2-4 x 20-25 m; self-installation of starting blocks; Execution of commands by trainees: “To start!” and “Attention!” 2-3 times; running from a low start 3-4 x x 20-25 m; game "Who can move the cubes faster."
Methodical instructions: it is better to teach starting positions from a high start without support on the hand, then with support on the hand, and only after that start teaching low start with support on one hand and two hands; Make sure that those exercising are in the “Start!” position. did not raise their heads up, did not bend their arms at the elbow joints, did not spread their arms wide; achieve the correct placement of the feet on the blocks and optimal lifting of the pelvis at the command “Attention!”; when leaving the start, raise the body gradually; achieve the correct running rhythm; in the first three steps of the starting acceleration, focus on active repulsion, and then on the frequency of movements; 2-3 cubes are placed at a distance of 10-15 m and they must be quickly moved one by one to the starting line.
Consolidate the result
In addition to warm-up exercises and jogging, beginners are advised to follow the correct diet : 1300 kcal per day when losing weight, 1700 kcal per day when maintaining weight, 2000 kcal per day when gaining weight.
When jogging regularly, it is necessary to maintain the correct sleep schedule so that the body is completely rested; it needs at least 7 hours of sleep a day. If the sleep schedule is not followed, the body becomes especially susceptible to diseases, the risk of viral and bacterial infection through airborne droplets increases, and excessive fatigue and soreness may occur.
Task 6. Teach finishing techniques
Means: explain and show finishing options; repeat “running” finishing 2-3 times; perform on-site finishing using the “chest throw” method 3-5 times; perform this exercise while walking 4-5 times and running 3-5 x 25-30 m; perform finishing on the spot using the “shoulder” method 4-5 times; perform the same exercise while walking and running 3-4 x 25-30 m.
Methodical instructions: achieve a sharp bend forward and at the same time move your arms back; exercises are first performed individually, and then in pairs and groups of several people; draw the attention of athletes to the fact that running must end not at the finish line, but after it.
When to expect an effect
By warming up and jogging according to a schedule, you can count on training results in just 3 weeks. If you run 1 - 2 times a week, you can expect results in 1.5 - 2 months.
Warm-up before running for professional athletes differs from warm-up for beginners only in the number of exercises, but both options imply the same effect: warming up the body before exercise.
Completely neglecting to warm up before running is harmful to the health of joints and ligaments.
Author of the article: Valery Nesterov.
Task 7. Improving short-distance running technique
Remedies: use the above exercises to correct individual errors; running on the run in segments of 20-40 m; running downhill with an angle of 5° 3-4 x 30-40 m; running from a low start up an inclined track 4-5 x 20-30 m; participation in control assessments and competitions.
Methodical instructions: after mastering the basics of running technique, athletes should systematically work on refining the details of the technique and consolidating the correct skills; for this it is necessary to use special exercises of the athlete and exercises of selective and general influence on training devices; find out the reasons that caused the technical violation; pay attention to the development of physical qualities, which often cause problems with low start techniques and distance running.
Page 13 of 24
Methodology for teaching short-distance running techniques
Teaching short-distance running techniques does not occur in the same sequence as when teaching other types of athletics, since running is a natural way for a person to move quickly. However, the technique of sports running differs significantly in its effectiveness from the technique of regular running and requires maintaining natural freedom of movement.
Before giving athletes a correct idea of the modern technique of short-distance running, it is necessary to familiarize them with the features of this type of athletics.
Task 1. To familiarize students with the features of running and create in students a correct understanding of the technique of short-distance running.
To solve this problem, students need to run segments of 60-100 m several times at low and medium speed and record the detected errors. The number of repetitions of jogging may be different for each student. It depends on how quickly the student runs the distance in his own manner. At the same time, those mistakes that are repeated in most runs are recorded.
In order to familiarize students with rational running technique, generally accepted means are used: explanation, live demonstration, viewing of film loops, filmgrams, photographs, drawings.
Task 2. Teach the technique of running along a straight line.
The main means for solving this problem will be repeated runs at low and medium speeds over various distance segments (60-100 m): special running exercises over 30-40 m segments - running with high hip lifts, mincing running, running with shin throws, running with jumping steps. All these exercises are performed freely, with a gradually increasing frequency of movements, followed by a transition to normal running. Special running exercises are first performed individually and then by the whole group. Repeating these exercises multiple times in each session leads to the elimination of typical errors in running technique: insufficient hip lifting, incomplete straightening of the leg during take-off, excessive bending or deviation of the body, keeping the elbows far from the body, etc. (Fig. 7).
Rice. 7. Special running exercises: a - running with high hip lifts;
b - running with throwing the shin; c - running with upward pushes, d - mincing run
After each exercise, you should pay attention only to the main errors, offering to eliminate them the next time you repeat. It is inappropriate to simultaneously point out 3-4 shortcomings, since the student must concentrate on correcting the most significant error, and then proceed to correct the next one, otherwise the shortcomings in running will not be eliminated.
Task 3. Teach the technique of running around a turn.
The main exercises for teaching the technique of running around a turn are running 50–80 m with acceleration while turning the treadmill. First, training takes place on the outermost (6–8) tracks, then on 1–2; running at different speeds in a circle with a radius of 20–10 m; running with acceleration around the turn and exit into the turn; running with acceleration around a turn and exiting a turn onto a straight line; imitation of hand movements. As students master the technique of running short distances on a track with a larger radius, they should move on to running on a track with a smaller radius.
During training, it is necessary to monitor freedom of movement and timely tilt of the body to the center of the turn, changes in the work of the arms and legs, i.e., with more active and wider work with the right hand, a slight turn of the feet to the left occurs.
Task 4. Teach the technique of low start and starting acceleration.
The main means of training are: practice in installing starting blocks on a straight line and a turn (Fig. 8); execution of the commands “Get started!” and “Attention!” with different placement of blocks along the length, width and inclination of the platforms; running from a low start in a straight line and around a turn independently, as well as on command (by a shot) (Fig. 9).
Rice. 8. Executing the command “Go!”
Rice. 9. Execution of commands “Get started!” and “Attention!”
Running from a low start should be preceded by a large number of runs from a high start, facilitating mastery of the basics of starting movements and free wide running in the first steps.
Task 5. Teach finishing techniques.
Training begins with an explanation of the meaning of the finishing throw and familiarization with the main finishing methods: chest and shoulder. Basic means: running 30-40 m with acceleration at the finish line; leaning forward towards the finishing line with arms moving back when walking and running at different speeds; throw to the finishing target with a turn of the shoulders while walking and running at different speeds. To successfully learn finishing, exercises should be performed first independently, and then in a group.
Task 6. Teach running technique in general, taking into account the individual characteristics of those involved.
At the stage of mastering running technique in general, it is necessary to systematically work on clarifying the details of the technique and consolidating the correct skills. It is important to achieve the ability to run freely, controlling your movements. In the process of improving the technique, it is necessary to use a larger number of special exercises, gradually increasing the level of their complexity (Fig. 10). An approximate plan for teaching short-distance running techniques is shown in Table 3.
Rice. 10. Special exercises for a runner (according to N.G. Ozolin)
Table 3
Approximate plan for teaching short-distance running techniques
| Task | Means | Organizational and methodological event | Common mistake | Cause | Correction |
| 1 | 2 | 3 | 4 | 5 | 6 |
| 1. Familiarize each student with the running characteristics and create a correct understanding of the short-distance running technique | 1. Repeated runs of segments at low and medium speed (60–100 m) 2. Explanation of the features of running technique, its demonstration | Identify the individual style of running along the distance and record recurring shortcomings. Viewing film clips, films, videos, photographs, drawings | In test runs, a student can demonstrate a running style that is not typical for him | Trying to run better. Insufficient number of runs | Determine the moment when the student demonstrates his running style |
| 2. Teach the technique of running in a straight line | 1. Explanation and demonstration of straight running technique | Shown by the teacher or the most prepared student | Excessive tension, stiffness, lack of freedom of movement | Wrong idea about running technique. The desire to run at maximum speed | Reduce your running speed. Set up a natural, fast run |
| 2. Repeated runs of 40-80 m segments at low speed | Familiarize yourself with the running characteristics of each student | Excessive torso tilt | Head tilt forward | Raise your head higher and look 10-15m ahead | |
| 3. Running at an acceleration of 40–60 m | Maintain freedom of movement. Place your foot on the track from the front of the foot | Bend the torso back | Insufficiently active repulsion from the ground. The head is raised high or thrown back. Feet turned out | Lower your head Look forward, not up | |
| 4. Running with high knees, mincing running, running with throwing the shin back, running with jumping steps on segments of 30-40 m | Raise the thigh to a horizontal position. Do not tilt the torso back. Push off at an acute angle (forward) | Large lateral and vertical oscillations | The push-off is directed not forward, but upward | Running along the line of the treadmill Emphasis on moving the hips forward | |
| 5. Imitating the movement of hands and arms in place (as when running) | Perform movements freely with a large amplitude | Tension in hand work | Fingers tightly clenched into a fist | Control the position of the hands | |
| 3. Teach the technique of running around turns | 1. Explanation and demonstration of the features of the technique of running around a turn | Pay attention to the difference between running around a turn and running in a straight line, and to the tilt of the body | Instead of tilting the entire body, teachers tilt only the head to the left or bend at the waist | Misunderstanding of the essence of running on a bend | Point out a specific error |
| 2. Imitation of hand movements in place, as when running around a turn | The left hand moves forward and back, its elbow is pressed to the body, and the right hand moves more across the body with the elbow pointed to the right | Incorrect hand function (as when running in a straight line) | Misconception about hand work when turning | Imitation of hand movements in place | |
| 3. Running along a curved treadmill (50–60 m) at different speeds, then running in a circle of varying radius (20–10 m) | Perform on tracks with a large turning radius (tracks 5-8) | When turning, the runner sticks out his left shoulder, not his chest, and turns to the right | The elbow of the right hand is not retracted to the right enough | Increase the abduction of the elbow of the right hand to the right as it moves to the right | |
| 4. Running with acceleration in a straight line and entering a turn | Make sure you enter the turn smoothly | On a bend, the runner is thrown to the right onto the adjacent track | Insufficient torso tilt forward - to the left | Increase the tilt of the body to the left, strengthen the rear push of the right leg | |
| 5. Running with acceleration around the turn and entering the straight line | Go into free running after reaching the straight line | Go into free running after reaching the straight line | The foot is placed on the track from the heel, the muscles involved in pushing off are poorly developed | ||
| 4. Teach the technique of low start and starting acceleration | 1. A story about the main options for low starts and placement of pads | With the usual low start option, install the front block at a distance of 1.5 feet from the starting line, and the rear block at the length of the shin from the front block | Insufficient sole support feet in the back block | Only the toe touches the pads | Rearrange the knee Change the pad angle |
| 2. Independent installation of starting blocks by those engaged in | The support area of the front block should have an inclination angle of 40-50°, and the rear one - 60-80°. The distance between the axes of the pads is 18-20 cm | Wide arm placement and elbow flexion | Misconception about starting technique | Straighten your arms, extend them forward parallel to each other | |
| 3. Execution of commands “To start!”; "Attention!" | Keep your head straight in relation to your body. At the command “Attention!” smoothly raise the pelvis slightly above shoulder level, slightly straighten the legs, rationally distribute the body weight on the legs and arms | Too much back arch | Head thrown back | Lower your head down, direct your gaze 1 m forward | |
| 4. Independently perform the commands “To the start!”, then “Attention!”, and begin the run without a signal | Ensure that participants run out and do not jump from the start | The track is too deep, shoulder projection is far from the starting line | The runner sits with his torso tilted too far back | Practice the correct position in front of the mirror | |
| 5. Start of running by a signal given at different intervals after the command “Attention!” | Avoid false starts Smoothly straighten your torso | The pelvis is raised very high, the legs are almost straightened | Misconception about low start technique | Lower your pelvis, bend your legs, practice the position in front of the mirror | |
| 6. Demonstration and explanation of the installation of starting blocks on a bend | The starting blocks are located at the outer edge of the track | The runner leans too heavily on his hands and his shoulders are pushed forward. | The center of gravity of the body is moved far forward | Raise the pelvis, move the shoulders back to the projection | |
| 7. Execution of the commands “Start!”, “Attention!” and running out from a low start on a turn independently and on command | Perform starting accelerations with access to the edge in a straight line, followed by tilting the body towards the center of the turn | Both arms are pulled back at the same time. Quick straightening of the body during the first steps of acceleration | A strong push with the hands from the path. A sharp rise of the head up, fear of falling. | Perform short and quick movements with your arms Running out from the start while limiting the lifting of your body with a bar held by the teacher | |
| 5. Teach technique finishing | 1. Explanation of the meaning and demonstration of the finishing technique | Introduce the basic methods of finishing with the chest and shoulder | Jump to the finish line | Misconception about finishing technique | Run the finish line at full speed without special throws or jumps, maintaining a tilted torso |
| 2. Tilt of the torso forward with arms moving back while walking while running slowly and quickly | Premature torso tilt | Whiplash of the shin forward, deviation of the body back | Ending a run prematurely | Same | |
| 3. Tilt forward on the ribbon with a turn of the shoulders while walking while running slowly and quickly | At the last step, while bending, turn your torso to the right or left | Choosing a foot to throw | Finishing early | Same | |
| 4. Finishing at maximum speed in any way | Actively run through the finishing line | Excessive leaning and falling | Loss of balance | Same | |
| 6. Teach running techniques, taking into account the individual characteristics of those involved | 1. Using all the special exercises indicated above to correct individual errors | Approach creatively in their use in accordance with physical fitness, ensure that the frequency and length of running steps and freedom of movement are maintained | Excessive tension, enslavement | Running speed is inadequate to the technique of performing movements | Reduce the speed of running segments |
<< Previous — Next >>
| Table of contents |
| Methods of teaching the technique of athletics sports |
| DIDACTIC PLAN |
| PREFACE |
| Learning as a pedagogical process |
| Methodological principles of training |
| Methods, means and objectives of training |
| Typical training scheme and sequence of studying the technique of athletics sports |
| Analysis, errors and assessments of movement technique execution |
| Forms of athletics classes |
| Safety measures during the training process and injury prevention |
| Methods of teaching race walking techniques |
| Methods of teaching running techniques for medium and long distances |
| Methodology for teaching short-distance running techniques |
| Methods of teaching relay running technique |
| Methods of teaching hurdle running technique |
| Methodology for teaching 3000 m steeplechase running technique |
| Methodology for teaching the technique of running high jumps |
| Learning to jump using the “stepping over” method |
| Training in jumping technique using the “flip” method |
| Learning to jump using the Fosbury flop method |
| Methodology for teaching the running long jump technique |
| Methodology for teaching the running triple jump technique |
| Methods of teaching pole vaulting technique |
| Studying the elements of the elastic pole jumping technique |
| All pages |
