Classic push-ups train several muscle groups at the same time, and also build endurance and willpower. Beautiful relief and fit figure to suit any teenager. How to teach a child to do push-ups can be understood by considering a set of general strengthening activities. This is easier to do than for a beginner adult. The growing body actively absorbs protein foods, which helps strengthen bone tissue and increase muscle volume. The level of general physical fitness will allow you to determine the speed of training individually.
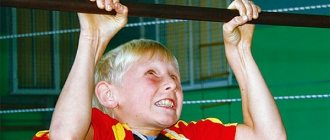
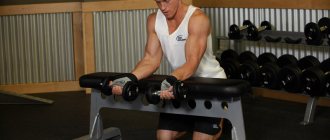
How to do pull-ups correctly
It’s good if adults have experience in sports training. They will be able to point out to the child his mistakes and correct his actions. Correct pull-ups on the horizontal bar consist of several stages:
- Starting position: you need to grab the bar and hang with your arms outstretched. The body and legs should form a straight line, the limbs should be straightened, the hands should be positioned slightly wider than the shoulders. The main load is distributed on the muscles of the arms and back.
- Lifting the torso up. The effort is carried out while inhaling.
- Arm bending. Hanging on bent arms is not recommended, as holding in this position requires effort and can lead to overexertion.
- Extension of the arms and return to the starting position. It is wrong to sharply reduce your body weight. The muscles must work both on the ascent and on the descent, otherwise you can fall off the horizontal bar.
If you have doubts whether your son is performing the exercise correctly, watch a video lesson of how a boy does pull-ups on a horizontal bar, or consult a physical education teacher.
What muscles work
First, let's look at how our body behaves when you do push-ups.
Starting position – lying down. Your weight is distributed between your hands (you stand on your palms) and your toes. The rest of the body is stretched out like a string and, as they say, hangs in the air.
So, you stand on your palms and toes. The torso is maintained in a straight position due to the work of the core muscles and almost all other muscles of the body, which in this case play the role of stabilizers.
Then the following may happen - the pelvis will begin to fall down, and accordingly, you will bend in the lower back towards the floor. In order to somehow correct the situation, you will try to raise your pelvis towards the ceiling, and in the end you will bend in the other direction. Again, instead of a straight line, your body will be an angle. This is mistake. There should be no downward or upward bending.
Weak or untrained core muscles will prevent you from standing upright. It is unlikely that a person with a complete lack of physical training will immediately learn to do push-ups correctly. Hence the first conclusion - your body must have some muscle tone. It would be a good idea to pump up your abs and strengthen your back muscles.
By changing the position of your hands, you can use each of these muscle groups to varying degrees.
- Spread your palms wider and spread your elbows to the sides - transfer the emphasis of the load to the pectoral muscles.
- Place your hands shoulder-width apart and press your elbows close to your body – loading your triceps.
Push-ups are no less important for girls than for men.
But, despite the fact that men are stronger than girls, they are the ones who most often violate the technique and bend down. Girls are more scrupulous in this regard, but they often have problems with weakness of the pectoral muscles and arms.
Given this feature, let's talk about how to do push-ups correctly for girls and beginners. In fact, it's easy, it just doesn't work out the first time. If you're determined to do push-ups, here's a quick guide for beginners.
Peculiarities
Push-ups are an exercise through which the body is lifted up in a horizontal plane and returned to a position as close as possible to the floor. Lifting is carried out by bending and extending the arms, while the body should be tense and motionless.
You can master push-ups in early childhood, before entering school, but you need to do it correctly. Starting from 3-4 years old, children control their body well enough to repeat certain exercises after adults, so it is possible to gradually strengthen the muscles of the whole body and lead the child to master the main exercise.
Positive effects of push-ups.
- Full development of body muscles. During the push-up process, the child works the muscles of the arms, legs, chest, abdomen and back. Thanks to one exercise, almost all the large muscles of the body are involved in the work, which has a positive effect on its general physical development.
- Increased blood flow. During physical activity, the heart works more actively, blood circulates faster throughout the body, allowing it to be better saturated with oxygen and eliminate decay processes, which has a beneficial effect on the general condition of a person.
- Self-organization and self-development of the child. By playing sports, a child becomes more organized, persistent, and disciplines himself. In addition, classes are usually held in a group, which allows you to gain the necessary socialization skills and have an important level of competition to maintain interest in classes and achieve results.
Before you start learning push-ups, you need to familiarize yourself with possible contraindications and the harm that exercises can cause for some children.
- Problems in heart development. Any diseases of this organ are incompatible with active sports, as they increase the load on it, which can cause negative consequences and danger to the child’s life.
- Presence of acute respiratory disease. With severe colds, the body is weakened and is not able to fully work physically; its strength is aimed at fighting the infection. You should not engage in sports during illness, so as not to overload the heart and not undermine the general condition of the child; it is better to wait until the peak of the illness passes and gradually begin to exercise.
Push-ups are not a difficult coordination exercise, but their implementation requires general physical training and assistance in mastering this element.
Advanced push-up variations
With clap
Push off the ground with such force that you can rise into the air and perform a clap with your hands. This exercise fits into the program as a plyometric exercise.
Diamond
In a plank position, place your hands next to each other under your chest in a diamond shape. Now perform a push-up as you would normally do, but do not change the position of your hands. This requires you to apply a lot more force through your arms. But you can also help with the pectoral muscles, moving them together. It is important not to change the position of your hands.
"Scorpion"
Start in a standard push-up position. When you're all the way down, lift one leg off the floor, bend your knee, and lift it toward your back. You can also move it a little to the side. Perform several repetitions for each leg. It is better to perform repetitions alternately for each leg.
"Spider-Man"
To do this, get into a standard push-up position. Once you've finished lowering like a regular push-up, lift one leg off the floor and bring your knee to your side. It should reach almost to the shoulder. Perform several repetitions on each leg, alternating legs. If you do them correctly, these exercises should engage your core and, to a lesser extent, the pectoral and upper body muscles.
On one hand
Spread your legs wider than usual (for better balance), place one hand on your back, and do a push-up with the other hand.
On fists
Instead of resting on the palms of your hands, rest on your fists, using the knuckles of your first two fingers to support your weight. This is a good way to strengthen your fists for other sports such as martial arts or boxing.
On fingers
You can also try push-ups on the tips of your fingers, but keep in mind that very few people can do this, because it requires a lot of physical strength.
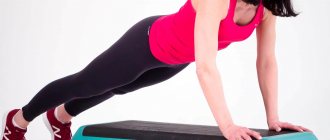
With feet on support
You can also perform a variation of push-ups with your feet raised on a stand. The intensity of the exercise can be increased by raising your feet on the bench. The higher your legs are raised above the floor, the more difficult the exercise becomes. Instead of a bench, you can use a fitness ball - this variation forces the torso muscles to work.
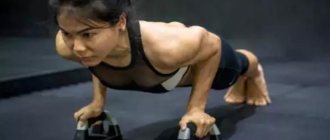
Push-ups for girls
For girls, push-ups are useful not only for strengthening your arms or tightening your contours. To develop beautiful and high breasts, you can also use similar physical activity. Women need to do the same exercises as men. But professionals do not advise immediately increasing training loads.
In terms of technique, push-ups will not differ from men’s exercises, especially if we talk about beginners. But there are some concessions for women. This means that you do not need to use any weights. The number of approaches is also reduced, and it is advisable to keep the speed moderate. The training program is drawn up based on the girl’s level of preparedness, as well as the goal.
For a beginner, the following weekly training scheme is suitable:
- First day. First round: 5 reps. Second set of 7 repetitions. Third 5 times.
- Third day. First set of 9 reps. Second round of 10 reps. Third set of 9 reps.
- Fifth day. The first approach is 12 times. Second set of 15 repetitions. Third round of 12 reps.
You should rest no more than a minute between sets. Further loads must be increased in the same way. Be sure to write down all your results (even if they are negative) to monitor the training process.
In order for a girl to learn how to do push-ups correctly, it is necessary to perform the same exercise technique as for men, but slightly change the position of the hands. Most girls want to tighten their contours, strengthen their breasts and work their back. That is why the emphasis on triceps is done much more often than in men. The number of repetitions needs to be performed less than for men. 20 or 25 times is enough. Exercises must be performed at a fast pace. All this needs to be mastered in order to understand how to properly do push-ups for girls.
https://youtube.com/watch?v=Kbxud4CFCNA
Recommendations
- Start doing push-ups from the floor only when you have mastered the technique of doing the exercise from your knees.
- Place your hands near your body or hip-width apart. This way you can work your chest and forearms.
- Once the classic exercises are mastered, you can try performing “steps” with your arms to the side before lowering them into your body.
- In this case, a greater load will be placed on the chest muscles.
Knee push-ups for women
This exercise scheme is no different from classic push-ups. It is only necessary to change the degree of load, as well as the distribution. In this exercise, the abs will be involved to a lesser extent. Otherwise, you can also change the position of your palms, use a stand on your knuckles, and so on.
To perform knee push-ups at home, you need to go through the following steps:
- Place emphasis on your palms and knees.
- Hands are spread shoulder-width apart.
- The body is kept tense.
- The shins do not come off the floor, while a slow push-up occurs.
- You need to control your breathing.
- The lowest point is the right angle at the elbows.
From the wall
This exercise is ideal for beginners. Those girls who have never done push-ups need to master this technique first.
Scheme:
- Step back from the wall about 1 meter. The greater the height, the further you need to move away.
- Move your body forward and rest your hands on the wall.
- Raise yourself a little on your toes.
- Don't bend your knees or break your body line.
- Start doing push-ups, bringing your chest as close to the wall as possible.
Try to regularly perform all the exercises, study the recommendations and soon you will be able to achieve significant results and get the desired and sexy body. And in order to avoid various injuries, you should warm up your body very well before each workout. Don't forget this. Both boys and girls should be able to tune in to training. You should approach your studies only with the right attitude.
Good luck with your training.
Originally posted 2018-01-09 10:27:14.
Other push-up methods for children
If your child’s physical fitness does not allow him to do push-ups, then you can use other methods that are lighter versions of push-ups. We offer several variations of this exercise that will help improve your child’s physical fitness.
From the wall
This exercise is ideal for the very beginning level. It allows you to strengthen the muscles of the pectoral and shoulder girdle, improves blood circulation in these areas. Wall push-ups also help you lose weight in your arms.
Technique:
- Starting position - you need to rest your palms against the wall, and they need to be spaced slightly wider than your shoulders.
- Take a few steps to get as far away from the wall as possible. In this case, the arms should be straightened and parallel to the floor.
- While inhaling, bend your arms at the elbow joint until your forehead or nose touches the wall. When bending your arms, you must carefully monitor their position; they must remain parallel to the floor, while your body forms a straight line.
- As we exhale, we slowly return to the starting point.
For beginners, you need to do 10 repetitions; when the muscles become stronger, you can move to the intermediate level. The intermediate level involves 20 repetitions in 2 sets. For advanced - 50 repetitions of 3 sets.
Did you know? Wall push-ups work parts of the body such as the wrist, elbows, and shoulders, that is, those areas that are most often subject to injury. In addition, this exercise warms up the muscles well and prepares them for other more complex exercises.
From a bench (chair, sofa)
This exercise is aimed at strengthening the deltoid muscles and is a slightly more complicated version of the previous one. To perform this you will need a low chair or you can choose an armchair or sofa. In height they should be at mid-thigh level.
Technique:
- Starting position - stand at a distance of 60 to 90 cm from the bench, place your feet wider. Place your hands on the bench, with the distance between them equal to shoulder width or slightly more. The whole body should be straight.
- Inhaling, we lower ourselves down, bending our arms. The main thing when doing this is not to lower or raise your pelvis.
- As you exhale, we return to the starting position.
This type of training requires 12–15 repetitions; to make it more difficult, you can do several approaches.
Find out how to teach your child to do pull-ups.
Off the floor, on my knees
This push-up helps protect your lower back from overexertion. This exercise is recommended for beginners and for children who have problems with the lumbar region.
Technique:
- Get on all fours, place your arms so that your torso, pelvis and legs from your knees form a straight line.
- From the starting position, while inhaling, bend your arms at the elbow joint.
- As you exhale, we return to the starting point.
When performing this exercise, it is necessary to monitor the position of the pelvis, and at the same time, the shin should not be raised too high, since in this position the load on the lumbar region increases, and the back bends in this place.
Push-ups for a child
Among various segments of the population, debate continues about the extent to which and at what age a child can be involved in sports and push-ups in particular. There are a number of positive factors, as well as negative consequences (if the technique is incorrect) or contraindications to such physical activity. Let's look at these points separately to form a more holistic picture of the process.
Read about how a child should properly warm up his muscles before doing exercises.
Benefit
Among the positive aspects we highlight the following:
- The most important beneficial aspect can be considered the intensive development of the muscles of the abdomen, back, arms, chest and legs. Having mastered the correct technique, the child will strengthen the joints and tendons, reduce the risk of carpal tunnel syndrome and a number of other joint diseases.
- Exercise increases blood flow, which will cleanse blood vessels more effectively. Push-ups remove sticky adhesions and heal old scar tissue, resulting in less joint damage.
- Systematic classes develop a child’s sense of self-organization and discipline him in relation to his body. In general, playing any sport facilitates the socialization of children and has a positive effect not only on physical but also mental development.
Possible harm and contraindications
You should not do push-ups in the following cases:
- diseased heart. Since any physical activity overloads the cardiovascular system, training becomes simply dangerous for a small person;
- in acute respiratory diseases (especially infectious ones), the heart is also heavily strained. For this reason, it is better to refrain from exercise until recovery.
Learn about effective dumbbell exercises for children.
What are push-ups
The term for push-ups in American-English etymology (“puss up”) was first mentioned between 1905 and 1910. After 1945, a more familiar form appeared - “press up”.
Push-ups are a basic exercise that is most often performed in a lying position. It consists of raising and lowering the body using the strength of the arms.
Important! There is a common misconception that doing bench presses is much more effective than regular push-ups. However, this type of bench press eventually injures the rotator cuff. With the same main groups of muscles being loaded, push-ups from the floor, when performed correctly, spare the joints and develop natural strength.
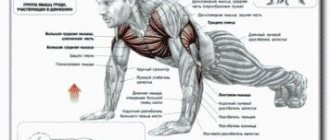
The exercise uses the pectoralis major and minor muscles, the triceps, deltoid and lats muscles, the muscles that support the spine, buttocks, quadriceps, lower legs, feet and toes.
The feasibility of daily training
It is important to understand that doing exercises every day is definitely beneficial. But going to the gym every day and doing heavy strength exercises is rather harmful
If you approach physical activity as a prevention of blood stagnation, heart disease and physical inactivity, then it makes sense to give it to yourself daily. But if we are talking about strength progress, gaining muscle mass, in this regard our body is not as fast as we would like.
Recovery of muscle fibers after active training occurs within 48 hours or more (you can judge this for yourself by soreness and lack of strength after training).
So, we conclude:
- Doing push-ups every day does not lead to the development of strength and muscle mass gain. The body simply does not have time to recover a day after the previous load. And, let's be honest, the load is not so great if you can easily repeat the workout the next day.
- But as exercise, to maintain muscle tone and prevent various diseases, push-ups every day will come in handy.
And, since there is no advisability of push-ups for increasing strength and mass on a daily basis, let’s talk about the “morning exercise” mode.
Benefit
The benefits of learning new strength training skills are invaluable:
- The muscles of the whole body develop.
- Strengthening and gaining muscle mass improves good relief and overall athletic fitness.
- Getting rid of excess fat deposits by increasing the load on the heart and circulatory system.
- Improved metabolism while burning extra calories.
- Increasing body endurance and overall strength, strengthening immunity.
- Proper breathing during power loads will allow you to further complicate the techniques performed without deteriorating your well-being.
- Develops confidence in oneself and one’s abilities, which is reflected in other areas of a teenager’s life.
Understanding the mechanism of muscle strengthening forms a system of exercises. A professional trainer or physical education teacher knows the benefits of gradually learning any physical activity, systematic exercises and increasing the number of techniques performed, making it more difficult each time. The correct order of approach to training leads to quickly obtaining sustainable results. You should not start with direct push-ups from the floor.
At what age can a child be taught to do push-ups?
You can teach your child to do push-ups from the age of 3-4, showing the exercise by example and presenting it as a game.
Please note that children, like adults, need to warm up before class to warm up the muscles and ligaments, increasing their elasticity, and avoid injury. For this, circular movements of the shoulder joint, bending left and right, kneading the hands, touching the toes with the hands, and squats are suitable
The entire process of learning to do push-ups can be divided into several stages in order to gradually get closer to the final goal:
Push-ups from the wall. It is performed as follows: you need to rest your palms against the wall at chin level, placing them slightly wider than your shoulders; The distance to the wall should be such that your arms are fully straightened. As you inhale, bend your elbows until your nose touches the wall; the body is stretched out. As you exhale, we return to the starting position. To start, the child needs 5-7 times. Gradually increase the number of repetitions. The exercise helps strengthen the muscles of the shoulder girdle, gently engaging traumatic areas of the body (elbows, shoulders, wrists), increasing blood flow and strengthening them.
Push-ups from a bench (chair, sofa). The higher the support, the easier it will be to perform the exercise. The optimal height for a child is 40-50 centimeters. The young athlete should place his hands slightly wider than his shoulders on the edge of the bench, his legs are shifted back, his stomach is pulled in, his back is straight, his legs and head and torso are in line. As you inhale, the child bends his elbows until his chest touches the bench, and as he exhales, he straightens his arms with effort. It is necessary to keep a straight line with the entire body from head to feet. For the first time, 3-5 push-ups are enough.
Push-ups while on your knees. Technique: take a lying position, leaning on straightened arms and knees. The arms are located under the upper chest and spread slightly wider than the shoulders, the body from head to knees is straightened and located in one line. Push-ups of this type can be recommended not only for children, but also for the entire fair half of humanity, since, by reducing the load, in comparison with the classic push-ups from the floor, uses the most problematic, but at the same time necessary muscle groups.
Classic push-ups. It is similar to the previous exercise, only with straight legs
Please note that the body should be straight, the back should not arch, the buttocks should not stick out, the head should be in line with the body, and the gaze should be directed downwards. We lower ourselves while inhaling, rise with a push – exhale
Hands are shoulder-width apart and at an angle of 45º. The parent who is working with the child is obliged to monitor the correct technique for performing the exercise, unobtrusively correcting the protruding parts. This is necessary, since improper execution of the exercise puts unnecessary stress on the muscles and the entire spine.
You should not linger long at any one of the stages, except for the last one, as the child gets used to lighter exercises, and it will be more difficult for him to move on to the next stage, which requires more effort. Yes, learning to do push-ups requires some effort, but the benefits are great. The muscles of the abdomen, arms, chest, legs are strengthened, endurance increases, blood circulation improves, the heart is strengthened, muscle mass increases, joints are strengthened, willpower and character are formed.
So, teaching a child to do push-ups is not that difficult. If personal example, systematic training, and play form are your constant companions, then soon you will be rewarded in the form of the success of your own child!
Correct body position. Peculiarities
How to teach a child to do push-ups? To understand how to do this, you need to familiarize yourself with the correct body positions that make it easier to perform techniques in the future, and study the location of longitudinal and transverse muscle fibers. With a narrow position of the arms, the triceps are pumped up, and with a wide position, the pectoral muscles; on the fists, the hands, wrists, and biceps in the complex are strengthened; on one arm, the main load falls on the shoulder girdle and ligaments. Once you get stable results, you can move on to pull-ups on the horizontal bar. Preliminary exercises will include climbing ropes, trees and wall bars, and overcoming high barrier boards.
An important condition for good physical shape is proper nutrition and rest. Eating fresh fruits and vegetables, avoiding overeating and preferring sweet and savory foods will lead to a toned figure. A sports diet is designed to provide the body with a balanced supply of essential vitamins and microelements.
How to learn to do push-ups
Using the information provided above, you can create a rough exercise plan for several workouts.
To learn how to do push-ups correctly, you must adhere to the following rules:
If previously a person had no sports activity at all, then for the first few workouts it is better to do it against the wall and perform 20-30 repetitions in one approach. After a week, move on to push-ups from your knees. You can perform 10 or 15 repetitions per circuit. At this point the person should feel that they can move on to the next stage. You can now focus on your feet. At this moment, be sure to pay attention to your breathing, which you haven’t even thought about before. Lower yourself as you inhale, rise as you exhale.
Under no circumstances should you hold your breath. It is very important to learn to breathe regularly when doing push-ups. If you can perform 20-25 repetitions using the correct technique, then get up from your knees and stand in the classic technique.
How to teach a child
The methodology for mastering the exercises is not designed to be adjusted according to age. But teaching a child to do push-ups is much more difficult than explaining all the steps to an adult.
Here you will need to focus on the features of breathing. First, the child needs to learn to do push-ups about 4-5 times in one approach.
The entire load should rise very smoothly, not by days, but by weeks. It is also worth considering that the child needs to constantly switch to something, so there is no need to force him to do the same exercise every day. It’s better to try changing the speed of execution or changing the position of your hands.
Training from scratch
In the case when a person wants to immediately load his muscles very heavily and ignore the gradual increase in load, then he can use push-ups from the floor from scratch through working with elevations. It is best to use some kind of bench, bricks or low sofa. A very important point is to reduce the distance between the floor and the body. It is better to start training with the usual emphasis on the palms, and over time you can change the width of your hands. As you master the technique, you can complicate your exercises. For example, start doing push-ups with jumps (after one repetition, jump up sharply, jump, return to the starting position and do another repetition).
Regularity of classes is important here. Even if a person starts push-ups from a classic wall rack, you need to increase the number of repetitions in the approach every day. Only in this case will it be possible to achieve significant results and soon learn how to do push-ups a large number of times.
To learn how to do a lot of push-ups, you don’t need to perform the same exercises with a constant number of approaches every day. Change the pace, rhythm, number of repetitions, and so on. The body also needs to be given some time to rest, which will allow the muscles to recover. You can learn how to do push-ups correctly only if you create a competent training regimen. It is advisable to exercise every other day, and perform cardio exercises between workouts. This way you can achieve endurance. But real progress will come only in a month. Don't rush yourself and overexert yourself.
Doing exercises on parallel bars
You should not immediately move on to this exercise if you have not mastered push-ups. Dips do not start from scratch because good physical preparation is required. This is especially true for girls. This type of exercise is much more difficult to master than the classic version, and therefore professionals advise you to first carefully look at the photo and video instructions in order to observe the training of a professional athlete. This way you can learn the technique and not make mistakes.
Training scheme:
- put our hands on the uneven bars;
- we press our elbows to the body and lean forward while inhaling, then we go down;
- the angle of inclination should be approximately 30 degrees;
- We make an effort and rise, straighten the body and at this moment exhale.
Conditions for a good result
To achieve sustainable results at any age from scratch, you need the following:
- It’s worth creating a training schedule to monitor the body’s rest and recovery;
- exercises must be varied in order to use the maximum amount of muscle tissue;
- In addition to classes to increase the quantity and quality of bench presses, general physical fitness training is recommended - running, squats, swimming, jumping, strengthening the abdominal press, working with dumbbells, overcoming obstacles, rope climbing, playing volleyball and football.
By adhering to a set of exercises for two weeks, the child will be able to perform full push-ups on the floor at least 2 or 3 times. Most exercises must be performed in three sessions, this is justified by the fact that the body begins to increase loads gradually. You need to learn how to do planks to strengthen your abs, buttocks, arms and legs, starting with a few minutes of strengthening your entire body. The plank is the starting position for push-ups. From the variety of plank positions, you need to choose the easier one for the first approaches. During repeated actions, the position of the body should change angles of inclination in order to transfer the force of gravity to other areas. Plank on the elbows, on the toes, on the fists, basic, side, with a raised leg - all varieties are available for mastering.
Types of push-ups and their features
- ● Starting position - lying on the floor. For comfort, you can use a non-slip yoga mat.
- ● The toes of the feet and palms should rest on the floor.
- ● Hands are positioned shoulder-width apart.
- ● Fingers point forward.
- ● The back is flat, not rounded.
- ● As you inhale, the body is lowered. This causes flexion of the elbow joints.
- ● The body is fixed in the lower position for a couple of seconds. There should be 5 cm between the chest and the floor surface.
- ● As you exhale, the body is lifted and returned to the starting position, focusing on your hands and toes.
- ● From the knees
Exercise for beginners. Although it is quite easy to do, it is not at all effective. Here they rest their knees on the floor surface, and keep their feet crossed and raised up. - ● With a wide grip
The starting position is classic, but the hands are located at a distance twice the width of the shoulders. The legs are brought together. Socks rest on the floor surface. While performing this exercise, carefully monitor the position of your elbows. They should look to the sides. The body is lowered all the way - the chest should touch the floor. As soon as the chest touches the surface, make a sharp rise and return to the starting position. - ● With a narrow grip
The exercise is aimed at strengthening the deltoids and triceps. The starting position is palms resting on the floor with a minimum distance from each other. During the press, your elbows should point back and slightly to the sides. - ● On one arm
Exercise for professionals. The press is done on one arm, then on the other. The legs should be spread wide apart and the feet should rest with their toes on the floor surface. The arm that remains unused in the press is moved behind the back in a slightly bent state in line with the body. One-arm push-ups are done smoothly. It is forbidden to move the unused hand to the side. - ● With clap
The exercise is aimed at developing arm muscles, strength and speed. In the starting position, feet are placed shoulder-width apart, toes resting on the floor. In this case, the hands should be at a distance twice the width of the shoulders. To clap and do a push-up, you need to forcefully push your body up, lift your palms and quickly clap. When coming out of the clap, you should not fall sharply. Land in the starting position carefully and smoothly. - ● On the fingers
In this type of push-up, the push-ups involve not the palms, but the fingers. This is a difficult exercise. Brushes must be trained. To move on to such a bench press, you will have to exercise with an expander. - ● Weighted
A powerful type of push-ups for professional athletes who build muscle mass. Barbell plates or special belts are used as weights. This type of bench press requires the presence of a partner who can back up the athlete.
Method of teaching classic push-ups
As already noted, the most optimal period for teaching a child to do push-ups is between the ages of 6 and 7 years. Of course, these limits are conditional and can be shifted depending on the student’s physical fitness. To master this exercise, we offer the simplest and most effective method, which consists of 6 steps:
- We take the starting position lying down, arms bent at the elbows, at shoulder level. The main thing in this position is that the forearm is perpendicular to the floor. The legs are connected together.
- We straighten our arms, but at the same time the body should remain straight, and our knees should not be lifted off the floor.
- We straighten our legs and at the same time make sure that the body and legs form a straight line.
- Fix your body in this position for a couple of seconds.
- At the count of 1–2–3–4–5, slowly lower your straight body to the floor.
- Touching the floor with the chest, we return the body to the starting point.
We repeat several times.
Some children do push-ups incorrectly, and there are several reasons for this:
- the simplest and at the same time banal: no one has ever shown how to perform this exercise correctly. In this case, to perform it correctly, it is necessary to demonstrate this exercise by a person who has authority for the child. This could be a father, a coach or a mentor;
- fatigue, which does not allow you to maintain the correct body position. If you notice that your child is doing push-ups incorrectly, you need to give him a rest or stop doing this exercise altogether.
Important! When performing this exercise, you must clearly monitor the correct position of the body, i.e. the body from head to heels should form a straight line, and the arms at the starting point form an angle of 90° with the floor.
Improperly performing push-ups negates all the benefits of them, and sometimes even harms tendons and joints, so the child needs to be supervised from the very beginning so that he performs the approaches correctly. The goal of any parent who wants to teach a child push-ups is to introduce him to physical activity and a healthy lifestyle.
Features of a child's education
The development of children has its own characteristics, and therefore they need to be accustomed to various physical activities at different years. Let's look at the nuances of learning at different periods of their growing up.
Suitable age for physical activity
Childhood can be divided into several periods:
- age group from 3 to 6 years. Children need to develop flexibility and plasticity, which is lost over time. That is why it is necessary to do daily exercises with them, which is aimed at developing muscle flexibility;
- age group 6–7 years. Training should be aimed at developing cardio loads, working with your own weight, and exercises to work your abdominal muscles. At this age, it is necessary to accustom the child to regular and shuttle running, squats, push-ups and pull-ups, and other exercises that are aimed at developing muscles. Working with additional weight at this age is not recommended, the only exception may be rowing, working with a barbell to work the biceps using minimal weight, working with vertical and horizontal ropes;
- age group up to 10–11. Children are already prepared to perform more anaerobic exercise. These include jump squats, throwing a ball against a wall, box jumps, and barbell work (for example, bench press or military press). Also, do not forget about developing coordination; for this, you can perform exercises such as muscle-ups on rings or a horizontal bar, lunges, and handstand push-ups. However, you should not rush to grab additional weight, because the joint-ligamentous system is not yet prepared for strength training;
- age group from 12 years. Children are already prepared for strength work, and they are classified in the teenage group, where the use of additional weight is allowed. For this age, it is recommended to use light weights in training, working with which will be more effective than using your own weight. And the desired results can be achieved much faster.
Important! Children under 11 years of age should work primarily with their own weight. It is necessary to introduce additional load only after consultation with a doctor who will assess the physiological development of the child, and under the strict supervision of a trainer
How to assess physical fitness
In the physical development of children, it is not enough to simply be guided by age categories. Children during the period of formation of the body (up to 11–12 years) need clear control of physical development, therefore it is necessary to regularly assess physical fitness. Only with a properly constructed and well-thought-out system of physical development will a child develop as a healthy personality and be able to maximize his or her talents.
There are many different methods for assessing the physical fitness of children. All of them involve the child passing certain tests that will show how prepared he is to perform exercises of a more complex level. A striking example of such tests is passing standards at school, when teachers check the performance of certain exercises and compare them with a table of results that was developed by the Ministry of Education together with the Ministry of Health.
Check out the set of exercises for morning exercises for children.
In the process of assessing a child’s physical fitness, it is necessary to pay attention to the following aspects:
- how well he has mastered certain skills and techniques for performing basic exercises and elements;
- the ability to apply acquired knowledge and skills in various situations;
- on reaction speed, agility, strength, flexibility, coordination and endurance;
- on general activity during exercise.
Based on the assessments received, further adjustments are made to the child’s physical fitness development program. After all, tests clearly demonstrate the imbalance in their physical development.
A little motivation
The strongest motivation is the example of your neighbor. If a girl, for example, does more push-ups than her boyfriend, this is already motivation for the guy! They both end up doing push-ups.
If you want to pump up or strengthen your arms, shoulders, chest, but you can’t go to the gym, here’s a good reason to figure out how to learn to do push-ups.
Set yourself a specific goal for the number of repetitions at a time. The goal will not let you stop or go astray. But without a goal, you will give up training in a week or month.
Use push-up variations for beginners to pre-strengthen your muscles, exercise regularly and with pleasure. In this case, the result will not take long to arrive!
It is possible to develop decent muscles even in the absence of exercise equipment and at home. An effective exercise that involves almost all muscle groups is the push-up. However, training preschool children for the purpose of building muscle mass is not an acceptable task. According to experts in the field of health-improving physical culture, significant strength loads, as well as exercises to increase endurance, have a negative effect on the formation of the motor system of children and on the growth of bones in length.
Let us dwell in detail on how parents can teach their child to do push-ups on the floor without harm to the child’s body.
“Do a hundred push-ups against all odds” OR how to do 100 push-ups
For many people, performing a proper push-up, let alone doing 100 push-ups, can be extremely difficult.
But, if you want to get stronger, then this 12 week plan will help you. In fact, it will help you learn to do 100 push-ups without stopping in 12 weeks!
The difference between this plan and the previous one is that here you perform the movement consistently and smoothly, without paying attention to technique.
I recommend this plan for those who are able to perform at least one full push-up. If you are still working on it, then it is too early for you to use this training plan.
You probably think it's impossible to do 30 or 50 push-ups, let alone 100 in one set, but trust me, anyone can do it! All you need is the right training plan and repetition.
Let's move on to the diagram of how to do 100 push-ups, starting with one repetition per set. You are ready?
| Mon | W | Wed | Thu | Fri | Sat | Sun | |
| Week 1 | 5 x 1 | 5 x 1 | Rest | 4 x 2 | 4 x 2 | Rest | 4 x 3 |
| Week 2 | 5 x 2 | 5 x 2 | Rest | 4 x 3 | 4 x 3 | Rest | 4 x 4 |
| Week 3 | 4 x 5 | 4 x 6 | 4 x 6 | Rest | 3 x 8 | 3 x 9 | 3 x 10 |
| Week 4 | Rest | 2 x 12 | Rest | 3 x 10 | Rest | 4 x 8 | Rest |
| Week 5 | 2 x 15 | 2 x 16 | Rest | 3 x 15 | 3 x 15 | Rest | 4 x 10 |
| Week 6 | 2 x 20 | 2 x 22 | Rest | 3 x 20 | 3 x 20 | Rest | 2 x 25 |
| Week 7 | 4 x 18 | 4 x 20 | Rest | 2 x 38 | 2 x 40 | Rest | 3 x 30 |
| Week 8 | Rest | 3 x 55 | Rest | 4 x 30 | Rest | 5 x 25 | Rest |
| Week 9 | 2 x 45 | 3 x 45 | Rest | 2 x 50 | 3 x 50 | Rest | 2 x 60 |
| Week 10 | 3 x 55 | 4 x 50 | Rest | 3 x 60 | Rest | 2 x 65 | 3 x 65 |
| Week 11 | 2 x 70 | 4 x 65 | 2 x 80 | Rest | 2 x 80 | 3 x 75 | 2 x 85 |
| Week 12 | Rest | 2 x 90 | Rest | 2 x 95 | Rest | 3 x 90 | 1 x 100 |
The same training table in the picture to download to your computer.
How to use this program
In the 12-week push-up program, each workout is described by the numbers "2 x 10", for example.
- First digit = number of approaches
- Second digit = number of repetitions
The shorter your rest between sets, the better, but in later weeks, when you have to do almost 100 push-ups for a certain number of sets, increasing the rest time is simply necessary. There is no need to take a long break. Rest 5 minutes between sets to complete the required number of sets and reps.
If you cannot complete the target number of repetitions in one set, give yourself a few seconds to rest and continue until you complete everything.
I repeat, this program is for those who can do at least one push-up. It is designed specifically for beginners. If you do everything as expected, then by the end of week 12 you will be able to perform up to 100 repetitions.
The main mistakes in the technique of classic push-ups
Push-ups are not as simple an exercise as it seems at first glance. Errors in technique are made not only by practitioners, but even by coaches! Improperly performing push-ups can lead to injuries to the wrists, shoulder and elbow joints, as well as pain in the neck, back and lower back.
If you can't maintain proper form during push-ups, drop to your knees or reduce the number of reps! Train yourself to do this exercise correctly from the very first time you do it.
Elbows point in different directions
The most common mistake in push-up technique is the position of the elbows relative to the body. Keeping your elbows out helps compensate for lack of upper body strength. Of course, you can do this version of push-ups (which many people do)
.
But the problem is that this method of execution increases the risk of injuries to the shoulders and elbow joints
. Therefore, it is better to pay attention to the position of the elbows: they should be turned back 45 degrees, and not look in different directions.
Arms spread too wide
In classic push-ups, your hands should be strictly under your shoulders.
. Some practitioners practice push-ups with wide arms, but this is a weaker position in which your muscles do not work well enough. Additionally, wide-arm push-ups can cause shoulder pain over time.
Lifting the pelvis upward or bending the body
During push-ups, the body should form a straight line. But if you have a weak core, then there is a risk of poor push-up technique: lifting your butt up or, conversely, arching your lower back and lowering your hips towards the floor. Incorrect body position will put extra stress on the spine
. To avoid this mistake, start practicing the plank exercise - this will help strengthen your muscle corset.
Insufficient range of motion during push-ups
A very common mistake in the push-up technique is performing the exercise with incomplete amplitude, namely, not lowering the body down enough. Naturally, at first it will be difficult for you to perform push-ups with the full range, but train yourself from the very beginning of practical training to lower your body to a right angle at the elbow
.
For example, let's visually compare the correct and incorrect performance of push-ups.
1. Correct classic push-up:
The body forms a straight line, the pelvis does not rise up, the lower back does not bend. When doing push-ups, the body lowers low, the elbows are quite close to the body, the palms are under the shoulders.
2. Correct knee push-ups (simplified version of classic push-ups):
Similarly, the body forms a straight line, there are no deflections or bends in the back. We pay attention to the correct position of the palms relative to the shoulders.
3. Push-ups with an error:
The pelvis is lowered down, the lower back is curved, the straight line of the body is broken. Doing this exercise can cause back pain and even injury.
4. Push-ups with an error:
In this picture we see insufficient lowering of the body, the elbows barely bend. It is better to do 5 high-quality push-ups than 15-20 poor-quality ones, where the arms do not form a right angle.
Push-ups: benefits, harm and contraindications
Like any other exercise, push-ups have a number of advantages and disadvantages, as well as contraindications.
for execution.
This is a great strength exercise for developing muscles, but if done incorrectly or with weak joints, it can have unpleasant health consequences
.
Benefits of doing push-ups:
1. Push-ups are the best exercise to strengthen your chest muscles.
with your own body weight. If you want to get a good workout on your pectoral muscles, then push-ups should definitely be included in your training plan.
2. Push-ups are a multi-purpose exercise that works several muscle groups
. In addition to your chest, you'll strengthen your triceps, shoulders, and core. Push-ups also work your back, legs, and buttocks, providing a full body workout.
3. To perform push-ups, you do not need additional equipment. Plus, you can do this exercise both at home and outside.
. Are you on vacation? Don't have access to a gym? No problem, push-ups can be done anywhere you can find a small square of space.
Description
Regarding cooperation, write here: VK ►https://vk.com/st_skochko ———————————————————————————————— — VKontakte group – https://vk.com/httpvk.comst_skochko
Tags: How to pump up your shoulders at home? How to pump up your legs at home? How to pump up your abs at home? How to pump up your arms at home? How to pump up your pectoral muscles at home? How to pump up your back at home? How to pump up a trepezius at home? Video coming out: shaking your shoulders at home! Video coming out: pumping up your legs at home! Video coming out: pumping up your arms at home! Video coming out: pumping up your abs at home! Video coming out: pumping up your back at home! Video coming out: swinging the trapeze at home! Video coming out: pumping up your chest at home! A set of exercises for the pectoral muscles A set of exercises for the Back muscles A set of exercises for the Legs A set of exercises for the abdominals A set of exercises for the Shoulders A set of exercises for the arms A set of exercises for the Trapezius Workout at home! Complex of Exercises for beginners! How to build muscle mass? Training program on the horizontal bar and uneven bars Training on the bench press, Training on the Deadlift, Training on the Squat with a barbell How to pump up your Arms on the horizontal bar? Exercises on the horizontal bar for beginners How to build muscle on the horizontal bar? guide on how to build muscles at home How to Build up your CHEST MUSCLES at home Training your chest muscles at home how to build muscle mass How to eat right? Nutrition program to gain weight and build big muscles How to increase muscle mass Workouts to gain muscle mass How to get pumped up? how to get pumped up for a skinny person? how to lose excess weight? How to pump up without exercise equipment? How to increase the number of pull-ups? A set of exercises on the horizontal bar. Denis Borisov, Yuri Spasokukotsky, Vasily Ulyanov, Mikhail Boratov Denis Minin, Evgeny Kozyr, Evgeny Kocherga, Eric, Shade, Savchuk Alexander Shchukin, Meat according to GOST, Golubochkin, Sergey Badyuk, How to quickly pump up your chest without iron. Three exercises
Deadlift, Bench Press, Pumping up the Chest, Pumping up the Arms, Denis Minin, Workout, iPhone6, Evgeniy Kocherga, Horizontal bars, Yard Sports, Workouts, Exhibition Performance, World Workout, Horizontal Bar School, How to pump up on the horizontal bar, Strength Elements, Workout is POWER, Strong Guy, +100500 Home Workout, Workout, Strength elements on the horizontal bar, Workout Motivation, Workout PRO, Exercise with Kettlebells, Exercises with dumbbells, Exercises with your own weight, How to become Strong, Complex on parallel bars, complex on the horizontal bar, Complex of push-ups, Complex of exercises on the press
How to pump up your pectoral muscles at home?
The push-up process is very similar in nature to the bench press, but with the opposite amplitude
. The push-up uses a similar group of muscles as the bench press.
Therefore, if you are interested in the question of how to pump up your pectoral muscles at home, carefully read the material below.
Of course, you will not have the opportunity to add additional weight, as is the case with a barbell. However, using the right technique
, as well as more complicated types of push-ups, will help you pump up your pectoral muscles at home quite quickly and at no extra cost.
First of all, understand: you don't need to strive for daily training - you need time for muscle recovery. Also a common mistake of many athletes is the belief that an increased pace will help pump up the chest. Don't try to do everything quickly - try to do it right
: Bending and straightening your arms, control the rise and fall of your body. Do not hold your breath under any circumstances; breathe regularly and rhythmically.
Many people stop exercising because of pain in their elbows. This happens when a person turns off his elbows at the highest point of the lift, fully straightening his arms. The upper position should fix the arms almost straight, and when lowering, they should not be spread too wide.
How many push-ups should a 13 year old girl do? Here I am doing 27 push-ups)
It's simple! Different types of push-ups for different muscle groups! So
It's not quantity that matters, but quality! Not all guys do push-ups like this.
Even those who are older
Not all guys do push-ups like that... Even those who are older.
yes, I do 2 less push-ups and the norm is 20 for men, but for you... in short, it’s normal, even a little too much strength
Well, when I served normally I did 20 push-ups, but now I haven’t done push-ups for six months and I’m swimming like a dumpling.
Well done. In general, it is better to monitor quality rather than quantity.
I don’t know such standards =)) but 27 is a good start =) you can do 5 times more if you want and do it =)
Well, I don’t know how about 27. A girl studied with me and did pull-ups 20 times. She played the violin. I don’t know how it was played - I didn’t hear it. And I pulled myself up well... from a hanging position... with an overhand grip... until my chest touched. so you have room to grow) ) PS yes, the girl was 15 years old.
good for you =)
Not enough, you need at least 200 times! You're not doing enough push-ups, I have no words!
touch.otvet.mail.ru
Correct push-up techniques
Proper technique is important. But it is not the same for every exercise. Since all people are different, often the nuances of a technique have to be selected experimentally. This does not mean that the technique will be completely different for two different people. There will just be some differences.
The technique of different types of push-ups is discussed in detail in this article.
Speaking about how to do push-ups correctly for girls, it’s only worth saying that push-ups for women usually involve working on the triceps. That is, the position of the arms is narrow and the elbows are pressed to the body.
For men, the most popular style is the chest style: palms are placed wide, elbows spread to the sides.
Even wall push-ups need to be done correctly. Focus on the sensations, try to work your chest muscles and triceps. Different hand positions can be safely practiced here.
Why do you need to do push-ups?
Firstly, this exercise perfectly develops the shoulder girdle and upper limbs. It is similar to the standing barbell press, which is used to pump up the shoulders. And here the muscles of almost the entire body are involved in the work, which, one way or another, are responsible for upside-down balance. Simply put, the energy consumption is large, the range of muscles involved is also large, and the “exhaust at the exit” is even greater.
From such push-ups, as you understand, not only your shoulders, but also your body as a whole will become stronger. Moreover, physical qualities improve. For example, the same coordination. For some, just standing in a handstand is difficult, and then you also need to do push-ups.
Secondly, such a non-standard exercise is a great way to diversify your set of exercises, “surprise” your muscles with a non-standard load, or even overcome a “plateau” (stagnation). In addition, this exercise is something of a bridge between regular push-ups and push-ups without support of the legs (when an athlete with an almost horizontal body, but without support on the legs).
Such exercises are considered the height of professionalism and mastery of one’s own body.
How to do handstand push-ups
First of all, I’ll say that to start, try doing push-ups against a wall (heels resting on the wall) or with the help of a partner (he holds your ankles so that you don’t fall). This will help you initially focus on push-ups, and not on maintaining balance. A little later, having understood how it works, you can perform these push-ups on your own and not near the wall.
So, you have taken a handstand. What's next? Your task is to constantly look at your brushes. Now gradually bend your arms, lowering your face almost to the floor (or what are you doing push-ups from?). You need to bend your arms not away from yourself, as it may seem at first glance, but along the body (your forehead and both arms should form an imaginary triangle when lowering, as if you were trying to move from a handstand to a headstand). Naturally, there is no need to touch your forehead to the floor.
Now simply straighten your arms and take the starting position. Basically, that's it.
Oh yes! Choose the width of your arms yourself, although I would recommend slightly wider than shoulder width. And it is not necessary to pull your socks up: here we are not talking about the beauty of execution, but about the number of times. By the way, your legs can be spread to the sides. This technique is used by artistic gymnasts to better control their balance.
Push-ups: how to do them correctly
Push-ups are the most popular bodyweight exercise. It is used not only in strength training, but also in plyometric exercises, CrossFit, Pilates, callanetics and even yoga. And such versatility of push-ups
easy to explain. Push-ups help you engage every muscle group from your neck to your toes, and especially strengthen your pectoral muscles, shoulder girdle, triceps, and abs.
There are many different types of push-ups, but before moving on to more complex modifications of this exercise, let's understand the technique of performing classic push-ups. The correct form of exercise is not only maximum results and high-quality muscle work, but also reduces the risk of injuries and damage
during classes.
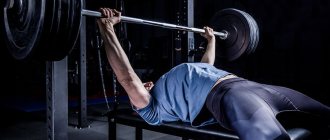
Correct technique during classic push-ups:
- The body forms a straight line, the pelvis does not go up and does not bend down.
- The abdominal muscles are tense, but breathing is not held.
- The head is in a neutral position, not looking down, but not lifting up either.
- The palms are strictly under the shoulders and do not go forward.
- Palms face forward, parallel to each other.
- The elbows are turned back 45 degrees, they are not spread out to the side.
- As you exhale, bend your elbows and lower your body parallel to the floor, maintaining a straight line of your body.
- Push-ups are performed with full amplitude, i.e. the body drops as low as possible. Elbows should form a right angle.
It is this technique of classic push-ups that helps to evenly work the muscles of the shoulders, chest and triceps.
Push-ups work several muscle groups at once. This exercise allows you to work all the muscles of the shoulder girdle and the small stabilizing muscles of the shoulder. Also, push-ups from the floor and from the knees develop strength and elasticity of the shoulder muscles,
which is especially important since the shoulder joint is extremely unstable and susceptible to displacement and injury.
Push-ups help work the following muscle groups:
- Pectoralis major muscle
- Deltoids (shoulders)
- Triceps
- Serratus anterior muscle
- Abdominal muscles
In addition, during push-ups, the muscles of the legs, buttocks and back are indirectly involved in the work. Push-ups also increase functional strength.
necessary to perform regularly performed actions (lifting and moving objects, cleaning the house, holding a child in your arms).