In the latest posts of traditional answers on Instagram @zozhnik_ru, among dozens of questions, the topic of MFR - myofascial release regularly comes up. Movement expert, certified trainer, founder of the Newyorkfitspo project Victoria Borovskaya recorded a short lecture (with transcript) and a 10-minute MFR complex (with a detailed analysis of each of the 17 exercises) for Zozhnik.
What is myofascial release: short video lecture with transcript
Even though the benefits of myofascial release are proven and undeniable, there are still many people who are quite skeptical about this type of exercise. In fact, since there is very little research on the positive effects of myofascial release on tissue, some people think that it is all a marketing ploy, like many other things going on in this world. In this regard, I am often asked what MFR is, which I talk so much about, and what time is best to do it - before training, during or after training. And is it really worth spending your precious time on it?
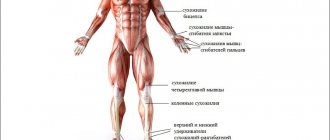
In fact, the word "myofascial" comes from two words meaning muscle and connective tissue - the membrane that permeates every muscle we have, and literally everything in our body, including our internal organs. This leads to a completely natural conclusion, by the way, already confirmed by many data, that working with connective tissue, with superficial and internal tissues, muscles and fascia really helps improve the quality of movement. But that’s not all, because there are a lot of effects from the influence of MFR, which I would like to talk about in more detail.
Our modern world is designed in such a way that we sit a lot and move very little, and our body, from an evolutionary point of view, has not yet had time to adapt to the new way of life. In fact, by nature itself we are destined to move a lot, to be active in the constant struggle for survival - to escape from a saber-toothed tiger, to climb trees, to chase mammoths, to gather, etc. and so on. Thus, our body physiologically needs movement.
As soon as our lifestyle becomes passive, functional changes begin to occur in the body - the body becomes “rigid”, joints lose their mobility, connective tissue becomes rigid and sticky due to lack of hydration. The latter means that a lot of scars and adhesions form in the fascial tissue, seemingly out of the blue.
As a result, one of the unspoken laws of nature is fulfilled - that which does not move, sooner or later ceases to function . With the help of myofascial release, we have the opportunity to influence our soft tissues, as a result of which adhesions dissolve, swelling disappears, lymph flow and blood microcirculation improve.
Victoria Borovskaya has a very broad educational base:
- FPTI Personal Trainer, Focus Institute of Personal Training.
- Nutritionist for Precision Nutrition and FPA.
- Corrective Exercise Specialist, NASM.
- Fitness therapy through the ISSA movement.
- Specialist in working with the formation of healthy habits Behavior Coach, NASM.
- Specialist in working with the age group of the population (50+) ACE
- Currently: student at Gray Institute: Functional Training & Fitness.
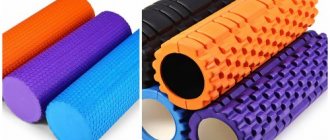
In the arsenal of a professional, there are many devices for MFR - balls and rollers of various types and configurations. Of course, it is not at all necessary to use all this every day. In this matter, progression is important - moving from simple to complex. For those who already practice MFR, soon, for example, one tennis ball will no longer be enough, so balls of different hardness have been invented that can be used to work with some trigger points that prevent you from performing movements in full amplitude. There are also different double balls that are very good for rolling your back along the spine, there are foam rollers, Pilates rollers, long and short Trigger Point Grid rollers, etc. – it all depends on the surface you are working with.
Devices for MFR come in varying degrees of hardness, and I would like to warn beginners against abusing “pimples” and various “grooves.” For beginners, I would recommend using smooth, soft rollers to start with, and only gradually progress over time and move on to using something harder.
We work with all the tissues on our body, starting from the feet and then moving up - to the calf muscles, thighs, back, chest, neck, right up to the aponeurosis, which we must also work with our own fingers.
I sometimes get asked what to do when traveling long distances: it’s difficult to find room in your luggage for a device like a roller skate. But, in fact, the use of devices in this case is not important. It is enough to take with you a small ball, which you use in some releases, or simply stretch yourself with your hands, which also improves the conduction of nerve impulses, making the movement easier and more amplitude.
How long does it take for a visible effect to occur for those who do MFR to lose weight?
The visible effect of using MFR, due to increased lymph flow and removal of excess fluid from body tissues, will be noticeable literally the next day. If you stop there, this effect does not last long. If you combine MFR classes with functional training or posture correction work, after two weeks, those around you will notice something more than a decrease in swelling. They will see qualitative changes in body composition and appearance. This will happen due to a real reduction in the volume of tissues that were in a state of edema, as well as a visual approximation of all body segments to the vertical axis as a result of detuning the alignment of the joints. Weight loss is a very complex physiological process. Even for a healthy person, it is possible if two conditions are met: rational nutrition and proper construction of the training process. Myofascial release is one of the most important components of an effective workout for those who want to lose weight. But only with proper use - taking into account the individual characteristics of the client, including the state of posture and the presence of diseases.
Contraindications for MFR
It is impossible not to mention several contraindications for myofascial release exercises. Those who have a confirmed diagnosis of varicose veins .
In addition, it is better for pregnant women to consult a doctor first .
And there is also a very important point - when we, so to speak, roll various parts of the body, under no circumstances should we go into bone structures, namely the lumbar region, which must be handled very carefully, and also in the groin area, in the knee area joints and calcaneus . Also be careful when working with the neck area, especially in the area of the collarbone , where there are quite a lot of lymph nodes. In this case, I really hope that no one will mistake the lymph nodes for trigger points and crush them, God forbid, which would lead to very disastrous results.
Indications
Myofascial fitness classes are recommended for everyone who has no contraindications. There is also a list of problems for which the method is especially useful and effective. These include:
- muscle pain;
- poor posture, lack of flexibility;
- frequent injuries, predisposition to osteoporosis;
- lack of sports facilities, severe muscle pain when doing fitness;
- sleep disturbances and headaches;
- lack of flexibility, presence of trigger points, areas of muscle tightness;
- excess weight, predominance of adipose tissue over muscle;
- stress, overexertion;
- sports injuries.
Exercise #1: MFR of the plantar fascia of the foot
Important points
: The MFR complex begins with working with the foot. The foot is a support for our entire body. Many problems that arise in the body higher up the chain are associated with dysfunction in its functioning.
We start with working out the soft tissues. In a standing position, place a ball (a tennis ball is quite suitable) under the middle of the foot and begin to roll it along the surface in different directions, avoiding the area of the toes and heel bone.
The pressure on the foot should be sufficient, but not cause pain. Figuratively speaking, on a 10-point scale of pain intensity, sensations should not exceed 5-6 units.
We perform rentals at a fairly intensive pace. We don’t hold our breath. We try not to look down at our feet. This is important because the postural muscles must be activated, and this is possible by maintaining axial traction from the crown to the tailbone.
In this exercise we activate the tissues on the foot, thus letting the brain know that we have this wonderful part of the body.
How much we do: 10-20 seconds on each leg.
Why is the sequence of application of techniques important and what happens if it is disrupted?
The sequence of application of various MFR techniques, as well as compliance with the rules for using equipment (rolls, balls of different densities and different diameters, mini-rolls, pyramids, balls with convex parts and many other shapes) is determined taking into account the knowledge of the muscle-fascial interaction of tissues, the dependence of the “opening » one zone to improve the stretching of antagonistic zones, as well as the anatomical and physiological characteristics of a person and the goals and objectives set for training. Accordingly, a violation of the sequence of techniques, inadequate use of equipment (excessively hard or uselessly soft) or failure to respect the boundaries of the impact zone can lead not only to a decrease in the effectiveness of the lesson, but also to the appearance of pain in the client or a deterioration in general well-being. Sometimes this can last from 2-3 weeks to 1.5 months, due to activation of the trigger point and further tissue inflammation.
Exercise #2: Activating the Outside of the Foot
Important points
: This procedure can be performed every day, for example, at home in front of the TV while watching a series, at the end of a hard day at work, or after freeing our feet from tight shoes.
We sit down and rub the outside of the foot with our hands. We actively knead, comb the entire surface - from above, on the sides and from the back from the heel.
Rub the tissue on one leg, then on the other.
By actively moving the tissues on the foot, we thus improve blood circulation and proprioception.
How much we do: 10-20 seconds on each leg.
Exercise #3: Mobilizing Your Toes
Important points
: Sit down in a comfortable position. You can sit cross-legged, on a chair or bench, as you wish.
We insert our fingers between our toes and perform flexion and extension of our fingers back and forth, guiding the movement with our hand.
Then we make rotational movements with our toes in one direction and the other. We repeat the same on the other leg.
If such movements are very painful for someone, hold your fingers between your toes before performing the exercise. This way you will give the nervous system time to understand what is happening and move away from the state of shock.
Do it in an amplitude acceptable to you, do not break your fingers. The sensations should be as light and pleasant as possible.
Try not to hold your breath or clench your jaw. Maintain a vertical position of the body, stretch up behind the top of your head. It must be said that, in principle, we perform the entire complex of MFR with a relatively flat back and with axial extension, so as not to block our breathing.
Perhaps for some, such actions as sticking your fingers between your toes is a very difficult manipulation. But believe me, this should actually be a very simple exercise.
I recommend changing your everyday narrow shoes to wide and comfortable ones. In my deep conviction, practicality is a very important quality. You should not suffer in the name of fashion, otherwise in the future you will have to communicate with doctors much more often than you would like.
How much we do: 10-15 flexions and extensions and the same number of rotations.
Which rollerball is better?
The massage roller (or massage cylinder) is the main tool for achieving myofascial release. The English name “foam roller” (or simply “roller”) refers to the material used - foamed plastic of varying degrees of hardness.
The surface of the massage roller can be either smooth or with ribbed parts - they, in turn, are designed to massage trigger points. It is also recommended to use smaller projectiles - for example, double balls - to target these points.
Note that studies do not confirm the advantages of one type of rollerball over another. In fact, the effectiveness of myofascial release does not depend on the presence (or absence) of ribbed elements, but on the correct application of effort and the quality of working certain muscles.
***
Myofascial release is a self-massage technique to speed up recovery processes and reduce pain after physical training. Exercises with a roller help increase tissue elasticity and have a positive effect on the range of motion of joints.
Exercise #4: MFR of the gastrocnemius muscle
Important points
: Sit on the floor and place the roller under your shins in the calf muscles. In this exercise, you can work both legs at the same time by placing them side by side on the roller. In an advanced version, we put one leg on the other and, raising the pelvis from the floor, leaning on our hands, we do longitudinal rolls back and forth on the roller from the Achilles tendon to the popliteal region.
Rolling can be done by slightly rotating the leg left and right.
Don't be afraid to adjust your position on the mat. Nothing bad will happen if you roll forward or backward. The most important thing is to work on the calf muscles, thus relieving fatigue from the legs.
If you find a sore point, stay on it for 20-30 seconds and breathe, and then do several transverse rolls. If you are in a hurry and there is not enough time, then, in principle, the effect of longitudinal rolling will be quite sufficient.
Don't forget about breathing! If your wrists get tired, take a break. Under no circumstances should you torture yourself. Our body and, in particular, the nervous system are designed in such a way that MFR does not work if you experience severe pain.
How much we do: 5-6 rolls on each leg.
Precautionary measures
MFR training is by no means an easy warm-up, as it might seem at first glance. And after the first lesson you will be convinced of this. To make your workouts as productive as possible and avoid injuries, remember a few simple recommendations.
- Particular care should be taken to treat the area of the neck, joints, groin, upper and lower spine. And it is better to completely avoid massaging those areas where bones can be felt (for example, knees or heels).
- If you are not sure how to do the exercises correctly, work with a trainer. Ideally, you should start with group classes in the fitness room. Once you master the technique, you can start training at home.
- If there is even slight inflammation in a certain area, it is strongly not recommended to work on it.
- No more than 1 minute is allotted for each muscle being trained. You can massage the painful point for no longer than 15 seconds.
Exercise #5: Ankle Mobilization
Important points
: Sit on the floor and stretch your legs in front of you. We place the roller under the shins approximately in the middle.
We perform movements with our feet in the following sequence: we stretch our feet away from ourselves, in this position we bend our toes towards ourselves, then we pull our feet towards ourselves and bend our toes. Next, repeat the movements 10 times in the same order.
While performing, try to apply pressure on the roller with your shins, while simultaneously maintaining axial extension of the body, as if stretching behind the top of your head towards the ceiling. Try not to hold your breath.
When bending your fingers, try to spread them as wide as possible. This movement may seem very difficult to some. In this case, we can recommend the following: special finger separators for pedicure, which can be periodically placed on the fingers for a while, will help retrain the nervous system.
How many we do: 10 repetitions.
Errors during execution
The effectiveness of myofascial release exercises depends on the correct execution. Mistakes made by beginners at the initial stage can negatively affect their health. The technical violation is as follows:
- Slouched back;
- Protrusion of the abdomen;
- Putting excessive pressure on the body;
- Insufficient pressure;
- Long-term exposure;
- Slow/fast impact.
If you want to practice the MFR technique, you must complete a training course under the supervision of a specialist.
This will allow you to correctly work out the movements, learn to perform exercises with the desired speed and degree of pressure. This is the only way myofascial release classes will benefit the body. Share
Exercise #6: MFR of the hamstrings
Important points
: Sit on the mat and place the roller under the back of the thigh just above the kneecap.
Leaning on your hands, we perform longitudinal rolls forward and backward to the subgluteal fold. At the same time, we push well off the floor with our hands.
During skating, you can use the so-called Rocking technique from Pilates - swinging your leg from side to side.
Repeat the same for the other leg.
If you find a painful point, stay on it for 20-30 seconds and breathe. At the same time, try to avoid severe pain that is difficult to tolerate. The pressure on the tissue should be sufficient, but not leading to hematomas. Treat your body with care, and it will serve you faithfully for a long time.
How much we do: 5-6 rolls on each leg.
Favorite exercises with a massage roller
It is important to understand that no foam roller exercise should be painful, because if it is, your muscles will begin to contract and will not relax. At first, you may feel a little uncomfortable, but you should not feel severe or unpleasant pain.
Exercises on a massage roller can be divided based on the part of the body in which they are performed - exercises for the legs, arms, back, buttocks and chest. There are two basic techniques that you can use on any part of the body.
The most commonly used is “classical massage” - you slowly and smoothly move along the roller from the lower part of the limb to the upper. You can decrease or increase the pressure on the areas being massaged using your own weight.
The second option is to rub the sides of the calf from right to left. This exercise gives the muscles a different direction to relax.
Exercise #7: MFR of the gluteal muscles
Important points
: In this exercise we will roll the zone of a conditional pocket on jeans.
We sit on the roller and place the ankle of one leg on the knee of the other. Then we transfer the body weight to the buttock (attention!) from the side of the leg that we placed on the knee of the other.
Leaning on your hands and pushing them well off the floor, we do longitudinal rolls along the buttock 5-6 times. Next, we perform the same number of rolls across the gluteal muscle.
We do the same for the other buttock.
Don't hold your breath and try not to press your shoulders to your ears.
In principle, there are no clear rules in this exercise. You can rotate your pelvis from side to side as you wish. The most important thing is not to bring yourself to tears from pain and not to use the roller on bone structures, namely the sit bones and lower back.
How many we do: 5-6 rolls along and the same number of rolls across.
Additional recommendations
MFR training will be most effective only if you eat properly. Fascia in this regard is extremely finicky, since finding the necessary balance of nutrients to support connective tissue is very difficult. The Apitonus vitamin and mineral complex can help with this.
The drug contains a full range of biologically active substances, including a rich complex of amino acids. Namely, collagen and elastin are built from them - building materials for connective tissue. And all this is contained here in an easily digestible natural form.
Another important component of Apitonus is the plant antioxidant and capillary protector dihydroquercetin. It improves blood microcirculation, thereby helping to eliminate congestion in the muscles and ensure uninterrupted access of nutrients to problem areas. In addition, it is a real vitamin of youth, promoting renewal of the body and protection against oxidative stress.
Train with pleasure and health benefits!
Exercise #8: MFR of the ischial tuberosity area
Important points
: For this exercise we will need a ball. For our purposes, a tennis ball or similar is quite suitable. The main thing is that it is not too studded.
To perform it correctly, you must first find your ischial tuberosities. I think it’s clear from the name that the ischial tuberosities are the bones on which we roll when sitting. Please note that during MFR we will use the area around the ischial tuberosities without affecting the bone structures themselves.
We sit on the mat and place the ball under one of the buttocks. Raising your pelvis above the floor and leaning on your hands, we perform circular movements around the ischium. Try to control the movement of the ball, avoid the bone area and do not move the ball into the middle of the butt, so to speak.
We do the same for the other buttock.
In fact, MFR of the ischial tuberosity area can be done while sitting on a chair, even at the workplace. The tissue in this area is in desperate need of relaxation. In the modern world, we spend most of our time in a sitting position and do not pay any attention to the gluteal muscles. But before you pump up your buttocks, the tissues in this area need relaxation. Due to the accumulated tension in this area, many people may experience “sparks flying from their eyes” while working on the gluteal muscles.
Therefore, MFR needs to be turned into a habitual routine like brushing your teeth in the morning. We don’t forget to brush our teeth every day, but compared to the muscles that are forced to work from morning to evening, teeth are just a part of our body, visible when talking or smiling. Note that myofascial release does not take too long.
How much do we do: 6-7 circular movements in each direction for each buttock.
Who and when can perform mfr
Performing MFR is allowed for all people who have no contraindications. Fascial gymnastics has shown positive results in eliminating muscle hypertonicity and recovery after training . It is permissible to use this method for prevention , during warm-up, to warm up the joints, increase flexibility, and prevent injuries. Myofascial release is often used after exercise to help the body recover faster. For runners and professional athletes who engage in high-intensity activities, MFR is simply necessary.
MFR also receives positive reviews as a separate fitness activity . There is a feeling of lightness of the body, the absence of any discomfort or muscle pain. There are no restrictions on the place where you can perform the exercises or the time of execution. Myofascial training in this sense is a universal technique, suitable even for home use. This method in combination with massage shows good results.
Exercise #9: MFR of the anterior thigh
Important points
: Lie on your stomach and take a plank position with emphasis on your forearms. We place the roller under the front surface of one of the thighs.
For beginners who are just mastering the MFR, you can work with the front surface of both legs at the same time, placing them side by side on the roller.
The technique is as follows: pushing off with your forearms, we perform longitudinal rolls of the thigh up and down the roller. Then we combine longitudinal rolls with leg rolls to the right and left.
Next, you can slightly roll the quadriceps femoris muscle, which can have a lot of tension, at a slight angle. Don't feel too much pain. If the pain is too severe, the roller can be changed to a softer and smoother one.
During such rolls, avoid the area of the iliotibial tract, in which the fibers do not like too rough interference in their structures, since they are located slightly differently. This zone runs along the lateral surface of the thigh.
If you find a sensitive point, linger on it, breathe and perform flexion and extension in the knee joint, and then rotate the shin from side to side parallel to the floor.
You can perform longitudinal rolls while simultaneously bending and extending the leg at the knee joint.
While doing this, do not bend your lower back too much. Do not hold your breath under any circumstances. Try to feel freedom of movement. Let your body tell you which movements it needs.
How much we do: 5-6 of each roll on each leg.
What are the benefits of exercise with a massage roller?
Training with a massage roller has a very good effect on our flexibility. In addition, it improves blood and oxygen flow, improves performance, relieves muscle tension and reduces stress. At the same time, it can help eliminate cellulite because it restores tissue elasticity. A study published in the Journal of Strength and Conditioning Research shows that myofascial release using a foam roller can significantly increase range of motion without any negative effects.
If you do high-repetition movements such as running , you tend to overwork some muscles , which can become fatigued over time. Muscles that are overused tend to become tense, which subsequently causes them to malfunction. With the help of a foam roller, you can release those tight muscles and knots in the fascia so that your body can function normally again.
Exercise #10: MFR of the inner thigh
Important points
: Let's start working on the tissues of the inner thigh. We lie on our stomachs facing the mat. We bend one leg and move it slightly to the side. We place the roller under the inner surface of the thigh approximately in the middle.
We start MFR by rotating the hip - lifting the shin up and down. Then we perform longitudinal rolls of the adductor muscles from the knee along the thigh. Please note that when performing rentals we do not touch the groin area.
Next, we repeat all movements for the other leg.
In the area of the inner thigh there is a lot of adhesion, tissue gluing, swelling and poor blood circulation. It is for this reason that it is often impossible to bring this area into the desired toned shape with any effort.
After inner thigh myofascial release, you will notice a significant improvement in how you feel.
How much do we do: 5-6 flexions and extensions and 5-6 rolls for each leg.
History of the method
Before 1981, no one had heard of the term “myofascial release.” The state of Michigan can be called the birthplace of this method. In 1981, a university training course dedicated to myofascial fitness appeared, so the date is considered significant in the history of the method. After teaching this training, the authors of which were Anthony Chila, John Peckham, Carol Manheim, MFR began to spread and find new followers.
Since then, many scientific studies of this topic have appeared by both foreign and Russian specialists. Myofascial release training is useful for massage therapists, osteopaths, fitness instructors, professional athletes, and therapists.
A characteristic feature of the method is a complex combination of different techniques:
- structural integration (deep massage);
- osteopathic techniques;
- Graston equipment;
- use of additional equipment;
- independent MFR.
Exercise #11: MFR of the tensor fascia lata
Important points
: First you need to determine where exactly the tensor fascia lata is located. Feel the side of the ilium with your fingers and go down a little lower. In this place you can find a dense cord, which is very often in a tense state, especially among runners and those who walk a lot and suffer from tension in the calf muscles.
Lie on your side and place the roller slightly diagonally in the area of the tensor fascia lata. Leaning on your hands, we perform small-amplitude longitudinal and then transverse rolls. We repeat all movements on the other side.
Very often there is so much tension in this area that it may seem like we are rolling a bone, but in fact it is the hip flexors that are very tight. It happens that the tensor fascia lata takes on too much of the load that the gluteal muscle should naturally take on, but for some reason it does not do this.
Don’t forget about breathing, and don’t be surprised if there is less tension on one side. The point is that in a certain sense our body is asymmetrical, and this is normal.
If you experience too much pain, then it makes sense to use a softer roller - for Pilates. My only advice is to please choose a quality product. Otherwise, after some time you will be faced with the fact that the roller will quickly lose its qualities under the weight of the weight.
How many we do: 5-6 skates on each side.
Result of application
To master the basic MFR techniques, it makes sense to listen to a specialist (in a fitness club or at least watch a video). During the class, a person will get a feel for what myofascial release is by performing exercises for different muscle groups. During workouts, which usually last 1 hour, it is important to spend this hour usefully, listen to your own feelings in order to achieve a therapeutic effect. If everything goes as it should, over time the range of movements will increase, unpleasant pain will go away, and blood circulation around trigger points will be restored.
Possible results of using myofascial release techniques :
- Correction of muscle imbalances;
- Improved posture;
- Facilitation of the training process;
- General improvement in well-being, relief from pain, including headaches;
- Prevention of injuries;
- Normalization of the cardiovascular system;
- Increasing sports endurance;
- Increasing the elasticity of fascia, increasing flexibility;
- Accelerated regeneration (useful for professional athletes);
- Prevention of osteoporosis, dislocations, fractures;
- Weight loss;
- Anti-stress effect, normalization of sleep.
Exercise #12: Thoracic MFR
Important points
: Lie on your back on the floor, place the roller below in the area of the lower edge of the shoulder blades. We bend our legs at the knees, placing our feet flat on the floor. We throw our hands behind our heads so that our elbows remain in the field of peripheral vision. We immerse our head in a bowl of palms.
Remaining in this position, we perform flexion and extension in the thoracic region. Do it in a comfortable amplitude; we don’t have the task of putting your head on the floor. Try not to bring your elbows together or lose the position of your shoulder blades - they seem to hug your chest, sliding along your ribs. Imagine that someone is pulling you by the elbows.
Then move a little lower, literally a centimeter, and continue to perform flexions and extensions. Thus, we need to work the entire thoracic spine to the upper edge of the shoulder blades.
Next, we return to the starting position and, maintaining a slight bend in the thoracic region, raise the pelvis above the floor and perform longitudinal roller rolls along the thoracic region from the lower edge of the ribs to the upper edge of the shoulder blades.
Don't forget about breathing. We inhale and exhale through the nose.
How much do we do: 5-8 flexion-extension and 5-6 longitudinal rolls.
Exercise #13: MFR of the sacral area
Important points
: I must say that a lot of tension accumulates in the sacrum area. Often there are so many adhesions that some people do not have the ability to pull the fold on the skin with their fingers and roll it up and down. But the skin on the sacrum should be as mobile as anywhere else on the body.
In principle, MFR of the sacral area can be done with your hands, but you can also use a roller.
So, we sit on the roller, then slide down a little and place the roller in the sacrum area. Leaning on our hands, we roll the sacrum along the roller, applying not so much pressure as scratching this area, moving from side to side and back and forth.
In this exercise, it is strictly forbidden to rest your sacrum on the roller. Avoid any unpleasant, let alone painful, sensations.
How long we do it: 20-30 seconds.
How to properly and effectively train with a massage roller?
The method of using a massage roller during training is quite simple. Select the body part you want to massage and lie on top of the cylinder so you can control the pressure with your body.
Stretch down and up slowly to find areas that have been contracted and hardened. Work the hardened area for a few seconds and then continue. Do the entire exercise slowly, otherwise it may cause too much damage and you will end up with bruises. By moving slowly, you give your muscles time to adapt and relax under pressure.
The massage roller will apply pressure to the painful area, but you will feel good about it. However, if you notice that you are experiencing pain that you are uncomfortable with, shift your weight to create a pressure that is comfortable for you. The most important thing you must remember is that you should always listen to your body. You should feel pain, but pain that is bearable and relaxing. Do not use the massage roller on your joints. Perform exercises only in areas where there are muscles. The massage roller does not affect the joints, and you only create unnecessary pressure in the area that is most stressed during exercise.
Exercise #14: MFR of the latissimus dorsi muscles
Important points
: MFR of the latissimus dorsi area can be very painful in some cases, so it makes sense to use a softer roller. In principle, for this purpose you can use double balls, or two balls sewn into a sock, if you want some kind of deeper effect on the tissue. In this case, we stand against the wall, place the balls between the back and the wall, avoiding the area of the vertebrae, and perform rolls along the spine.
If you use a roller, then lie down comfortably on your side and place the roller in the area of the lower ribs. We lean on the floor with one hand, extending it in front of us.
We perform movements from a series of exercises in Pilates “Book Opening” - we move our arm to the side, rotate the body and open the chest as much as possible, thus rolling the latissimus dorsi muscles. Imagine that someone takes you by the hand and pulls you up and then to the side.
Do it slowly. If you rotate to the side while exhaling, then the amplitude of the movement will increase. If you want a better performance of the rotation, then do it while inhaling. Breathing is a tool that can be used if you learn to manage it wisely.
How much we do: 10-20 seconds on each side.
What is the difference between personal MFR training and group training?
During MFR training in a group format, a general scheme of influence on the body is used without taking into account those individual characteristics that are caused, for example, by sensitivity to pressure, body size, and changes in posture. Of course, the effect of group MPR classes is quite noticeable and significant, but it is not comparable to the result that is achieved during personal training, when the trainer has the opportunity to select individual techniques, their sequence, and also monitor compliance with the technique of performing MPR techniques.
Exercise #15: MFR of the pectoralis minor muscle
Important points
: First, you need to decide on the area of the pectoralis minor muscle that we will work on. Extend your arm to the side and bend it completely at the elbow. So, if you extend your thumb towards you, it will indicate the zone we need - the area of the pectoralis minor muscle. When performing the exercise, we will inevitably engage the pectoralis major muscle, but our main goal is to relieve tension from the pectoralis minor, thus directly influencing our posture.
In principle, MFR of the pectoralis minor muscle can be performed using a regular tennis ball, rolling it along the entire area towards the armpit. But you can go through it with your fingers, kneading and rolling the fabric. If you find any painful spots, stop and work on them for a few seconds.
Don't forget to breathe while doing this. Repeat the same on the other side of the chest.
How much we do: 10-20 seconds on each side of the chest.
Tips, common mistakes
The main recommendation that is found in all guides for beginners is not to overdo it with pressure and prepare in advance for the start of training: first of all, eliminate possible contraindications, which we will discuss below.
You need to exercise on an empty stomach, one and a half to two hours after eating. It is allowed to drink water, but it is better in small portions.
Observe the main principle - gradualness, smoothness of all movements. Breathing should be deep and measured. Start with areas that are closer to the body, gradually moving away from it. Start with the area where the pain is mild, gradually moving to rolling the trigger point. If severe discomfort occurs, stop applying pressure immediately.
Typical mistakes when practicing MFR on your own:
- performing exercises with a “round” back;
- abrupt start from a painful point;
- too fast pace, breathing problems;
- prolonged exposure to the painful area (more than one minute);
- excessive pressure.
Exercise #16: MPR of the trapezius muscle area
Important points
: MFR of the trapezius muscle area can be done with your fingers - rolling, squeezing the tissue in different directions.
Or you can use special double balls, or two tennis balls sewn into a sock. Stand with your back to the wall, place double balls between your back and the wall so that your spine is between the balls, and perform longitudinal rolls along the thoracic spine. Avoid the vertebral area.
A lot of tension accumulates in the trapezius muscle area. This exercise is suitable for those who have their shoulders creeping towards their ears, who experience a lot of stress during the day, and who spend a lot of time in a sitting position.
It’s hard to believe, but due to problems in this area, with age, the upper eyelids begin to “creep” and wrinkles appear on the forehead. The tissues here are so overstressed that they create tension along the entire posterior superficial line of the body, as if pulling our face down.
Additionally, many who suffer from frequent headaches will be surprised to learn that tension in the upper trapezius may be to blame.
It's no secret that most men who practice strength training neglect MFR classes. Sometimes you can see an unnaturally hypertrophied trapezius muscle in comparison with the biceps, triceps and pectoral muscles. It even happens. that the trapezium itself is developed unevenly in height on the left and right sides. Often it is enough to relieve swelling of the tissues in this area, eliminate adhesions and trigger points at least for a while, and progress amazingly begins.
How long we do it: 20-30 seconds.
Fascia, fascia anatomy
The structure of the human body is designed in such a way that each tissue or organ has a special shell: bone tissue is covered with periosteum, the brain is covered with dura mater, and the spinal cord is covered with an arachnoid structure. Muscle groups consist not only of myofibrils - individual fibers, but of connective tissue structures, as if lining and covering them, ensuring the sliding of individual muscle groups relative to each other during motor activity.
Fascial structures are well supplied with blood and are fully innervated, which ensures their response to physical irritation. They are completely elastic, stretch along with the muscles, and relax. The condition of the fascia is inextricably linked with the condition of the muscle and vice versa. If there is insufficiency or pain in the connective tissue structures, then the muscles react in a similar way - they limit their mobility.
An experienced massage therapist will detect so-called triggers for this problem - extremely painful points that can be physically felt along the fascial fibers. The diameter of these formations is several millimeters, located in the thickness of the muscle fiber, along the fascia.
A trigger point is a concentration of contracted fibers that do not allow oxygen to circulate freely. Decay products, carbon dioxide, irritate this area more than others and pain appears.

