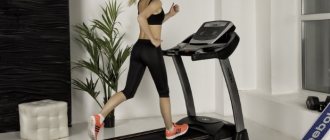
Swimming is one of the oldest sports that allows you to get in shape and strengthen your muscles, improve blood flow and relax.
There are several sports swimming styles, but the most famous of them are crawl and breaststroke.
They differ radically in execution technology, involve different muscle groups, and are also used for different purposes. What to choose for swimming – crawl or breaststroke?
Let's look at these techniques and try to answer this question.
The health benefits and harms of swimming
Benefit
Swimming is good for everyone - from babies to seniors.
It helps adult men and women get good exercise and relieve stress. Swimming doesn't put stress on your joints and uses all muscle groups. It's like athletics, only more effective and less traumatic. Health benefits of swimming:
- develops strength and endurance;
- helps the spine become more flexible;
- promotes weight loss;
- improves joint mobility;
- trains the lungs and heart;
- restores healthy sleep.
It is worth noting that the benefits of swimming for the spine, lungs and muscles are felt if you swim correctly. To do this, you need to learn to dive, paddle and glide through the water, without stopping at the achievement of “I can swim like a dog.”
Harm
It is no coincidence that a doctor’s certificate is required to swim in the pool: there are a number of diseases for which swimming is contraindicated.
For example, dermatitis, furunculosis, eczema and fungus are aggravated by water contact. In addition, skin diseases can be dangerous to others.
You also need to understand that swimming is a great physical activity for the whole body. Therefore, it is better for people with heart disease or cancer to consult a doctor.
Some chronic diseases of the lungs and intestines may also be a contraindication. Swimming is not recommended for people with epilepsy or seizures.
Basic skills and safety rules
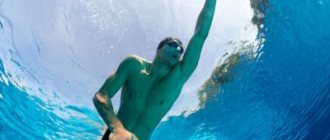
Scuba diving is a fun, but dangerous activity. When swimming underwater, follow certain safety rules for closed and open water bodies.
Pool
Before you go scuba diving in the sea or river, it is useful to practice in a pool. Having mastered the technique, you will be able to feel more confident in natural bodies of water, which, unlike a swimming pool, are not limited by walls and floors.
Recommendations for snorkeling in the pool:
- Overcome fear. Completely get rid of your fear of water. This factor is one of the most dangerous when sailing. Sudden panic often leads to inappropriate behavior in inexperienced swimmers.
- Feel the water. Swimming underwater is noticeably different from simply gliding through water. It is necessary to get used to the new “living conditions”. To dive to depth, you need to master a certain technique. Even a simple dive is difficult at first, since the water pushes out a person who does not know how to descend correctly.
- Breathe correctly. Always inhale through your mouth and exhale through your nose. Learn to exhale without simultaneously taking in water through your nose. Master holding your breath so you don't have to come up every 10 seconds. This skill is one of the basic ones in the training program. Thanks to high-quality breath-holding, you can not only learn to swim skillfully at depth, but you will also feel safe.
- Practice your technique. Learn all the basic skills you might need when swimming underwater. Dive, move in different directions, calculate the time correctly before surfacing.
Safety rules for diving in the pool:
- It is prohibited to visit the pool after drinking alcohol;
- refrain from swimming after physical exertion and fatigue;
- wear safety glasses - they will save the mucous membrane of the eyes from damage by chlorinated water;
- avoid collisions with other people swimming in the pool;
- swim in only one lane;
- between eating and swimming, maintain an interval of at least 1.5-2 hours.
Open water
After you have mastered the technique of scuba diving in the pool, you can go to open water. Be especially careful here and follow safety precautions.
Safety rules in open water:
- If the bottom is not visible, do not jump into the water. This rule will help you avoid dangerous, including fatal, injuries.
- Don't go too deep. Diving to a depth of more than 5 m is not recommended even for experienced divers. Only athletes dive to 5 m or more. Trained swimmers are able to hold their breath for a long time and are able to make longer ascents.
- Learn to calculate your strength. You should always have oxygen in reserve for ascent.
- Don't waste your energy. Move smoothly, without fuss and unnecessary energy expenditure.
- Dive only while inhaling. Diving while exhaling is strictly prohibited.
- Never go underwater alone. There should be a person with you who can provide assistance if necessary.
- Control your distance from the shore. Don't swim too far.
- Leave the pond in time to avoid hypothermia.
When practicing freediving, which involves diving to a depth of more than 5 m, special training is required under the guidance of an experienced instructor.
Where to learn to swim?
Methods of teaching swimming are theoretical and practical. To learn the theory, you can read articles or books, watch training videos on the Internet. From theory you need to move on to practice - training on the water.
View trainer profiles
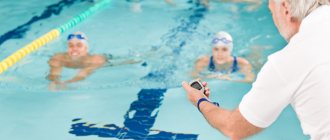
In a swimming pool
It is better to take your first lessons in the pool - in still water it will be easier for you to control your body position. Moreover, it is better to do this with a coach, so that later you do not have to correct errors in technique.
Natalya Pulcheva swimming coach
4,89 37
Open profile
Often students do not know how to breathe or how to lie on the water. The trainer will show and tell you how a person should feel in a certain position of the body. I train in the water: I show by example, and then I observe the student.
Tips for those who want to learn to swim in the pool:
- Pay attention to group classes. It's not only cheaper and more fun, but also more effective. You gain like-minded people, and with them the motivation and habit of going to the pool.
- If you are serious, then immediately sign up with a trainer. The main advantage of individual lessons is that all the attention is on you. This way you will master the technique much faster.
- At first, stay close to the side. You need to gradually get used to the water and feel that you are safe.
Advantages and disadvantages
A swimming pool is a specially organized place for learning to swim. This means that here you can not only safely gain your first skills, but also get rid of the main obstacle - the fear of water. Plus, training is available all year round. And this is a big plus, because regularity of classes is an important factor of success.
But you still need to find a good pool. And you will have to pay for the subscription. But there is a hidden advantage to this: financial motivation works. By giving the money, you will probably attend classes.
On open water
There are not many alternatives to the pool - a lake, river, sea or reservoir. And they are available mainly in the summer.
Advantages and disadvantages
Experts do not recommend learning to swim in a lake, river or sea for several reasons.
- Rivers and lakes have cold currents and springs, and uneven bottom topography. For an inexperienced beginner, swimming can turn into a tragedy.
- In the sea, the water is denser, it will “hold” you, and you won’t be able to feel the movements.
- Training will be irregular, from time to time.
- It is difficult to learn to swim in open water, because there are usually a lot of swimmers near the shore.
But open water also has its advantages: you can learn to swim and relax in nature. And you won’t have to pay like you do for visiting the pool.
At home
If no body of water, even an artificial one, is inaccessible to you, you can try to learn to swim at home. Of course, you can't do this in the bath. But there is so-called “land swimming” - training that helps prepare the body for the stress of water.
Advantages and disadvantages
Obvious advantages: you don’t need to travel anywhere, you can train in the comfort of your own living room. But there are more disadvantages: learning to swim at home without an instructor is almost impossible. Or rather, it is impossible to do it correctly. You won’t see yourself from the outside and even after a dozen videos you won’t be able to understand that you’re making technical mistakes
.
Pro Tips
Danil Antonenkov: “Just as a house is built from the foundation, so equipment is built in order. You cannot move on to learning to carry and grab until a person has learned to lie on the water.
In my methodology, I divide all elements into several levels:
- The initial one is to lie down on the water (learn to keep balance), learn to change hands correctly like a stayer, breathe correctly (be sure to exhale the air), and turn your body. It is important not to rush here.
- Advanced . When the initial elements have taken root, only then do we move on to carrying, coordination of arms and legs.
- Effective - underwater part of the stroke, variations of 4-6 kick crawl, variations of stayer, sprint change of hands.
The initial elements can be completed in 6-12 workouts, and the underwater part of the stroke can be practiced for a very long time.
The first priority is balance. How do you know if you're doing everything right? At the initial stage, speed is not important, ease is important. You must lie on the water, calmly stroke, exhale, and not accumulate oxygen debt. There should be no muscle fatigue or acidification. The water holds you, and you move forward. When you can swim for an hour without stopping or getting tired, then you can say that the basic elements have been learned. Here you can add and move on.
The second point: we must strive to do everything well at once, and not fix unfinished elements. You have to strive for perfect execution, otherwise it will be more difficult to retrain muscle memory later.”
“Dry swimming”, or exercises for swimming on land
Dry swimming is a dry swim workout that mimics the movements of a swimmer. Exercise improves your fitness and helps you achieve results faster on the water. Many coaches give the dry-swimming routine as homework.
For dry swimming, athletes use their own body weight, fitballs, TRX loops and special exercise equipment - rubber. Exercises can be done at home or in the gym.
The training is structured according to the following scheme:
- Warm up and warm up muscles.
- Swings - swinging your arms to increase shoulder mobility.
- Strength exercises and working with rubber bands.
- Flexibility exercises that increase range of motion.
- Stretching and cool down.
It is best to find out whether you need dry swimming lessons from a trainer. Typically, such techniques are required by professional athletes, but can also be useful for adult amateurs. For example, to understand the principle of movement in water and practice the technique of swimming breaststroke, crawl or butterfly.
How to get only pleasure from swimming?
It's simple - you need to master the technique of movement and breathing. In addition, to save yourself from overwork while swimming you need to:
- learns to slide - not only muscles, but also inertial forces must move the body;
- when swimming crawl, you should rest by stretching your arm forward before the next stroke;
- when swimming breaststroke, extend both arms before the next movement;
- regularly increase the body's endurance - running, walking on an incline.
Only a patient and diligent person who is ready to devote enough time to regular lessons can learn to swim. Swimming well reveals the “dormant” forces of the body, helps to become physically stronger, improves posture and tightens the body.
Breathing while swimming
You need to learn to breathe correctly from the very first training. This is the key to success in mastering more complex techniques.
Inga Sologub swimming instructor
5,0 44
Open profile
Breathing is the most important point in swimming. With the correct technique, take a deep breath through your mouth and exhale through your nose into the water. If we inhale and exhale through our mouths, we will be able to float on the water, but the air supply in our lungs will be used up faster.
The biggest risk of using the wrong technique is that water can get into your nose. This is something many people who learn to swim are afraid of. Exhaling through the nose provides protection from water entering the lungs.
You need to train your breathing in a pool or in shallow water, if we are talking about open water.
There are several exercises for this.
- Inhale through your mouth, drawing more air into your lungs, not through your cheeks. Submerge your face under the water and exhale through your nose. Try to gradually increase the duration of exhalation and decrease the inhalation.
- Repeat this exercise while lying on the water. To begin with, it is better to stick to the side. Take short breaths and slow exhales into the water.
- A more advanced type of breathing training when swimming: sharply raise your head above the water, take a short breath and exhale slowly.
- If you have a swimboard, you can do this exercise: hold on to it with one hand and use your legs. Every three seconds, turn your head to one side to inhale quickly and to the other to exhale long.
Such exercises not only help you understand the principle of proper breathing while swimming, but also develop your lungs.
Swimming with your head up
A typical mistake for beginners, often leading to injury. You can raise your head while swimming only when the task is to swim a short distance slowly (in elite sports, raising your head while swimming is prohibited).
Swimming with your head up quickly becomes overtired because:
- there is strong pressure on the cervical spine;
- compression of the blood vessels of the brain occurs;
- the spine is in an incorrectly curved position, which leads to the development of pathologies;
- gliding through water is slowed down.
How to float
Our body itself knows how to float on water: thanks to our lungs, we can stay afloat and not drown. Once you realize this, it will be much easier for you to learn. And to consolidate the skill, there are simple exercises.
Exercise "star"
The “star” is performed on the back or chest. The exercise helps you understand that with the correct body position you can lean on the water. The “star” on the chest is done like this:
- Go into waist-deep water.
- Raise your hands and take more air into your lungs.
- Push off the bottom and lie with your chest on the water.
- Extend your arms and legs to the sides. The face should be facing down.
Don't be afraid - the air in your lungs will keep you on the surface. The main thing is to straighten your limbs and spine. In this position, like a starfish, you will increase the area of pressure of your body on the water and will not sink under your own weight.
The exercise can be complicated: raise your head while lying on the water. Buoyancy will decrease, but you will understand that swimming with your head under the water is much more convenient.
For the “star” on your back, the execution algorithm is approximately the same: inhale deeply, lie on your back in the water, stretch your arms and legs in different directions. This option is a little more complicated, but it is a good way to overcome your fear of water.
Float exercise
“Float” helps you feel that thanks to the air in your lungs, your body can stay afloat regardless of your weight. Despite this, experts advise doing the exercise at shallow depths: the water should reach up to your chest, so that if something happens, you can immediately straighten up and rest your feet on the bottom.
You need to do the exercise like this:
- Take a deep breath.
- Pull your knees to your chest, clasp your hips with your hands.
- Lower your head under the water and press it to your knees.
- Don't panic, let the water push you to the surface.
Thanks to the air in your lungs, your body will turn its back upward and you will begin to float up like a float. You just need to find balance and slowly exhale the oxygen supply. And to avoid the temptation to take a breath, you can pinch your nose with a special clothespin.
Breaststroke hand crawl
There is also a mixed style of swimming, in which the arms do the breaststroke stroke and the legs work in the crawl style.
This type of swimming is sometimes also called “applied breaststroke” .
This is one of the possible options for teaching children to swim, especially preschool children.
The point is that it is still difficult for young children to master the crawl with its difficult breathing, but, on the other hand, it is no less difficult to master the breaststroke kicks, which are technically difficult for adults.
Therefore, children are first taught to use a swimming board to use their legs in a crawl stroke , and then, when the child floats on the water and can swim like an arrow using his legs, he is taught to breaststroke .
Swimming training for adults can be based on a similar scheme.
At the same time, this style should still be considered not as an independent swimming style, but as an intermediate step on the path to full crawl and breaststroke.
What you need for swimming: equipment and accessories
There are not so many mandatory things to do in the pool:
- swimsuit or swimming trunks;
- cap;
- towel, shampoo and shower gel;
- rubber slippers.
Young swimmers are advised to take children's swimming goggles. For training in the sports section, you can even buy a good model with a seal.
Some accessories are not required to be purchased. To figure it out, we made a table.
| Swimming trunks or swimsuit | Necessarily | It is better to choose a sports model. Beach shorts and swimsuits impair maneuverability in the water. |
| Mask | Not necessary | This is an accessory for scuba diving. |
| A tube | Not necessary | Accessory for snorkeling and diving. Newbies to the pool don't need them. |
| shoulder blades | Not necessary | Needed to practice the stroke, increase its speed and strength. |
| Board | Not necessary | With a board you don’t have to think about how to stay on the water. You can focus on moving your legs. |
| Vest | Required only in open water | The main means of safety in open water. |
| Wetsuit | Not necessary | Useful for diving. |
| Flippers | Not necessary | Can be used when learning to swim breaststroke and crawl. |
| Glasses | Not necessary | They will come in handy to see better under water and protect your eyes from irritation. |
| Oversleeves | Not necessary | Can be useful for learning to swim in open water, especially for children. |
| Nose clip | Not necessary | Prevents water from entering the nose. |
| Earplugs | Not necessary | Prevents water from entering the ear. |
How to snorkel?
Thanks to special equipment - a mask with a snorkel - diving under water becomes longer and more interesting. To avoid unexpected difficulties while swimming, master the technique of using the equipment perfectly.
How to wear a mask?
Before putting on the mask, check its integrity. After putting it on, adjust the ties. In order for the mask not to allow air to pass through, it must fit very tightly to the face. There is no need to tighten the rubber band too much. Its task is to support the mask, which is held in place mainly by vacuum.
How to put on a mask correctly:
- press the mask to your face;
- release excess air;
- The mask should fit tightly to your face.
How to hold the phone?
First, the breathing tube is attached to the mask to give the swimmer an additional support point. They hold it with their teeth.
How to hold the handset correctly:
- After biting down on the tube, blow into it to get all the air out.
- With the mask on, lie face down in the water. In this case, the tube should be located at an angle of 90 degrees to the water.
- Inhale and exhale several times. As you inhale and exhale slowly, you should make sure that the air moves easily through the breathing tube.
- Hold your head so that the top of the tube is always above the water.
Do not allow water to enter the tube. If it penetrates there, then when you inhale it will enter the mouth, and then into the lungs. To prevent this, keep your tongue near the tube. This way you will feel what is coming in - air or water.
Having felt the water in the tube with your tongue, quickly push it out of your mouth and float up. After pouring the water out of the tube, continue swimming.
The mask is fogged up - what should I do?
Mask fogging occurs due to the difference between the temperature of the water and the swimmer's body. The water is colder than the human body, so drops of condensation collect inside the mask. Foggy glass does not allow a person to see normally.
Some swimmers advise rinsing the glass with salted water, others even recommend spitting on it. But both options are not effective. If you don't want your mask to fog up, don't buy a model that has the nose on the inside. The breathing nose emits steam, which helps fog up the glass.
How to avoid fogging:
- Buy models in which the nose is located outside the mask.
- Use special anti-fog products. One application is usually enough for 2-3 dives.
If water gets into the mask
Due to the movement of the facial muscles, the mask may move slightly, literally a fraction of a millimeter, from its surface. This is enough for water to flow under the mask.
How to remove water from a mask:
- Roll over onto your back.
- Lift the glass of the mask and blow air into it. Due to the created pressure, the air will squeeze water out of the mask.
This method of removing water is only suitable for cases where the nose is located inside the mask.
If your ears are blocked
Even at shallow depths – 2-3 m – swimmers’ ears become blocked. The air in the ears creates pressure, which has an adverse effect on well-being. To remove air from your ears, pinch your nose. This creates pressure in the nose and ears, and the air escapes without pain.
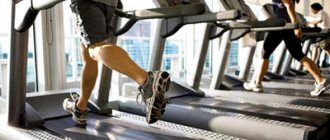
Swimming styles and techniques
There are several basic swimming styles:
- Crawl or freestyle
. In this technique you need to constantly move your legs and make alternating strokes. You can swim crawl on both your front and back. - Breaststroke
_ The arms make powerful strokes underwater, and the legs move like a frog. - Butterfly
. The arms make a powerful stroke, and the legs move like a dolphin's tail.
Swimming instructors say that you can start learning with any style, but the easiest way to start is crawl swimming.
Rotation from one style to another
As we have already understood, alternating styles will bring the most effective results, but few people know that you can change one for another not only by starting a new swim from the side.
You can change one style to another right in the middle of the “path” of the pool - usually this is done for relaxation, when the muscles are tired from the same type of work.
How to transition from belly crawl to breaststroke: Complete the stroke and position yourself so that your body is in a straight line and your arms are in front. From there you can start breaststroke movements - a stroke with your arms and a push with your legs.
If, on the contrary, you want to make a breaststroke turn into crawl , then after a whole cycle of movements (stroke with arms, inhalation and push with legs), you need to take the same straight pose with your hands in front of you and begin the transition to crawl with an arm stroke.
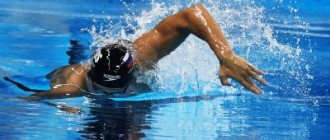
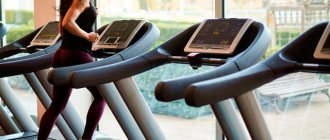
Crawl
Crawl, or freestyle, is the fastest type of swimming and most suitable for beginners. In addition, you can only swim the crawl on your back.
Front crawl swimming technique
When learning to swim front crawl, it is important to master the correct stroke, as well as learn to glide through the water and feel the balance of the body.
You need to keep an eye on the following things:
- Gather your fingers so that your palm turns into a “cup” and row alternately with your right and left hand. It is important not to hit the water, but to plunge your hand smoothly and confidently. To avoid splashing, the thumb should first touch the water, then the entire “cup”.
- Bend your shoulders and elbows at the beginning of the movement and fully straighten at the end. The main impulse of the arm movement should take place under water.
- Move your legs at the same time. The amplitude should be small, and the movements should be free and smooth. There are approximately two to three leg movements per stroke.
- Inhale air and release it into the water as you turn your head towards your raking hand. In this case, the face should always be lowered down, but the body should alternately turn in one direction or the other, depending on the phase of the stroke.
Backstroke swimming technique
Swimming crawl on your back is even easier than swimming on your front: you can row with straight arms, and you don’t need to immerse your face in the water. The main burden falls on the legs.
Basic Rules:
- To breathe correctly, turn your head towards the hand that is currently working above the water. For one inhalation there should be two or three cycles of hand work.
- Do not lift your head above the surface of the water - this will put additional stress on the spine.
- For an effective stroke, raise your elbow above the water.
- Make sure that your legs move evenly and without unnecessary effort. Start moving your legs from the hip, not the knee.
Exercises on dry land
One of the effective exercises for learning crawl on land is leg training:
- Lie on your left side and straighten your legs.
- Make small amplitude swings with your right leg. You should feel the anterior thigh muscle.
You can also work on your hands:
- Lunge forward and lean slightly towards your supporting leg.
- Imitate strokes using both hands alternately.
- Try combining the exercise with breathing.
It is important for professional rabbit climbers to develop strength and endurance. Therefore, there are sets of exercises for them not only on land, but also on water.
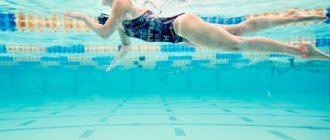
Water crawl exercises
To swim the crawl correctly, you need to hone your leg movement technique. Beginner swimmers are advised to use their legs, holding on to the side of the pool and lowering their head into the water.
Technique:
- Straighten your body, stretch your legs and relax them.
- Perform alternating swings with straight legs.
- Periodically raise your head to inhale and exhale slowly into the water.
The training can be gradually complicated: do the exercise with a board, with straightened arms, under water.
For the hands you can make the following link:
- Swim crawl using only one hand. Straighten the second one and press it to your body. The task is to swim 25 meters like this.
- Then swim, rowing with both hands alternately, but observing the following rules:
- Until one hand is completely out of the water to the fingertips, keep the other hand horizontal.
- When one hand reaches the top point, the second begins to move.
- Do not allow your arm to bend prematurely; keep it underwater, extended in front of you. One hand always rushes forward while the other works.
The exercises teach you to move your arms synchronously, maintain a constant speed and horizontal body position.
To practice hand technique, you can do alternating strokes with a board or train with the help of shoulder blades. This equipment helps increase stroke strength.
Advantages and disadvantages
The crawl technique involves constant movement. Because of this, you get tired quite quickly, even though the energy is spent evenly. For example, when swimming breaststroke, the swimmer gets less tired: he makes a movement that gives the body acceleration, and then glides through the water for some time.
What is the difference?
There is only one similarity between these two styles - they are both performed on the stomach, in everything else they are very different , from the technique of execution to the use of different muscle groups.
The crawl technique involves constant muscle work in a plane perpendicular to the plane of the water, which allows you to develop the highest possible speeds.
In breaststroke, on the contrary, almost all movements occur in water; the swimmer has to constantly overcome the additional resistance of its molecules, which is why he will not be able to move as quickly.
You can also notice that those who swim crawl move continuously , constantly generating acceleration.
With breaststroke, the cycle of movements takes a certain time, after which the person glides along the surface of the water using the acceleration received from the stroke of the arms and the push of the legs. This makes it possible to compensate for the energy spent on overcoming the resistance of the water, and ultimately the swimmer is not overloaded.
An important difference lies in the muscle groups involved: when swimming with crawl, the main working tool is the muscles of the shoulders, arms and back, and when swimming with breaststroke, the muscles of the shoulders, chest and legs.
Breaststroke
Rhythmic and fast swimming style. Suitable for long distance swimming. Breaststroke is taught after the beginner has mastered the basics and learned to glide through the water.
Breaststroke technique
All movements are done quickly, almost without pauses. To master breaststroke swimming techniques and build proper breathing, you need to practice. There shouldn't be any problems with your arms, but the specific movements of your legs will take some getting used to.
Here are a few simple rules to help you master the technique:
- Bend your elbows, bring your palms together and raise them to approximately shoulder level. Then extend your arms and make a sharp stroke with your arms underwater.
- Simultaneously with the stroke, push off the water with your feet, like a frog. The legs will give the impulse to accelerate.
- The body will rise above the water - use this moment to inhale. Raise your head, inhale and exhale lower it into the water before your arms make the next stroke. Don't throw your head back, look straight.
The body should be under water in one smooth line from head to toes. To do this, you need to pull in your stomach and relax your spine. A common mistake when learning to swim breaststroke is to leave your head above the water after inhaling - while exhaling, your face should fall under the water.
Exercises on dry land
Imitation on a bench or floor helps to understand the principle of breaststroke swimming.
Practice your leg movements:
- Stretch out with your legs straight and closed.
- Bend your knees and pull them towards you, pointing your toes out.
- Push your legs and return to the starting position.
Exercises for swimming breaststroke in water
In the water, practice your leg movements by holding on to the side or using a board: “turning off” your arms, you focus on the movements of your legs. Remember to raise your head as you inhale and lower it under the water as you exhale.
Advantages and disadvantages
You can learn breaststroke swimming on your own if you have good coordination of movements. It is not easy to develop synchronicity between arms and legs; you need some experience in communicating with water.
Breaststroke works well on the shoulder girdle, pectoral muscles and legs. But the spine practically rests, which is especially useful for people with bad backs.
Which is healthier?
Medicine and sports science do not have a clear answer to this question.
From a therapeutic point of view both of these swimming styles are equally useful , but they can be recommended in accordance with the goals and wishes of the patient, as well as medical diagnoses.
For example, it is important for a person with scoliosis to strengthen his back muscles, which means he should devote as much time as possible to freestyle, backstroke or butterfly.
The crawl is especially good because the almost straight position of the body minimizes the load on the spine , but at the same time allows you to train nearby muscles.
If we consider breaststroke through the prism of medical opinion, then it is ideal for both beginner swimmers and people with poorly developed limbs (elderly or people with disabilities or consequences of injuries) and pregnant women. Intense leg movements not only develop the muscles of the lower half of the body, but also stimulate blood supply to the pelvic organs.
Simply put, the choice of a priority swimming style directly depends on a person’s physical fitness and his goals ; it is impossible to make an unambiguous choice without analyzing the entire situation. But there are a number of expert theories and opinions that the program of any sport should be balanced for a person.
Thus, there will be less benefit from using only one swimming style than from using several in combination.
If we take the leg muscles as an example, then for maximum usefulness in everyday life it is better to develop both the hips and lower legs, this will allow you to walk long distances and perform physical exercises with endurance and repetition.
The same applies to all other muscles - it is always better to develop them together than to perform exercises on only one group. This approach allows you to develop the whole body at the same time, without overloading it. When it comes to swimming, this means that the optimal approach is to alternate swimming styles during each session.
Focusing on one style can be justified by high sporting goals - for example, breaking the world record for the 100-meter freestyle, but for most people this is not relevant, and training only one style can easily overwork or strain the muscles.
Butterfly
Butterfly is a type of swimming in which all parts of the body move simultaneously. Because the legs are closed and their movements resemble those of a fish's tail, this technique is also called dolphin swimming. This style is considered the most energy-intensive.
Butterfly swimming technique
When swimming butterfly, the body constantly moves up and down: when the shoulder girdle lowers for the stroke, the lower back rises. And as the shoulders rise, the lower back sinks under the water. The technique is quite complex, so it is better to master it with a trainer.
Here are the basic rules:
- Extend your arms forward with your fingers closed. Then spread your arms out to the sides, keeping your elbows higher than your forearms. A stroke will occur, the body will rise above the water. At this moment you need to inhale.
- Bring your hands closer to your pelvis, then lift them above the water and quickly move them forward for the next stroke.
- Push with your legs closed, slightly bending your knees.
- For each stroke there are 4 kicks - down-up, down-up. The first two movements raise the head and shoulders, the second - the lower back.
The swimmer periodically lifts his chest out of the water to inhale. At the same time, breathing should also be rhythmic.
Exercises on dry land
Exercises to better understand leg movements:
- Stand with your back to the wall on one leg. Pull the second one forward slightly.
- Squat down, bending your supporting leg at the knee.
- Straighten your supporting leg and tilt your pelvis back.
- Take your other leg back and move your pelvis forward.
The legs move underwater during swimming using the same principle.
Exercise to practice body movements:
- Stand with your back to the wall at a distance of 20 cm.
- Bend over so that your shoulder blades touch the wall.
- Round your spine and “roll” it along the wall from your neck to your lower back.
- Touching the wall with your buttocks, straighten up and then bend at the waist.
Such a wave will help you understand how the body should move from the chest to the tailbone.
Exercises in water
To teach wave-like movements, you can do the following exercise:
- Take air into your lungs and lie down with your chest on the water. Keep your head straight, look down, relax your neck, stretch your arms in front of you.
- Make a stroke, describe a semicircle with your arms and press them to your body. Then bend your elbows slightly.
- Make a wave with your body from head to toe and at this moment return your arms to their original position, moving them forward above the water.
Advantages and disadvantages of the butterfly style
This is a very beautiful type of swimming, but the technique is difficult to learn and perfect on your own. But the instructor can explain everything quickly enough.
Body position
Danil Antonenkov: “Legs-hips-pelvis-back-head-crown - all together form a straight line in the horizontal plane. The top of the head is directed forward, and the gaze is downward. Under no circumstances should you look forward, because when you raise your head, you shift your center of gravity back, causing your legs to sink. As soon as you break the straight line, an angle immediately appears - the head is a little higher, the legs are a little lower. Because of this, frontal resistance increases and speed decreases. Your job is to keep your hips high.”
Swimming: safety precautions
Follow simple safety rules in the pool:
- Listen to the instructor or coach. He will tell you when you can enter and exit the water.
- If you have to share the path with another person, keep to the right, as if driving a car.
- Swim with a cap.
- Do not jump into the pool from the side.
- You should also not push, make noise or create obstacles for other swimmers.
- To avoid slipping, wear rubber slippers and do not run along the pool.
In open water, you can swim only in specially equipped and marked places, without swimming beyond the buoys. You should not dive in unfamiliar places and try to compete with the waves. Remember that a pond is not the best place to learn to swim, especially without an instructor.
Open water or swimming pool?
It is safer to learn to swim in a pool; the main thing is to master the correct push from the side with your legs (the body is extended like an arrow) and a turn from the side, for example, like a “pendulum”.
Open water is fraught with many dangers, so before you begin, you need to study the bottom, starting at a depth where it is easy to reach the bottom. A crawl with one-sided breathing will help you avoid problems when encountering a wave.
Memo
- The best way to learn to swim is to practice constantly.
- The fastest way to learn to swim is to use the services of a coach.
- If you are afraid of water, use a circle, a board and other accessories until the fear passes.
- After training, dry the inside of your ears well to avoid developing otitis externa - “swimmer’s ear.”
- Swimming strengthens the muscles of the whole body, so at first they will hurt. To reduce pain, you can combine swimming training with stretching.
Why do people swim underwater
In some sections of society there is an opinion that only children can dive. Therefore, if you are an adult, you should swim “seriously” and not engage in all sorts of childish things. Of course, if you are a diving athlete, no one will make any claims against you. But what to do if you are just an amateur swimmer who wants to diversify your training and enjoy it?
First, you should determine your goal - why you need to learn how to swim quickly underwater. These can be short dives to get new experiences, or long swims, and even diving and freediving. Depending on the direction of your activity, you need to draw up a specific action plan to achieve the results you need.
Other varieties
The above styles are considered the most optimal and healthy ways to move in the water.
Other varieties that are in demand can also be mentioned:
Swimming doggy style
- Doggy style is not a highly recommended option , which, however, in some cases can be used as an auxiliary exercise.
- On the side - mainly used as an exercise , but in some cases it can also act as an independent method.
If you like to swim underwater, you also like to dive correctly
No one wants to accidentally injure themselves or drown, so knowing how to dive correctly is extremely important.
There are several types of dives. First, let's look at how to act if you have no support under your feet, that is, you are already in the water.
You can swim in a style that is comfortable for you, then make a big stroke with your arms, reaching to your hips. The lower part of the body smoothly moves up, and the head moves down. When your pelvis is sufficiently higher than your head, you can straighten your legs. By rowing smoothly with your hands, you will go completely underwater.
At first, it is not recommended to complicate diving with supported jumps. To begin with, it is important to learn to understand the process of diving, feel your characteristics and take them into account when diving into the water. And only then proceed to more complex diving options. If you decide to dive into the water from a support, then the most appropriate option would be to jump with your arms outstretched forward. Be careful not to hit your body on the water! You can read more about how to properly start from a bedside table in this article.
A few rules for a perfect dive from a support:
- the ideal jump angle is from 45 to 90 degrees;
- the head is located between outstretched arms;
- the chin should be pressed tightly to the chest;
- hands look forward, palms down;
- fingers indicate the direction of the dive;
- a strong kick with your legs prevents your belly from hitting the water.
Sprint
If you are a professional swimmer who swims short crawl, that is, sprint, we recommend using the tips given in Don Talbot’s book “How to Swim Faster.”
It was published in 1976, but is still relevant.
Key tips from Don Talbot:
- legs - bend them a little more strongly, striking more towards the back than down;
- stroke - bring your hand closer to the water and not make a clear bend (in the classical technique it is clearly bent at the elbow and placed in the water - here the author recommends not making such a clear bend);
- there should be a lot of strokes, but not too many - without compromising their strength and efficiency ;
- the capture of water is not actually done - as soon as the hand enters the water, it immediately begins to stroke;
- train holding your breath so that during the distance you need to take fewer breaths, as they slow down the movement.
You can read Don Talbot's full recommendations for sprinters at this link (see pages 23-34).
Features of footwork
During movement, the legs are positioned side by side and perform continuous oscillations in the shin area in a vertical plane up and down. The swimmer's body actively assists in making these oscillations. The first two kick attacks raise the shoulders above the water, the second two lift the back.
The feet are at an angle of 45° in a medium-tension state. The legs seem to turn into the tail of a dolphin, making precise strikes.
Household (applied) types of swimming
There are several more or less common swimming styles other than Olympic ones. In the modern world, they have almost no practical application, but they can be interesting to study simply for the purpose of diversifying training and general development.
Swimming on your side (over-arm)
This is a fairly ancient method of swimming, the roots of which come from India. The legs scissor as in freestyle, and the arm makes asymmetrical movements.
This type of swimming was once quite popular; in Russia this type of swimming was very widespread until the mid-20th century, but currently no competitions are held in it.
The only practical use of side swimming is found among lifeguards when rescuing drowning people.
Trejen (trajen)
Trejen is named after the author of this style, who brought this method of swimming from South Africa. It is essentially a combination of freestyle and breaststroke. The arms work like in the front crawl, and the legs work like in the breaststroke.
Despite the seeming absurdity, this is a fairly effective and fast form of swimming. In 1912, even the Olympic Games were won by a swimmer from Canada who used the treadmill style.
From a practical point of view, Trejen can be used to quickly teach adults to swim, when it is not Olympic technique and beauty that is important, but simplicity and efficiency, for example, military personnel and rescue workers.
These and some other outdated types of swimming are well demonstrated in the Komsomolskaya Pravda video:
As practice shows, many people only have a rough idea of what breaststroke or butterfly is. Some have heard something about freestyle or crawl. But they hardly know that they are one and the same. Therefore, we thought it was worth sharing detailed information not only in classes at our school, but also on the Internet.
And, of course, you should start over. With a short excursion into the world of swimming. Therefore, today we will talk about what swimming styles exist.
Sports and household types of swimming
It might sound a little strange. But in the theory of swimming, not only sports or Olympic swimming styles are distinguished, but also applied and everyday ones. The first ones are most likely familiar to you. You've probably never heard of the rest.
Sports styles include:
· Crawl (freestyle)
Backstroke (backstroke)
For household and applied:
· Swimming on the side (over-arm)
Breaststroke
We decided to start with this style because it is considered one of the most popular among non-professionals. Of course, not in an academic form, but in a somewhat simplified form.
This is associated with the process of teaching swimming to amateur beginners. Their first movements in the water resemble breaststroke.
Breaststroke is a style of breast swimming in which the arms and legs perform symmetrical movements in a plane parallel to the surface of the water. Breaststroke is considered one of the slowest styles. But this does not affect his popularity in any way. Since covering long distances on the water, breaststroke is most comfortable.
Crawl (freestyle)
In contrast to breaststroke, crawl is the fastest style. And technically whiter and simpler. At the same time, the ratio between speed and energy consumption is optimal. If a swimmer performs the movements correctly, freestyle allows one to quickly cover long distances in water without overexertion.
How does a swimmer move? Lying on his stomach, he makes wide strokes along the axis of the body. Raises and lowers legs. All movements are performed alternately.
The swimmer's face is in the water. As he moves, he turns his head to take a breath.
Swimming is one of the oldest sports that allows you to get in shape and strengthen your muscles, improve blood flow and relax.