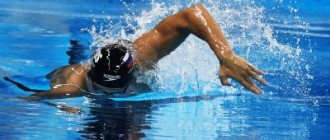
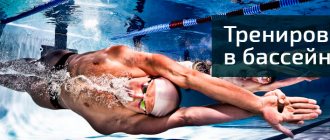
The belly crawl is the fastest swimming style and is the favorite of most athletes. Almost everyone who knows how to swim knows the technique of this style superficially, but we will tell you about its features and nuances that will help take swimming skills to a new level.
The article presents step-by-step instructions for all phases of movement when swimming crawl - from movements of the arms and legs, to breathing techniques, start and finish. The main mistakes are indicated and ways to increase the productivity of novice athletes are considered.
Setting up hand technique
The basis of correct crawl technique, like most styles, begins with hand technique. The following phases are distinguished in the movement of hands:
- immersion of the hand under water and influx;
- supporting and main parts of the stroke;
- hand leaving the water;
- raising your hand above the water.
The first phase is characterized by the entry of the arm, bent at an acute angle at the elbow, under the water. The hand is immersed first, then the forearm and shoulder. The main load during the stroke falls on the shoulder, so the upper limb should enter the water directly in front of it.
After the hand is immersed under the water, it is pulled forward, then another stage of hand movement begins.
It is very important to stretch your arm forward and reach for it with your whole body.
Thanks to this, maximum streamlining is achieved, which allows you to increase speed and reduce energy consumption. The second phase consists of the supporting and main parts of the stroke.
For the support stroke, the arm is slightly bent at the elbow until an obtuse angle is formed between the shoulder and forearm. The main stroke is performed by further bending the arm at the elbow joint until an angle of 90 degrees is formed.
The final action at this stage is straightening the arm before the phase of removing it from the water.
The third phase begins when the straightened arm reaches the position “along the body,” that is, on the side of the swimmer’s pelvis. Here it is worth paying attention to the shoulder area: due to the simultaneous immersion of the other arm under water, it comes out of the water first (then the forearm and palm should come out).
The final phase can be called the simplest: the arm bent at the joint is raised above the surface of the water to perform a new cycle of movements. A very important point is that when moving your hand above the water, your elbow points to the ceiling.
When diving, the arms are lowered not to one line in front of you, but parallel to the center line. The left one is a little to the left, the right one is a little to the right. This also reduces drag and increases speed.
To bring movements to automaticity and improve hand technique, it is necessary to perform a number of exercises (both with and without the use of special equipment). As part of learning the technique of crawl swimming, a swimming board, a stick and wide paddles for the hands are used.
- Catching up . The exercise consists of a person swimming freestyle with the only adjustment that one arm is in a straightened state and points forward, while the other moves according to the previously discussed phases. When the limb that made the stroke catches up with the motionless one, they change roles.
- Three-quarter catch-up . The exercise is similar to the previous one, but the movement of the straightened arm begins a little earlier than the working one reaches its level (it turns out that this limb performs three-quarters of the phases).
- Catch-up with the board . The same exercise, but the stationary hand holds the swimming board, which is transferred to the other hand when changing roles. It turns out to be a kind of relay race.
- On fists . It is necessary to swim crawl, clenching the hands of one or both hands into fists. In this case, you should try to make a stroke with the inner surface of the forearm. The exercise allows you to feel the water better, because immediately after performing it, you can see the difference in the pressure on your hands. This sensation is useful during the pull-up phase and can be used to retain water.
- Three times three . Swimming with the freestyle involves making three strokes in a row with the left hand and then with the right. When changing hands, the body suddenly rolls over to its side.
- Swimming with a bun . When you turn off your legs, it becomes clear how effectively or not you use your arms. Additionally, it stimulates the whole body to be pulled into line.
- Swimming with wide shoulder blades on your palms . This exercise is ideal for those who forget to take their elbow out of the water. Additionally, the strength of the muscles performing the stroke is trained.
Read also[edit | edit code]
- Exercises for learning front crawl swimming techniques
- Backstroke swimming technique
- Breaststroke technique
- Methods of teaching butterfly swimming
- Turning technique in competitive swimming
- Technique of starts in sport swimming
- Freestyle swimming
- Backstroke technique
- Crawl swimming technique
- Breaststroke technique
- Butterfly swimming technique
- Turning technique in crawl and backstroke swimming
- Swimming start technique
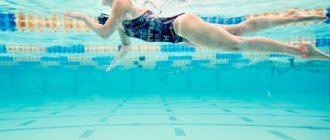
Legs in crawl
As mentioned earlier, the leg technique consists of performing up and down movements alternately. The movements are smooth from the hips, the knees bend only to create a slight wave-like movement of the leg. The sock is always pulled away from you.
The amplitude of the swing should be approximately a quarter of the swimmer's height. When moving correctly, only your heels are visible from the water.
It is very difficult to swim with very submerged legs. If your feet are drowning, there can be two reasons:
- the body in the water is not elongated enough;
- low frequency of leg movements or too large amplitude.
Exercises to improve crawl leg technique. The necessary equipment is a swimming board, desirable - fins and weights.
- We lie down on the water, rest our hands on the side or rope, and when working with our feet there should be a small fountain. If successful, move on to the second or third exercise.
- Swimming with fins allows you to understand the correct amplitude of leg movement (“it’s difficult to swing your fins too much—you get tired quickly”). You need to swim about 800 meters per workout.
- Swimming with a board in your arms outstretched forward and making sure your legs don’t sink is a little fountain. The minimum distance is 400 meters, but 600 in 45 minutes is better. You can rest for 2-3 minutes every 50 meters. The face rises only to inhale - exhale into the water.
- For advanced exercisers, you can use 0.5 kg weights on each leg (purchased at a sports store) - it effectively develops leg strength. You need to swim 100 meters with them in the middle of the workout.
Correct trajectory
During the stroke, our arm moves along a zigzag curve - it is bent at the elbow and seems to pass under the body and extend to the side.
This is a fundamental point, since if you make movements with straight arms, reminiscent of a “mill,” then the efficiency of your progress in the water will be very low.
Therefore, it is more correct to lead it in a zigzag. Sometimes this path is also associated with the English letter “S”, and if you look at both hands, they seem to be drawing the number eight together.
In these two pictures, the illustrators tried to depict this movement:
Zigzag trajectory - fig. 1 Zigzag trajectory - fig. 2
Breath
The swimmer's movement will be correct only with proper breathing.
The main characteristic of breathing when swimming crawl is rhythm.
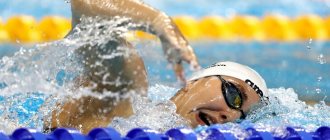
Inhalation is carried out through the mouth while turning the head to the side, towards the rowing hand (this creates a so-called air pocket). Then the face is lowered into the water, where exhalation occurs (first through the mouth, then through the nose).
The number of breaths on each side should be the same, since it is in this case that the rotation of the body will be correct, which will ensure a high speed of movement.
It is best to inhale every 3rd or 5th stroke with your arms. This way you will practice turning your head in both directions. But when learning to swim crawl, it is permissible to take air every second stroke - the main thing is to alternate (one pool of breathing on the left, the second on the right).
When taking air from the right side:
- The left arm is extended forward.
- The right one is extended back along the body, while the right shoulder begins to move out of the water.
- The head turns to the right side, the gaze looks back - inhale.
Same for the left side.
Leg movement while swimming
When swimming crawl, the legs make alternating movements up and down. Leg movements can be divided into two phases - preparatory and shock. In the preparatory movement, most of the muscles are relaxed, the leg is straightened until it reaches a horizontal position. After this, the foot begins to move down, the knee moves down. Once the foot is at or above the surface of the water, the impact phase begins.
The shock phase is aimed at developing lifting force, creating and maintaining a driving force. In the impact phase, the lower leg moves downwards, at the beginning of the movement, the foot faces the toe inwards, the thigh continues to move downwards, gradually bending at the knee, in the final stage the thigh moves up, the foot arches with the toes outwards. The number of kicks per cycle of two arm strokes is usually two, four or six. For beginners, we recommend using the six-beat crawl, as this technique is easier to master. The double kick crawl is usually used for long distances.
Coordinated crawl swimming
Leg movements are usually 2-3 times faster than arm movements. Depending on how many leg movements occur in one cycle of changing hands, a two-, four- or six-fold crawl is distinguished.
However, in order to learn to swim crawl, there is no need to monitor this; it is best to concentrate on the correct position of the body and head when inhaling, and, in fact, on the breathing itself. If you feel that you are getting tired quickly, do 2 leg swings for each hand stroke.
An important point in swimming with any style is the gliding effect. To do this, in the crawl you need to fully stretch out, tuck your shoulders and reach for the arm that is currently extended forward.
Typical beginner mistakes
Crawl is a technical swimming style in which the slightest nuances affect movement performance. Swimming crawl is not difficult, it is difficult to avoid making mistakes.
Typical beginner mistakes:
- The head is raised too high. This leads to rapid fatigue of the neck muscles. If a person swims crawl correctly, then only the top of the head is visible from the water.
- Excessively turning your head while inhaling. Because of this, the swimmer loses balance and speed decreases.
- Weak turns of the head and body during inhalation. This makes it difficult for a floating person to breathe air.
- Inhalation and stroke performed simultaneously lead to loss of speed and balance.
- Exhalation done at the wrong time. This mistake is often made by both beginners and professional swimmers. The result is a loss of speed.
- By pressing his chin to his chest, the swimmer loses agility. Mobility of the upper body decreases. The body is not able to move at high amplitudes.
Body position
The ideal starting position for crawling: a straight line with the lower part of the body slightly lowered into the water (keeping the whole body afloat requires a lot of energy, 20 centimeters is the average depth for comfortable swimming).
During swimming, a person spends most of the time not on his stomach, but in a half-turn, since the style requires constant rotation of the body for maximum effective acceleration and streamlining.
The rotation is simple to perform - the body seems to follow the working hand, leaning on the second one rowing under water, and turns to one side during entry , after which, simultaneously with lowering the hand and exhaling, it takes a straight position.
History of style
Crawl as a swimming style has been known to mankind for a long time, but Europe “met” it only in 1844 during sports competitions in London. English swimmers at this time swam breaststroke, so they were quickly defeated by the American Indians. But even defeat did not force the British to use the crawl - they considered this style too noisy and “wet” due to the abundance of splashes.
Healy, an Australian athlete, made a great contribution to the development of the crawl. He demonstrated how you can coordinate your arms and legs while rowing. At the same time, with his legs folded at the knee joint, he made intense blows on the water, focusing on his shins. Famous crawler swimmers of our time were the American J. Weissmuller and the athlete from Hawaii D. Kahanamoku, who lives in the USA. The peak of Weissmuller's popularity occurred in 1922-1927, Kahanamoku - from 1912 to 1924.
If we talk about women rabbits, we cannot help but mention the Danish woman R. Hveger and the Australian D. Fraser. The first was able to win all the awards in freestyle swimming from 1936 until the end of the Second World War, and Fraser was able to cross the line in the 100 m race.
What to pay attention to
- Try to make longer strokes - glide.
If you do your moves too frequently, you'll get tired quickly and won't gain much (if anything) in speed compared to longer sliding movements. - Remember to relax as you carry and enter the water.
- During strokes, it is also recommended to do small rotations of the body - it is believed that this allows you to move more efficiently in the water.
- Look at this video analysis of stroke technique Olympic champion Nathan Adrian - the trajectory, rotation, and all other nuances are clearly visible there:
How to swim 800 meters and other long distance freestyles
Swimming long distances with crawl while maintaining high speed both in the pool and in open water has the following features :
- Breathe every second stroke. Over long distances, the body requires more energy. Accordingly, in order for the muscles to receive a sufficient amount of energy and oxygen, it is recommended to breathe every second time. However, if you are in good shape, breathing every third stroke is also normal practice.
- Movements should be made less intense compared to sprint distances - so that you have enough strength. More attention needs to be paid to gliding and technique.
- You need to try to distribute your strength so that the second half of the distance is no slower than the first - that is, you don’t need to burn all your strength at the very beginning . At the same time, in the end, on the contrary, you need to give your best.