Home/Health/How useful are arm swings?
Everyone remembers swinging their arms as an exercise from school or kindergarten; everyone lined up during physical education and waved their arms in different directions.
Many people have the feeling that this simple exercise is useless, it’s only needed before running, or it’s generally “girly,” but this is not the case.
In fact, arm swings maintain health and keep muscles toned; it is advisable to perform this exercise every day.
Below we will write about the main advantages of this exercise.
Rotating your arms in a circle is a natural and simple activity that warms up and strengthens the shoulder girdle; if you do it daily, you can improve your physical fitness, improve your health and even improve your mood.
Few people know how to swing their arms correctly, here is a small explanation of how to perform the exercise correctly:
- Stand up, place your feet shoulder-width apart, bend your knees slightly;
- When rotating with your hands, the impulse comes from the very feet;
- The swings should be made continuous, first a few swings forward, then the same number back, then repeat the operation again;
- You can complicate the task a little, try to swing one hand forward, the other back, it will be difficult at first, but over time your brain will create neural connections for such a swing, and you will do better. This exercise is beneficial not only for the body, but also for the brain;
Exercises for the shoulder girdle and arms
Stretching exercises
Hand circling
Rice.
1 Large circular movements with the arms Exercise 1 (Fig. 1). Starting position: basic stance - feet shoulder-width apart, arms down along the body. Large forward circles with your arms and then large backward circles with your arms. Perform for 20-30 s.
Rice. 2 Small circular movements with hands
Exercise 2 (Fig. 2). Starting position: standing, feet shoulder-width apart, arms to the sides. Small circular movements on the side of the body: first forward, then back. Perform for 20-30 s.
Rice. 3 Circular movements with straight arms
Exercise 3 (Fig. 3). Starting position: main stance. Circular movements with straight arms in front of the body: first forward, then back. Perform for 10–15 seconds in each direction.
Swing your arms
Rice. 4 Swing your arms
Exercise 1 (Fig. 4). Starting position: main stance. Swing your right hand forward-up-back, with your left hand down-back. Swing your left hand forward-up-back, with your right hand down-back. Swings are performed with maximum amplitude, with straight arms for 15–20 s.
Rice. 5 Arm swing
Exercise 2 (Fig. 5). Starting position: main stance. Rocking relaxed arms with active assistance from the torso. The right hand is forward and upward, the left hand is upward and backward, to the starting position. Left hand forward and up, right hand up and back. To the starting position. The exercise is performed for 15–20 s.
Rice. 6 Swing your arms up and to the side
Exercise 3 (Fig. 6). Starting position: main stance. Swing your right hand up and to the side (over your head), with your left hand down and to the side (behind your back) with the torso tilted to the right. To the starting position. Swing your left hand up and to the side (over your head), with your right hand down and to the side (behind your back) with the torso tilted to the left. To the starting position. The exercise is performed 10–15 times.
Rice. 7 Arm swings with torso rotation
Exercise 4 (Fig. 7). Starting position: standing, leaning forward, arms to the sides. Swing your arms to the right with a twist of your torso. To the starting position. Swing your arms to the left with a twist of your torso. To the starting position. Repeat the exercise 10–12 times.
Abduction of arms
Rice. 8 Arm abduction
Exercise 1 (Fig. 8). Starting position: standing, feet shoulder-width apart, arms brought to the chest. Move your arms to the side, take a deep breath. To the starting position - exhale. Repeat the exercise 10–12 times.
Rice. 9 Retraction of arms back and up
Exercise 2 (Fig. 9). Starting position: basic stance, partner holding the wrist from behind. Maximum abduction of the arms back and up. To the starting position. Repeat the exercise 8–10 times.
Rice. 10 Abduction of arms with deflection
Exercise 3 (Fig. 10). Starting position: main stance. Move your arms up and back, bend over. To the starting position. Repeat the exercise 8–10 times.
Rice. 11 Arm abduction in the lock
Exercise 4 (Fig. 11). Starting position: standing, arms straight up, in the lock. The partner is behind, the right hand is on the hands of the person performing the exercise, the left rests on the back. Move your arms up and back as far as possible with the active help of your partner, bend over. To the starting position. Repeat the exercise 6-8 times at a slow pace.
Rice. 12 Retraction of arms back and up
Exercise 5 (Fig. 12). Starting position: main stance. Move your arms straight back and up. Return to starting position. Perform at a slow pace with maximum abduction 6–10 times.
Rice. 13 Pulling the arms back and up with the help of a partner
Exercise 6 (Fig. 13). Starting position: standing, leaning forward, hands behind in the “lock”. The partner is on the side with his palm on his neck. Maximum abduction of the arms back and up with the active help of a partner. Return to starting position. Perform at a slow pace 6–10 times.
Strength exercises
Rice. 14 Pull-ups by bending your arms
Exercise 1 (Fig. 14). Starting position: hanging on the bar, medium grip. Pull up by bending your arms. Return to starting position. Perform 8–10 times.
Rice. 15 Push-ups
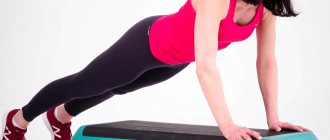
Exercise 2 (Fig. 15). Starting position: lying down, face down. Do push-ups with your arms straight. Return to starting position. Perform 10–12 times.
Rice. 16 Push-ups
Exercise 3 (Fig. 16). Starting position: lying on your back, support. Straighten your arms, do push-ups. Return to starting position. Perform 6–8 times.
Rice. 17 Handstand
Exercise 4 (Fig. 17). Starting position: handstand, partner holding straight legs. Bend your arms and lower yourself down. Return to starting position. Perform 6–8 times.
Rice. 18 Bending and extending the arms, overcoming the partner’s resistance
Exercise 5 (Fig. 18). Starting position: standing, one leg bent at the knee, forward, the other straight - back, arms extended forward to meet the partner’s arms. Flexion and extension of the arms. Overcome your partner's resistance for 20–30 seconds.
Rice. 19 Raising hands, overcoming resistance from a partner
Exercise 6 (Fig. 19). Starting position: standing, feet shoulder-width apart, arms to the sides. Your partner is behind you, holding your wrists. Raise your hands up, overcoming your partner's resistance. Return to starting position. Repeat the exercise 6–10 times.
Source: Tennis for everyone, authors V. L. Gorokhovsky, V. E. Romanovsky
Be careful!
If you are concerned about cervical osteochondrosis, then when engaging in physical therapy, you must follow the following rules.
1. In the acute phase of the disease, exercise therapy is not prescribed. Doing exercises “through pain” should not be allowed.
2. Movements should be slow and unsharp.
3. Remember - with cervical osteochondrosis, circular movements of the head are unacceptable. You should also not throw your head back.
4. Do not use devices for traction of the cervical vertebrae without consulting a specialist - carelessness can cause serious injury.
5. If you have intervertebral hernias, be sure to consult your doctor!
Good for your figure
Swings are an isolation exercise that is aimed at strengthening muscles. You won't be able to build muscle tissue with them - there are basic exercises for that.
There are different types of swings. They can be used for both the lower body and the upper body. Rhythmic leg movements affect several muscle groups:
- quadriceps;
- hamstring biceps;
- gluteal muscles;
- adducting and abducting.
Exercise gets your blood flowing, helping you get rid of the orange peel. Metabolism also improves and calories are burned.
Important! Some girls believe that leg swings can get rid of fat in the thigh area. Actually this is not true. Fat is lost when there is a nutritional deficiency. Physical exercise is necessary for a toned and sculpted body.
To strengthen the shoulder girdle, perform arm swings. The exercise has one peculiarity - it is done with light weight (with the exception of training for professionals). Depending on the types of swings, the following muscle groups are worked out:
Types of execution
Stagnation is detrimental, so after a while the body needs to give a little shake-up. A few simple ways will help diversify the exercise.
First option
Perform arm abductions with dumbbells alternately. The advantage is a greater effect, as well as the ability to control the correct execution. The same muscle group is trained, but it is easier to perform the exercise, since you can rest your free hand on your side or put it behind your back.
Second option
Perform swings while sitting , on a bench or stool. The body must be brought as close as possible to the knees and the exercise must be performed from this position. When moving up, your arms should be slightly bent at the elbows. With this tilt, not only the middle, but also the rear beam is included in the work. For complete isolation, the back can be straightened, but the risk of injury increases.
Some athletes do abdominal swings, but then it works not only the rear and middle deltoids, but also the pectoral muscles. Isolation cannot be achieved.
Download once, download twice
Trainers recommend combining different types of leg swings so that the muscles of the buttocks and thighs can receive a comprehensive load.
This exercise is simple and does not require special equipment (although you can use additional equipment). It can be done both in the gym and at home.
Swing forward
Starting position: stand exactly against the wall. We lean against the wall with one hand, and place the other hand along the body.
Raise one leg as high as possible. Keep your back straight, don't bend. We lower our leg. Repeat the exercise 10-15 times.
Then do the same manipulations with the other leg. For the greatest load, you can use weights.
Retraction
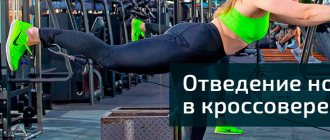
This exercise can be performed from different positions - standing, lying on your side or on all fours. You can do this in the gym using a crossover machine.
Starting position: stand straight, feet shoulder-width apart. Arms are straight and extended to the sides.
We begin to move the straight leg to the side as much as possible. We keep our body straight, do not bend or bend.
Lower your leg and return to the starting position. Repeat 10-15 times on both legs. For more, you can resort to weights.
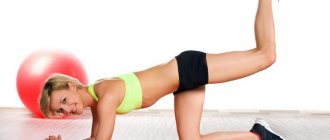
Swing back on all fours
Starting position: get on all fours. Palms pressed tightly to the floor. We begin to move our leg back and up. The leg should be level with the back.
We do 15 swings on one leg and the same on the other. For greater load, you can wear weights.
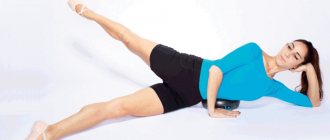
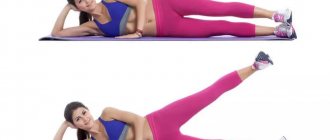
Lying on your side
Starting position: lie on the floor on your side. We rest our upper body on our arm bent at the elbow. We place the other hand in front.
Bend one leg at the knee. We begin to lift the other leg with a small amplitude. We do not pull out the toe. Repeat 15 times. Then we change position and do similar movements on the second leg.
Video exercise
In this video you can get acquainted with performing leg swings in a crossover simulator. The technique is described in detail here.
You will find more exercises in the article “Exercises on the crossover simulator.”
Swings with dumbbells
Starting position: stand with your feet shoulder-width apart and slightly bent at the knee joints.
We place our hands with dumbbells along the body, slightly bending them at the elbows. The back should be straight and the shoulders should be straightened.
We begin to slowly raise our arms with dumbbells to shoulder level. When lifting, the elbow should point upward. Then we gradually return to the starting position. Repeat 15 times.
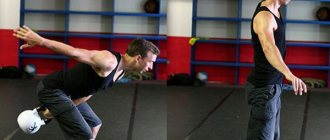
Swing with two hands
For this exercise you need to use one or two weights.
Starting position: stand with your feet shoulder-width apart. We move our pelvis back a little and keep our back straight. We place the weight between the legs.
We tear the shell off the floor. We make a small swing back (here you can tilt your body forward a little, but keep your back straight).
As soon as the weight begins to descend, you need to jerk your legs and buttocks. We straighten our knees and move our pelvis forward.
If you did everything correctly, the weight should “fly up” in front of you (as in the photo). Next, we bring the projectile to the shoulders or chin level. Then we lower it down and take it by the heels. Repeat the exercise 8-10 times.
Swing your arms back
I suggest you watch the video, which clearly shows swinging your arms back in a crossover.
Bent-over dumbbell raises
We stand up, place our feet shoulder-width apart, and bend our knees slightly. We hold dumbbells in our hands. It is necessary to tilt your body slightly forward.
We begin to spread and close our arms using the shoulder joints. We keep the body motionless. Repeat 15 times.
Execution technique
The exercise is a priority in shoulder training, preferably performed immediately after the base - lifting the barbell from behind the head.
The correct starting position is 50% of the work done.
- Taking the equipment in your hands, stand up: feet shoulder-width apart, weight should be transferred to the toes, back straight, arms along the body.
- The grip is neutral - point your palms towards your hips.
- Keep your head straight, standing dumbbell swings are best done in front of a mirror , then you can see all the inaccuracies and mistakes.
- Breathing is standard: when raising your arms, exhale, while lowering your arms, inhale.
- Inhale, and as you exhale, raise your arms with the dumbbells up. Try to get above shoulder level.
- Having brought your hands to the top point, you can lower them down. You should not hold your hands at the top; such a delay will not in any way affect the quality of the swings from the sides.
The exercise is quite simple to perform, taking into account compliance with all technical rules.
What to remember
Leg or arm swings are isolation exercises. They are aimed at developing and strengthening a specific muscle. Thanks to them, the body becomes toned and elastic.
To achieve weight loss, you need to change your diet. Physical activity to a greater extent cannot influence the fat layer.
A deficit of at least 10% in the daily menu will lead to weight loss. And swings will help work out the problem area.
There are many varieties of swings. They can be performed with arms and legs, forward and backward, to the sides and from different positions. It is also allowed to use additional equipment: dumbbells, weights or a machine.
To achieve good results, experts advise training on a regular basis - 3-4 times a week. It is important not to forget to do warm-up and stretching exercises.
That's all I have. See you again on the expanses of my blog! Don't forget to subscribe to updates - there's a lot of interesting things ahead!
Some useful tips for men and women
Dumbbell abductions to the sides have some peculiarities in execution , therefore, before starting the exercise, you should know what mistakes you should not make:
- Don't bend your elbows. This is the main mistake of swinging dumbbells to the sides, both while sitting and standing. Elbow bending engages the triceps and deprives the exercise of its isolating status. There is one simple way to avoid this. During execution, the dumbbells should be held along a tangent line upward, and not in a straight line.
- Select the appropriate weight of equipment. First of all, this applies to girls, since the characteristics of the female body imply the implementation of this type of swing solely for quantity. But you won’t be able to perform the exercise with a lot of weight and without bending your elbows - this is where physics comes into play.
- Raise your arms above shoulder level. When performing standing abductions with dumbbells, many athletes try to prevent further raising of their arms, bringing them only to shoulder level. This is not correct, since the maximum upward movement will create a high load on the middle bunch of deltas, and, accordingly, on the shoulder girdle.
Swing your arms to the sides [edit | edit code ]
Description of the exercise
• dumbbells • lateral raise machine • block (cable) machine
• arm swings in a crossover • arm swings in a simulator for raising arms to the sides
Raising your arms to the sides
belongs to the category of isolating exercises, since here only the shoulder joints are moved. As a result, only the middle bundles of the deltoid muscles are actually worked out. This trajectory of raising the arms is atypical for most sports and everyday activities, which explains why the middle bundles of the deltoid muscles play only an aesthetic role, creating a beautiful relief of the shoulders. This justifies the choice of this exercise as the main or first one.
Take two dumbbells or machine handles. Raise your arms, keeping them as straight as possible. Keep them in the same plane as your body throughout the exercise. Raise your arms so that they are parallel to the floor. Pause for a second, then lower your arms. Repeat the exercise at a slow pace.
Raising your arms to the sides can be done with dumbbells, as well as on a cable or special machine. Analyze the advantages and disadvantages of each exercise option presented in this section to choose the one that suits you best.
- Because the deltoids are easy to isolate, they are effectively targeted with weight-loss approaches. You don't have to worry about other muscles getting tired before your deltoids. As we've already discussed, decreasing weight sets will allow you to continue the set when you reach the point of fatigue. And you don't have to fiddle with changing the form of the exercise to make it easier to do. To do this, you should stop briefly and quickly remove about a third of the weight, then immediately resume the set. This will help maintain the burning sensation in the muscles. You can reduce the weight 1-2 times depending on the level of muscle depth you want to achieve (the more often you drop the weight during the set, the more intensively you work the muscles).
- Many women are tempted to cheat and change the form of the exercise to work with more weight, but this is counterproductive.
- If you violate the exercise technique by rocking your torso in order to raise your arms, you will have to arch your lower back. This will create unwanted stress.
Almost any variation of raising your arms to the sides loads the lower back. Therefore, it makes sense to use a weightlifting belt to reduce this load as much as possible.
- Throughout the entire exercise, hold your hands so that your thumbs are lower than your little fingers; This way you will be able to focus your efforts on the middle bundles of the deltoid muscles.
- Try not to bend your elbows to make the exercise easier, as this will start working the anterior deltoid muscles.
- During the first few repetitions, you should completely stop the movement in a position where your arms are parallel to the floor. If you can't do this, you may be relying too much on momentum or lifting weights that are too heavy to perform the movement.
- If you are using dumbbells, begin the exercise at a normal pace. When the muscles get tired, immediately move on to the chin row. These two exercises make up a superset, which is an advanced training technique.
Benefits of Dumbbell Lateral Raises
- You can use not only dumbbells, but also any other weights that you can hold in your hands (for example, water bottles).
- By changing the position of the upper body (leaning slightly forward or to the side), you can more effectively work the middle and rear deltoids. In this case, keep your back straight and use a weightlifting belt to avoid lower back injuries.
Disadvantages of lateral raises with dumbbells
Despite the fact that this exercise is the most common variation of arm raises (primarily because it does not require complex sports equipment), using dumbbells has more disadvantages than advantages. Below are three reasons that may convince you that this exercise option is not the best:
- When you begin to lift your arms, most of the work is done by the supraspinatus muscles, not the deltoids. The deltoids only come into action during the last two-thirds of the movement. And since the supraspinatus muscle is quite weak, excess load can lead to chronic pain in the shoulder area.
- During this exercise, the load is distributed unevenly. The higher you raise your arms, the weaker your shoulder muscles become. The load created by dumbbells increases as you raise your arms. As a result, the degree of difficulty increases as the muscles weaken. This unfavorable relationship between load distribution during movement and changes in muscle strength makes this exercise not the most optimal for working the deltoid muscles.
- The deltoids are stretched only to a small extent because the load created by the dumbbells is quickly reduced as the arms are lowered.
Of all the options for raising your arms to the sides, the option with dumbbells is the least productive and the most dangerous.
Arm raises on the simulator [edit | edit code ]
The advantage of raising your arms to the sides on the machine
- A good lateral arm raise machine is very effective because it puts lateral force on the arms. It is at this angle that the middle bundles of the deltoid muscles are best worked out. When you perform an exercise with dumbbells, it creates a vertical load that overuses the supraspinatus muscles.
Disadvantages of arm raises on the machine
- On a special simulator, the deltoid muscles practically do not stretch, just like when using dumbbells. This reduces the range of motion of the exercise.
- On many lateral raise machines, the distance between the axes of the moving arms is not adjustable. However, it must match the width of your collarbones, so not every machine will suit you. You can get the most benefit from training on a machine that is too narrow or wide if you lift one arm at a time. This way, you can position your shoulder so that it coincides with the axis of rotation of the machine.
- Often you will not be able to change your body position to more actively use the middle and rear deltoid muscles.
Raising your arms to the side on a cable machine [edit | edit code ]
Benefits of Cable Arm Lateral Raise
- Cable machines are more common than special lateral raise machines. They allow you to perform this exercise most effectively and safely.
- The direction of application of the load here better corresponds to the anatomy of the deltoid muscles than when raising the arms to the sides with dumbbells. Ideally, the cable should be slightly below the knee; then the load will not be vertical, but corresponding to the axis of movement of the shoulder.
- The range of motion here is greater because the cable machine allows you to move your right arm further to the left and your left arm further to the right at the bottom of the movement path than when training with dumbbells or a lateral raise machine.
- By changing your body position (leaning slightly forward or to the side), you can more effectively use the middle and rear deltoid muscles. In this case, keep your back straight and use a weightlifting belt to avoid lower back injuries.
Disadvantages of lateral arm raises on a cable machine
- You won't be able to work both arms at the same time. You will have to train one arm at a time, and this doubles the training time.
- When the cable is installed in the lowest position, the load is not completely lateral, which forces the supraspinatus muscle to be more actively used to the detriment of the deltoid. This option is not much better than raising your arms to the sides with dumbbells.
Other options[edit | edit code]
Variations of arm raises
- You can increase your range of motion by raising your arms as high as possible rather than stopping the movement at shoulder level. If you use this variation, you should slowly rotate your hands so that they are facing each other at the top of the movement. As you lower your arms, you should rotate your hands again so that at the bottom of the movement, when the dumbbells touch your thighs, your thumbs are facing each other. This option allows you to use the anterior deltoids and trapezius muscles more actively than the basic version of the exercise.
- Using dumbbells or a lateral raise machine, perform the movement for both arms at the same time. You should only do the exercise for one arm at a time if you feel like you are training the trapezius muscle more than the deltoid muscles. This can happen if you have wide collarbones.
- Using dumbbells, you can perform this exercise sitting or standing. In general, the technique is easier to follow in a sitting position. You can try starting the exercise sitting, then when you get tired, stand up and do a few additional reps.
- Using a cable machine or dumbbells, you can raise your arms not to the sides, but in front of you. This option allows you to work mainly on the anterior bundles of the deltoid muscles, which for most women will be superfluous. However, this option can be used to warm up joints and ligaments. Here you can use a neutral or overhand grip with your palms facing down.
What exercises for arms and shoulders should you do more often?
Tags
No matter how rapidly a healthy lifestyle and sports are popularized among women, today there is still an opinion that some types of physical activity are intended exclusively for men.
These, in particular, include exercises for the arms and shoulders. Many girls believe that only representatives of the stronger sex need to perform such exercises, but this opinion is erroneous.
© Depositphotos
Firstly, strength in the hands is very practical, it will definitely be useful in the life of every lady. Secondly, the clear relief and contour of the hands emphasize the grace of a woman, making her silhouette more sporty and aesthetic.
© Depositphotos
Among other things, some of these exercises are designed not only to create a beautiful and healthy body, but also to improve concentration and improve the functioning of the human brain as a whole. It’s these kinds of exercises that the editors of “So Simple!” today he will tell you.
Warm-up rules
Warm-up exercises accelerate blood circulation and expand the range of motion of joints, helping to prevent injuries. Warm-up exercises must be selected taking into account age, health status, body type, and muscle group being trained. Warm-up can be divided into groups:
Universal or general.
Performed before any physical exercise, preparing the entire body for training.
Special.
Aimed at maximum warming up of the muscles that will be worked out during training.
Stretching.
A popular type of body warming, it improves muscle stretchability and joint mobility. It is included in a separate group, although its elements may be present in the general warm-up complex.
Basic rules for all types of warm-ups:
- The exercises should be simple.
- The duration of the body warming session should be about 15 minutes.
- The warm-up begins with the upper body, gradually moving to the lower parts of the body.
