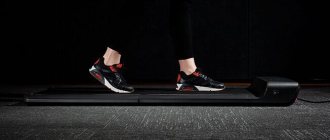
Running belt parameters
the more layers the fabric has, the longer it will last.
When choosing a treadmill, pay attention to the technical characteristics of the moving element, since the comfort and effectiveness of the workout depends on this.
Running belts consist of one, two, three, four layers. The more layers, the longer it will last. And if the tape is double-sided, then over time it turns over to continue studying.
There are exercise machines with orthopedic fabric that soften the impact and protect against injury. To enhance the orthopedic effect, choose sports shoes specifically for exercising in the gym.
And thanks to special shock absorbers, the load is removed from the joints, as the impact of the foot on the track is softened.
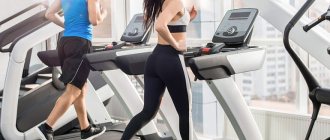
Another parameter is the speed of the running belt. Elderly, disabled people, and patients during rehabilitation should exercise at a minimum speed - from 500 to 800 m/hour. The maximum speed for the standard model is 15 km/h , and for the professional model it is 23 km/h.
When starting or stopping, the moving element must move smoothly.
The intensity of the load depends on the speed, the angle of inclination of the running belt, the greater it is, the more training options: imitation of climbing a mountain, running or walking over rough terrain. In standard models, this parameter is adjusted manually, and in electric models using a special button on the mini-computer monitor (without interrupting the workout).
Treadmill Owner's Manual (page 3)
1. With the treadmill idle (the treadmill should be empty), press the SPEED UP button to increase the speed to 6 km/h.
2. Determine whether the walking belt is moving left or right relative to the walking platform.
· If the belt moves to the left edge of the platform:
Using a wrench, turn the left adjustment bolt clockwise ¼ turn.
Using a wrench, turn the right adjusting bolt clockwise ¼ turn.
· If the belt moves to the right edge of the platform:
· If the walking belt is still misaligned, repeat the steps above until the walking belt is centered on the platform.
3. Once the walking belt is in the center position, increase the speed to 16 km/h and make sure it is moving smoothly.
If these steps do not correct the misalignment, you may need to increase the tension on the running belt.
| Turn clockwise to increase belt tension | Turn counterclockwise to decrease belt tension |
LUBRICATION
The treadmill is lubricated at the factory. However, to ensure optimal treadmill performance, we recommend checking the lubrication condition regularly. There is generally no need for lubrication during the first year of operation or the first 500 hours of operation.
Every 3 months, lift the edges of the treadmill and try to feel the surface of the running belt as far from the edge as possible. If you feel traces of silicone spray, no lubrication is required. If the surface is dry, follow the steps below.
Use only high quality silicone lubricant.
Applying lubricant to the running belt:
· Position the running belt so that the seam is in the middle of the platform.
· Insert the spray nozzle into the lid of the lubricant container.
· Raise the running belt on one side, holding the sprayer approximately 15 cm from the front edge of the running belt and platform. Start lubricating from the front edge of the running belt, working towards the rear edge. Repeat the same steps for the second side of the running belt. Each side should take approximately 4 seconds to process.
· Wait 1 minute before turning on the equipment to ensure that the lubricant is distributed evenly.
Cleaning:
Cleaning your treadmill regularly will extend the life of the equipment.
· Attention:
To avoid electric shock, turn off the treadmill before performing any cleaning or other maintenance. The power cord must first be unplugged from the outlet.
· Warning:
Do not use abrasives or solvents. To prevent damage to your computer, do not allow liquid to come into contact with it. Do not expose your computer to direct sunlight.
· After each workout:
Wipe the control panel and other surfaces with a clean, soft, damp cloth to remove any remaining sweat.
Weekly:
To make cleaning the running belt easier, we recommend placing a mat under the treadmill. Dirt that shoes leave on the running surface can fall under the treadmill. Clean the mat on which the treadmill sits once a week.
STORAGE:
Store the treadmill in a clean, dry area. The power button must be in the off position and the power cord must be unplugged.
FOLDING AND MOVEMENT:
This treadmill model is equipped with wheels so that it can be easily moved. Before moving the machine, make sure the power button is in the off position and the main body is in the folded position.
Important Notes
· This equipment complies with current safety standards. It is intended for home use only. Use in other conditions is unacceptable and may be dangerous. We are not responsible for damage resulting from improper use of the equipment.
· We strongly recommend that you consult with a therapist before starting training to make sure that your physical condition allows training using this simulator. Your doctor's recommendations should form the basis of your training program. Improper or excessive exercise can be harmful to your health.
· Read the training instructions and exercise descriptions carefully. If during exercise you feel weakness, shortness of breath, pain or other ailments, stop immediately. If pain persists for a long time, consult your doctor.
· This machine is not intended for professional training or for medical or therapeutic purposes.
Trouble-shooting
TROUBLESHOOTING INSTRUCTIONS:
| SIGN | CAUSE | SOLUTION METHOD |
| Message E0 | Security key not installed | Please install a security key |
| Message E1 | Speed measuring device feedback error | Please check the speed feedback mechanism and the 10-pin wire or contact a service center |
| Message E2 | Motor or drive error | Please check the 10-pin wire or contact the service center |
| E3 message | Overspeed error | Configure the feedback mechanism from which speed data is received, or contact a service center |
TROUBLESHOOTING DURING OPERATION OF THE TREADMILL:
This treadmill is simple and reliable to use. However, if you have any problems using it, please refer to the instructions below:
PROBLEM: The control panel backlight does not turn on.
SOLUTION: Check that the power cord is plugged into the outlet and that the treadmill's power button is in the "on" position.
PROBLEM: The circuit breaker trips during exercise.
SOLUTION: Check that the machine is connected to the 20A power supply for which it is designed.
*Note: No extension cord required.
PROBLEM: The treadmill turns off when rising.
SOLUTION: Check that the power cord is loose enough to reach the outlet when lifted.
PROBLEM: The running belt is not centered during training.
SOLUTION: Check that the machine is installed on a straight surface. Check that the running belt is tensioned sufficiently (see ADJUSTING THE TRADING BELT section).
PROBLEM: There is a clicking sound coming from the front of the treadmill when walking or running.
SOLUTION: To improve the performance of the treadmill, it needs to be leveled.
General training instructions
Start training gradually, for example, adding one block of exercises every 2 days. Gradually increase the load every week. Do short workouts at first, then gradually increase the duration of your workouts. Don't set yourself impossible goals, start with a small amount of training. In addition to training on this machine, perform other types of exercise, such as running, swimming, dancing and/or cycling.
Always warm up your muscles before exercising. To do this, spend at least 5 minutes stretching or doing gymnastic exercises, this will help avoid sprains and injuries.
Check your pulse regularly. If you don't have a heart rate monitor, ask your doctor to tell you how to take your heart rate correctly. Determine for yourself the frequency at which training will be most effective. In this case, it is necessary to take into account both your age and level of physical fitness. You can use the chart on page 18 to determine your optimal heart rate during exercise.
During training, breathing must be calm and even.
During training, you should drink enough fluid to meet your body's fluid needs. Please note that the recommended fluid intake of 2-3 liters per day increases significantly with physical activity. The water or drink should be at room temperature.
When exercising on the simulator, always choose light, comfortable clothing and sports shoes. Do not wear loose clothing that could tear or get caught on moving parts of the machine during exercise.
Exercises for individual training
How to determine what heart rate you should have during training?
Your doctor can give you more detailed information.
| Age | Heart rate at 50-70% (beats per minute) -ideal heart rate during training- | Maximum heart rate 100% |
| 20 years | 100-150 | 200 |
| 25 years | 98-146 | 195 |
| 30 years | 95-142 | 190 |
| 35 years | 93-138 | 185 |
| 40 years | 90-135 | 180 |
| 45 years | 88-131 | 175 |
| 50 years | 85-127 | 170 |
| 55 years | 83-123 | 165 |
| 60 years | 80-120 | 160 |
| 65 years old | 78-116 | 155 |
| 70 years old | 75-113 | 150 |
COPYRIGHT 1997 AMERICAN ASSOCIATION FOR THE RESEARCH OF HEART DISEASES
Heart rate measurement
In order to measure your heart rate, you need to learn how to do it. Place your index and middle fingers on the carotid artery, between the muscles and the airway. Count the number of beats in 10 seconds and multiply this number by 6. The resulting number corresponds to the number of heart beats per minute. An easier and more convenient way is to use a SportPlus heart rate watch.
Exercises to warm up/stretch muscles
A fruitful workout should begin with warm-up exercises and end with calming and relaxing exercises. Warm-up exercises are designed to prepare the body for upcoming physical activity. Calming and relaxing exercises help avoid the appearance of painful phenomena in the muscles. The following are stretching exercises to warm up and relax your muscles. Please pay attention to the following tips:
· Before training, thoroughly warm up all muscle groups that will be involved; you should spend 5 to 10 minutes doing exercises. When performing stretching exercises correctly, you should feel a pleasant tension in the corresponding muscles.
· When performing stretching exercises, speed does not matter. Avoid fast and sudden movements.
EXERCISES FOR NECK MUSCLES
Tilt your head to the right and feel the tension in your neck. Slowly, in a circular motion, lower your head to your chest, then turn your head to the left. You will again feel a pleasant tension in your neck muscles.
You can repeat the exercise several times, performing the exercise alternately to the right and left.
| 1 |
EXERCISES FOR THE SHOULDER AREA
Alternately raise your left and right shoulders, or raise your shoulders at the same time.
| 2 |
ARM STRETCHING EXERCISES
Alternately stretch your left and right arms toward the ceiling. You should feel tension in your left and right arms. Repeat the exercise several times.
| 3 |
EXERCISES FOR THE UPPER THIGH
Place one hand on the wall for stability, then reach back and grab the foot of your right or left foot with your other hand. Pull your heel toward your buttocks as close as possible. If possible, maintain this position for 30 seconds. Repeat the exercise 2 times for each leg.
| 4 |
INNER SURFACE OF THE UPPER THIGH
Sit on the floor. Bring your feet together. Spread your knees. Bring your feet as close to your groin area as possible. Then gently lower your knees down. If possible, maintain this position for 30-40 seconds.
| 5 |
TILTING
Slowly bend your body and try to reach your legs with your hands. Bend down as low as possible, trying to touch your toes. If possible, maintain this position for 20-30 seconds.
| 6 |
EXERCISES FOR KNEES
Sit on the floor with your right leg extended forward. Bend your left leg and pull it towards your inner thigh. Now try to reach the toe of your right foot with your right hand. If possible, maintain this position for 30-40 seconds.
| 7 |
STRETCHING EXERCISES FOR THE CALF MUSCLES AND ACHILLES TENDON
Place both hands on the wall and transfer your entire body weight to your hands. Move your left leg back, then repeat the exercise with your right leg. This exercise is designed to stretch the back of the leg. If possible, maintain this position for 30-40 seconds.
| 8 |
| Due to the large volume, this material is placed on several pages: 3 |
Get text
Canvas dimensions
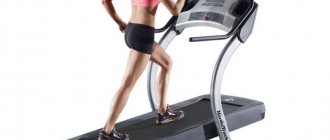
parameters for choosing a canvas: height, weight, step length
First of all, we pay attention to the size of the canvas; its length and width must correspond to the physiological data of a person. The length of the treadmill belt varies from 1 m 10 cm to 1 m 50 cm. As for the width, this figure varies from 30 to 60 cm.
Physical parameters by which a running belt is selected: height, weight, step length, running speed, sports training. To make your choice, test the track for yourself, and in different modes. If you feel comfortable and there is nothing in the way, the simulator is suitable.
Cleaning the Deck
Frequency: Every 3 months
Attention! If the deck is not periodically cleaned, it will cause friction between the belt and deck, premature wear of the deck and belt, and reduced engine life.
Actions:
1. Loosen the running belt tension bolts at both ends.
2. Lift the canvas with your left hand and with your right hand squeeze the silicone from the bottle onto the deck in a zigzag motion from the right side of the deck to the left, from beginning to end. (Approximately 40 ml)
It is recommended that after treating with silicone, spray a little WD-40 on top to thin the silicone.
3. Stretch the running belt.
4. Turn on the track and set the speed to no more than 5 km per hour. Allow the silicone to spread evenly over the entire surface of the deck. Remove excess silicone from around the edges of the deck. Adjust the tension of the running belt.
5. Using an ammeter, measure the current consumed by the motor.
(In the open circuit of the red or black wire.) The current load current should be from 7.5Amps to 11 Amps for a 220V model.) If, after servicing the deck and blade, the current value is more than 11 Amps, the blade or deck needs to be replaced.
Rules for caring for the running belt
extend the life of the treadmill
It is important to properly maintain the treadmill and correct problems if necessary. If used frequently, lubricate the running belt deck every month to prevent wear and tear. This also applies to adjusting the position of the moving element on the treadmill, because it moves due to improper transportation or uneven floors in the room.
Rules of care:
Preventative work
| Position | Daily | Monthly | Quarterly | 2 times per year |
| Console mount | Inspection | |||
| Frame | Cleaning | Inspection | ||
| Power cable | Inspection | |||
| Console display | Cleaning | Inspection | ||
| Steering wheel and handrails | Cleaning | Inspection | ||
| Front shaft | Cleaning | Inspection | ||
| Rear shaft | Cleaning | Inspection | ||
| Danger button | Test | |||
| Web tension | Inspection | |||
| Drive belt | Cleaning | Inspection | ||
| Deca | Inspection and Cleaning | |||
| Canvas | Inspection | |||
| Control board | Cleaning, vacuum cleaner | |||
| Engine | Cleaning |
What sizes do you need to know, and how to remove them correctly?
There are 3 key dimensions for any tape:
- thickness,
- width,
- length.
Thickness
It is difficult to accurately measure thickness using a ruler. Instead, you need to pay attention to the class of the simulator and the size of its rollers. He can be:
- Bytovym. The diameter of the rollers is 20 mm. The suitable thickness of the canvas in this case is 1.8-2 mm.
- Professional (commercial). The diameter of the rollers is 50 mm. The fabric on them is reinforced, two-layer. Its thickness is about 2.9-3 mm.
Reinforced blades from professional equipment cannot be installed on household devices - it is not designed to work with small-diameter shafts and will place too high a load on the motor and controller. At the same time, a thin tape can work on commercial exercise machines, but will wear out several times faster due to its inability to withstand the loads of the gym.
Width
The easiest way to measure the width of the tape is to take the size in a place where it lies flat and does not have severe damage to the edges.
Length
Measuring the length (actually the circumference) requires some patience and skill. To do this, you will need not only a tape measure or a long ruler, but also a writing instrument - a marker or chalk. Before removing the size, you need to remove the plastic protective caps from the back and make sure that the adjusting screws are not in the extreme position, that is, they allow you to tighten the fabric more. This is necessary in order to be able to adjust it in the future.
The length measurement procedure itself is as follows:
- The trainer is disconnected from the network.
- The first mark is placed on the side of the canvas.
- It is scrolled manually until the mark is at the bottom of the plane.
- The distance from it is plotted along a ruler. For ease of reference, you can take 25 or 50 cm.
- The second mark is pulled to the bottom of the deck - a flat base located under the top of the tape.
- A third mark is placed at the same distance.
- By scrolling the canvas, it is lowered until the first mark appears on top of the plane.
- The distance between the first and last marks is measured and added to the previously marked segments. The total will be the length of the running belt required to place an order.
What modes can be used
For beginners, it is recommended to first use the preset modes for training. Their selection is quite large:
- Running on hilly terrain. Such training simulates moving uphill with a gradual increase in load and incline, followed by a decrease. That is, a natural running up and down hills is recreated.
- Fat burning and heart rate control mode. The program allows you to gently regulate the load, training endurance and allowing you to get rid of extra pounds.
- Endurance running. This is a mode with a gradual increase in speed and a zone of maximum intensity. This regime is not recommended for beginners at the very beginning of training; you can switch to it after the second or third week of classes and preliminary warm-up.
- Fat burn with increased intensity. This program involves increased loads, but it is not suitable for everyone. It is necessary to take into account the individual characteristics of the body and follow the recommendations of the trainer.
- Fitness testing. The program first measures individual parameters, then gives a conclusion about the degree of endurance and physical condition. Based on such information, a personal mode is selected.
- Cardio training program. Suitable for professionals and beginners, aimed at strengthening the cardiovascular system and endurance. Great for beginners and the first week of training.
- Workout for the gluteal muscles. The program is used to strengthen a specific muscle group, shape the figure, and get rid of extra pounds.
Choosing the right program and setting up the treadmill increases the effectiveness of your training and allows you to quickly achieve excellent results.
In what cases is it necessary to replace the canvas?
Indicates wear:
- the appearance of tears, protruding threads and a white stripe in the center;
- looseness that cannot be adjusted;
- stretching and deformation;
- slippage during operation;
- division into layers.
Some defects can be eliminated by tension. If you carry out the procedure yourself, there is a risk of tearing the fabric. In this regard, it is better to contact us for help. Our specialists will do the work efficiently and quickly.
Cleaning the drive belt and shafts
The engine compartment should be cleaned once a month. To do this, unplug the treadmill, wait 10 minutes, then open the engine compartment lid and wipe it with a dry cloth. You can vacuum it.
Close the cover, remove the drive belt and wipe it and the grooves from dust. In the same way, remove dust from the shafts themselves.
Check the graphite brushes and replace them if necessary.
Correct electrical connection
Almost all treadmill manufacturers specifically state that the treadmill can only be connected to a grounded outlet. But in old houses it is difficult to find such sockets.
Be extremely careful when working with electricity! We strongly recommend that when working with electricity, and also if you are not confident in your abilities, contact specialists.
Find a treadmill service technician
Ignoring this point is fraught with power surges and damage to the electrical components of the treadmill. To avoid this, you can use a surge protector. Or connect the treadmill to a dedicated circuit, which is much more complicated and problematic.
How to replace a 25mm deck
Used only in professional simulators. Such boards are made from high-strength MDF, both sides are laminated with a heat-resistant material. Thanks to this, they can withstand weight up to 180 kg. Installed on Aerofit, Life Fitness, Precor, Technogym, Sports Art, Matrix, Cybex, Fitex, Johnson, Star Trac, Panatta, Bronze Gym, True Fitness, Schwinn, Nautilus, Svensson Industrial, Sole Fitness, Spirit Fitness, Kraft Fitness and others.
When you call our technician to a fitness club or gym to replace a professional deck, the order processing procedure is as follows:
- Measurements.
- Manufacturing.
- Departure for installation.
To replace in other regions of the Russian Federation, take measurements yourself and report them to us by phone. We send the board by transport company. Install it yourself.
How to make a request to replace the treadmill belt in our service center
You can submit an application by calling +7 (495) 223-12-48 or using the feedback form on the website. If you live in Moscow:
- Call a technician to your place. He will visit you at a convenient time, take measurements, and negotiate the price and timing of the service. After receiving approval, the specialist will replace the old tape.
- Measure the replacement material and contact us to manufacture the part. After this, the master will install the canvas.
If you live outside of Moscow, then take your measurements and place an order. Specialists will send the part by transport company or Russian Post. In this case, installation will be carried out by the owner of the equipment.