Sometimes it seems to me that there is a real war going on around me about videos teaching split stretching. They offer to do the splits in 15, 10, and even 5 minutes. in a day! Who is faster? The funniest thing is to watch when gymnasts and acrobats give unimaginable recommendations to “beginners” to do a cross split between two chairs and show them warming up before this in the form of tilting their head and body, optimistically encouraging them in the spirit of “the main thing is to believe in yourself!” No one has canceled their faith in themselves, but such advice is simply not safe. Here are 7 of the most common and terrible mistakes in split stretching, which at best do not allow you to achieve results, and at worst, injure the body. If you learn to avoid these mistakes, you can finally reach your cherished goal.
Since I often had to deal with beginners and people with different natural abilities, I tried many different split stretching techniques. And I came to the conclusion that the key word in this process is not “faster”, but “better quality”.
How does the scenario usually develop for newcomers chasing speed? A slight improvement in stretching, severe strength that does not allow you to continue training, and the dream of doing the splits remains a dream. If you want to do the splits while training at home, then the idea of 10 minutes. per day, leave it to people who are prepared, who no longer need recommendations. The more you learn about dangerous mistakes and learn how to avoid them, the healthier and more enjoyable your stretching process will be!
So, most of these errors are related to our physiology, but some of them have their roots in our psychological processes.
Short, low-intensity warm-up
This mistake is No. 1 for a reason. For good stretching you need a very high-quality warm-up. What does it mean? The fact that you had good aerobic exercise (any cardio, running, jumping, dancing) and your body is literally on fire, you are slightly (or maybe not slightly) sweating and you feel softness throughout your body. The duration of such active warming up is from 15 to 30 minutes. (note: one good warm-up will take more than 15 minutes). Why is such a warm-up necessary? Only in this state are your muscles really ready for manipulation - they are soft and warm, you won’t need much effort to stretch them. Another nice fact is that the pain level is much lower when the body is warmed up this way! Although I would not recommend doing the splits right away, it is better to do the previous exercises, for example, a tuck, leg swing, or something of your choice.
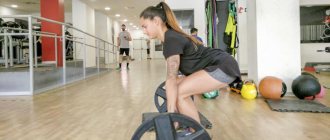
Warm-up before the splits
Warm-up is the most important step on the way to doing the splits. You need to do it before every workout. This will help prepare for the upcoming load. Rotations, jumps, squats, and bends are suitable for this stage. It is recommended to combine movements with each other.
Any physical exercise is stressful for the body, especially if it is unusual for it. Therefore, you need to start warming up slowly, gradually increasing the pace and also gradually slowing down. It lasts on average ten minutes. The fact that the warm-up was successful is evidenced by the perspiration on the forehead.
The order of the exercise could be as follows:
- Rotation of the legs in the hip joints.
- Rotations in the knee joints.
- Ankle rotation.
- Run in place.
© Syda Productions - stock.adobe.com - Jumping rope.
- Squats.
- Another variation of leg swing squats.
To avoid injury, you also need to warm up your upper body. To do this, you need to perform swings, arm rotations, and push-ups. It is important not to overdo it: warming up should not lead to severe fatigue.
Preliminary preparation should be performed in a heated room, on a warm floor. In the cold, muscles do not warm up and stretch well, and also “cool down” quickly.
After a short rest (2-3 minutes), you can begin splits exercises.
Too much zeal at first
New ideas really light us up and at first we are ready to give 200%. But there will be no benefit from such zeal. The fact is that when you just start stretching, the first successes are very easy and it seems that if you put in a little more effort, you will certainly do the splits. But muscles are structured differently; they need time to get used to stretching. Otherwise, you risk overstretching them or causing injury. So it’s better to be prepared for the fact that it will take time. Set yourself a certain period, for example 2 months, during which you will work with a gradual complication of the process. During your first workouts, try to do the minimum required and no more.
Cross split stretch
The transverse split is considered more difficult to master than the longitudinal split, which is due to the unnaturalness of this position for everyday life. The cross split stretch requires a high level of flexibility of the adductor muscles, development of the hip joints and good elasticity of the tissues surrounding them.
In our selection you will find the best exercises that will help you develop flexibility from scratch. To perform this you will need a mat and yoga blocks. Instead of yoga blocks, you can use volumes of books.
What is important to know:
- Be sure to warm up before doing the splits. Without warming up, stretching into splits is not only ineffective, but also fraught with injury.
- Stay in each pose for 1 minute. You can gradually increase the time and try to deepen the position to develop flexibility.
- If you want to quickly do the cross splits, train 5-6 times a week for at least 30 minutes. How quickly you can do the cross split depends on your natural abilities and efforts during training.
- Sitting on a transverse split is usually more difficult and takes longer than doing a longitudinal split. Therefore, you can first achieve one goal - to sit on the longitudinal split, and only then move on to mastering the transverse split.
- If you want to stretch with both the longitudinal split and the cross split, you can alternate the two exercise plans every other day.
Squat plie
Place your feet as wide apart as possible and point your toes out to the sides. From this position, squat with your back straight, lowering yourself until your thighs are parallel to the floor. Place your elbows on your hips or bend your body while clasping your knees with your hands. Do not move your pelvis back or bring your knees together while holding the plie. The exercise effectively prepares for a deeper load, toning the legs and gently stretching the adductor muscles of the hips.
Simple option:
Difficult option:
Fold with wide stance
Place your feet as wide apart as possible and lean down with your back straight, trying to reach the floor. Arch your lower back, leaning from your hips. Spread your legs as far as possible to place not only your palms on the floor, but also your elbows. The fold opens up the hip joints, increases range of motion, stretches the muscles of the inner thighs and increases the elasticity of the ligaments and tendons, which will help you do the cross splits at home in the future.
Simple option:
Difficult option:
Tilt with leg girth
Remaining in the same position with your legs wide, lean towards your right leg, trying to lie on it with your whole body, then towards your left. Then clasp your legs with your hands and lower your head down, trying to place the top of your head on the floor. A more complex version of the fold works the muscles of the inner thighs more deeply, opens the hip joints and increases their mobility, and also helps to activate blood circulation in the pelvic organs, which is beneficial for women's health.
Twisting the body in an inclined position
With your feet slightly wider than shoulder-width apart, lower your arms down, keeping your back straight. Now lift your right hand off the floor and turn your body to the right, feeling the stretch in the muscles of your left thigh. Then twist to the left to stretch your right hip. The exercise gently stretches the hips and sides of the body, elongates the spine and improves body flexibility, and also serves as an excellent cross-split stretch at home for beginners.
Side Lunge Stretch
Place your feet as wide as possible and bend your right knee, lowering your pelvis downwards, keeping your left leg fully straight. Try to sit as close to the floor as possible, stretching your inner thighs. Repeat with the other leg. A basic exercise of stretching for transverse splits develops flexibility of the legs, opens the hip joints and well stretches the adductor muscles of the hips, and also makes the ligaments and tendons elastic.
Simple option:
Difficult option:
Elevated Side Lunge
While remaining in a side lunge, place your straight leg on a chair; choose the height of the chair depending on the level of stretching (the higher the chair, the more difficult it is to stretch). Bend toward your straight leg or simply hold it tense, feeling the thigh muscles stretch. Repeat for the other leg. This exercise will help deeply stretch the leg muscles, opening the hip joints and preparing the body for the cross split.
Yoga squat
Place your feet slightly wider than your shoulders and point your toes out to the sides. Lower yourself into a deep squat, bending your knees completely. Place your palms together and spread your elbows out to the sides, resting them on your knees and applying slight pressure to deepen the stretch. Keep your back exactly in the same plane as your hips. An excellent exercise for opening the hip joints, stretching the gluteal muscles and inner thighs.
Seated knee extension
Sit on the floor and bend your knees. Spread your knees as far apart as possible so that they are in the same plane as your body. Place your hands on your shins, turn your toes to the sides. Keep your back straight, without leaning forward or bending at the waist. The exercise is suitable for doing split stretches at home for beginners, as it deeply stretches the muscles of the inner thighs, increasing the flexibility of the legs.
Seated frog pose
Sit on your knees and rest on your heels. Now spread your knees to the sides, trying to sit completely on the floor so that your shins are on the sides of your body. If you succeed, twist your body left and right to increase the stretch and gently stretch your spine. The more you open your knees, the stronger the stretch, so ideally try to close your feet behind you. The exercise is suitable for gentle stretching of the hips and is especially effective for beginners.
Seated leg abduction
Sit on the floor and spread your legs to the sides. Bend one leg at the knee and pull your foot towards your body as close as possible. The other leg remains straight and freely extended to the side. Try to move your straight leg as far from the center as possible to increase the load. Repeat with the other leg. Another gentle stretch for the inner thighs that is perfect for beginners.
Side bend while sitting
To complicate the previous exercise, tilting the body towards the straight leg will help. To do this, stretch your right leg to the side and lean towards it with your whole body, trying to clasp your foot with your left hand. Place your right one freely in front of you. Repeat the bend on the other side. The exercise not only stretches the sides of the body, but also increases the load on the thigh of the straightened leg, promoting deep stretching of the adductor muscle.
Half lotus stretch
Sit on the floor and cross your legs as comfortably as possible. Bring one leg back without straightening the knee, leave the other as is. Maintain this position until you feel a stretch in your inner thigh muscles, then repeat on the other leg. A simple exercise will gently stretch your hips, increasing the mobility of joints and the elasticity of ligaments, and will also help you quickly do the splits in the future if there is no stretching.
Bend over with crossed legs
Sit on the floor and cross your legs in lotus position or do a simplified version. Stretch your arms forward, trying to lie on the floor with your entire body. If it doesn’t work, then lean on your forearms and fix the position. The exercise gently stretches the adductor muscles of the hips, but it is important to remember that the leg that is higher or in front is stretched more, so do not forget to change their position.
Simple option:
Difficult option:
Butterfly sitting
Remaining in a sitting position, bring your feet together and spread your knees out to the sides. Grasp your feet with your palms, pulling them as close to the body as possible. Keep your back straight, do not round your lower back. To enhance the stretching, lean forward, trying to lower your whole body to the floor, but if that doesn’t work, stretch until you feel tension in your thigh muscles. The butterfly stretches the adductor muscles of both legs well, opens the hip joints, improving their mobility and flexibility.
Simple option:
Difficult option:
Lying frog pose
Get on all fours with support on your forearms and lower your body down, while simultaneously spreading your knees to the sides. If you can’t lie on the floor, then maintain a comfortable position, trying to spread your knees as wide as possible to get as low as possible. One of the best exercises, the correct execution of which will bring you closer to the cross splits. Here the hip joints are almost in a split state, and the leg muscles are stretched to the maximum, which increases the flexibility of the legs and the whole body.
Frog Pose with Straight Leg
From Full Frog Pose with Belly on the Floor, straighten one leg and hold the position. Then change legs. If you can’t lie with your body on the floor, place a mat under your knee and, holding yourself on straight arms, move your leg as far as possible, trying to straighten it completely. Lower your leg lower each time, which will help you get into the cross split. The exercise deeply stretches the thigh muscles, opens the hip joints, and improves the elasticity of ligaments and tendons.
Simple option:
Difficult option:
Lying Butterfly Pose
Lie on your back and bend your knees. Place your feet together and spread your knees out to the sides. Place your palms on your thighs and press down on them, lowering them lower, but avoid sudden movements to avoid injury. Try to place your feet as close to your body as possible, and spread your knees as far as possible, bringing them closer to the floor. A simple and effective exercise will improve your stretching, helping you do the splits at home.
Knee to body lying down
Staying on your back, straighten your legs. Bend one leg at the knee and clasp its foot with your hands. Turn your shin 90 degrees and pull it towards you. Repeat with the other leg. This simple exercise stretches the gluteal muscles, but with maximum rotation of the shin towards the body, it provides a deep stretch of the hip adductors, which increases the flexibility of the legs and brings you even closer to a full cross split.
Lying leg abduction
Beginners may want to skip this exercise due to its difficulty. Lying on your back, stretch your legs straight. Raise your right leg, bring it towards your body and move it to the side, lowering it as close to the floor as possible. Repeat with the other leg. Mastering this exercise will help you quickly do the transverse split at home and improve stretching in the longitudinal, as the inner thigh muscles are deeply stretched here and the range of motion of the hip joint increases.
Spreader
Lying on your back, lift your straight legs up and spread them to the sides. Help yourself with your hands to lower your legs closer to the floor, but do not overdo it to avoid injury. This exercise makes good use of the adductor muscles, which come into play when the legs are lowered under their own weight in the step. In addition, the cross-leg is almost a transverse split, only in inversion.
Side leg spread
Lie on your right side and lean on your forearm. Lift your left leg up, bringing it towards your body. Help yourself with your hand to pull your foot as close to you as possible. Do not bend your leg at the knee, pull it until the muscles of your thighs are tense. Then switch legs. A simple exercise will help you develop flexibility in your legs and quickly do the splits if you don’t have stretching, provided you do regular stretching.
Cross split with forearm support
Place a yoga block in front of you and rest your hands or elbows on it. Spread your legs as wide as possible, trying to get as low as possible. To intensify the stretch, sit on the floor, spread your legs as wide as possible and lean forward, resting on your forearms. In the future, try to lie on the floor with your body stretched out in front of you. Deep stretching of the inner thigh muscles will be the last step in mastering the cross split.
Simple option:
Difficult option:
Incline in cross split
Bends to the sides will help increase the stretch in the cross split. To do this, sit on the floor and spread your legs as wide as possible. Bend your whole body towards one leg, then towards the other, fixing the position. You can also perform a side bend on each leg to further stretch your core. Not only does it engage the muscles of the hips and pelvis, but it also stretches the spine and sides of the body, which improves the overall flexibility of the body.
Butterfly near the wall
Lie on your back with your feet on the wall. Get close to the wall, then bring your feet together and spread your knees out to the sides. Place your palms on your thighs or knees, pressing lightly on them to lower them. This exercise stretches the inner thighs, but also relaxes the lower back, improves blood circulation in the pelvic organs and prepares for higher loads.
Stepping against the wall
From a butterfly position against the wall, straighten your legs and spread them apart. Use your hands to help lower your hips even lower to the floor. The wall-supported stretcher allows you to lower your legs as much as possible, stretching the adductors and opening the hip joints well, which increases their range of motion. As a result, you prepare your body for a full split. This is one of the best exercises to quickly do the cross splits: you can lie in this position against the wall for quite a long time, deepening the stretch.
Cross split with support on the forearms
The final stage will be a cross split with support on your hands. To do this, place your elbows on the floor and spread your legs to the sides, trying to almost lower yourself to the floor. But under no circumstances sit down suddenly, so as not to injure yourself. Lower yourself to the minimum distance from the floor, reducing it each time. So you will soon completely fall into the splits and finally make your dream come true.
See also our other stretching selections:
- Top 40 Full Body Exercises for Men or Beginners
- Top 10 Exercises for Stretching the Pectoral Muscles
- Top 10 Quadriceps Stretch Exercises
- Top 10 Butt Stretch Exercises
- Top 20 Back Stretch Exercises
- Top 20 Hamstring Stretch Exercises
Skipping a workout due to mild soreness
When stretching, even a very “correct” slight soreness cannot be avoided, but it should not be confused with the soreness that arose during an injury or after an inadequate warm-up. If you are faced with the latter, then 3 days is the minimum you should wait for re-training. But if you have mild soreness, don’t be scared and quit classes. Let us once again indicate that slight pain is a normal accompaniment of any stretching and an indicator that there are changes. You should get used to it and learn to overcome it (if we are talking about “healthy” strength), otherwise, if you skip training, you can simply lose your achievements. However, if the pain occurs as a result of the mistakes described above, then take a time out, otherwise you risk injuring your muscles.
Twine on a boat
Anastasia Volochkova.
Photo: Instagram Or maybe it’s a raft?.. One thing is clear: the ballerina gets incomparable pleasure, demonstrating her perfect stretch in the middle of the gentle sea under the romantic clouds that cover the sky. Nastya has an oar in her hand: is she really steering her ship herself?
more on the topic
Anastasia Volochkova, together with her beloved, retired to a closed island. The ballerina promised to tell what this “private place” is.
Uneven rhythm of classes
As practice shows, the first two days are the most productive for those who have just started stretching; then the truly experienced usually go further. If there is no specific training schedule that you can really stick to, then you can say goodbye to the splits right away. Stretching requires strict discipline. Decide how many times a week you will exercise (less than 3 times makes no sense) and do not deviate from this rhythm. If you suddenly happen to miss work, be sure to compensate for it the next day. The fact is that muscles take a very long time to acquire the coveted elasticity and very easily lose it. Therefore, it is a big mistake to violate your training regimen.
Sitting on two chairs? Easily!
Anastasia Volochkova on a yacht.
Photo: Instagram Have you tried sitting on two chairs? The saying goes that it's not easy. But for Nastya Volochkova nothing is impossible! She sits on two soft loungers at once - thanks to the powerful stretch. Fans in the comments suggest that Nastya’s splits will soon be included in the Guinness Book of Records.
Lack of additional motivation
This may seem strange, but for some reason very often the desire to do the splits is not enough. The appearance of additional, even the smallest motivation, unimaginably speeds up the process, makes it more exciting and interesting. Imagine my surprise when one day during my stretching class I said that I would give a chocolate bar to the participant who did the splits today. I was amazed at how eagerly the grown-up and beautiful girls began to try hard and (what’s most surprising!) one of them actually did the splits! A competition with a friend, a photo battle, or a promise to yourself of something big after achieving your goal! You can come up with anything! Collect as many additional motivations as possible and they will inspire you again and again!
Longitudinal twine stretch
The ability to do a longitudinal split depends on the flexibility of the hip joints, as well as the elasticity of the muscles and ligaments of the thighs (especially the back of the thigh and hamstrings). The speed of mastering deep stretching depends on your natural inclination, but with regular training, everyone will be able to do the longitudinal splits.
We offer you the most effective stretching exercises for longitudinal splits at home, for which you will need a mat and yoga blocks. Instead of yoga blocks, you can use, for example, books.
What is important to know:
- Be sure to warm up before doing the splits. Without warming up, stretching into splits is not only ineffective, but also fraught with injury.
- Stay in each pose for 1 minute. You can gradually increase the time and try to deepen the position to develop flexibility. Remember to stretch on both your right and left legs with the same amount of effort.
- If you want to quickly do the longitudinal splits, train 5-6 times a week for at least 30 minutes.
- How quickly you can do the longitudinal split depends on your natural abilities and efforts during training.
- If you want to stretch with both the longitudinal split and the cross split, you can alternate the two exercise plans every other day.
Tilt to straight leg
Place your foot one step in front of you and lower your body down, trying to touch your palms to the floor. Do not bend your knees or lean your pelvis forward. Bend through your hip joints, not your lower back, so try not to round your back. Beginners are advised to use yoga blocks if they cannot reach the floor with their hands. A basic exercise stretches the muscles of the back of the thighs, which will help you do the longitudinal splits at home in the shortest possible time.
Simple option:
Difficult option:
Tilt towards the leg on an elevated platform
Place your foot on a chair or table and lean your whole body towards it, trying to reach your foot with your hands. Do not bend your legs at the knees, lean not from your back, but from your hips, in order to properly stretch the back of your legs. Start with a low height, but over time raise your leg higher and higher, maintaining correct technique when bending over. An effective exercise that stretches the back of your thighs and helps develop your tendon-ligament system, which will improve your flexibility and be the first step to doing the splits at home.
Simple option:
Difficult option:
Tilt to straight leg from a half squat
Place one leg one step forward and bend the other at the knee. Bend toward a straight leg while lifting your toes up to further stretch your calves. Try to place your forehead on your knee and place your hands on the floor as close to your body as possible. Bend from the hips to feel the stretch in the back of your legs, including your calves. The exercise deeply stretches the back of the thighs, improves the elasticity of the ligaments and is a must-do if you want to do the longitudinal splits from scratch at home.
Simple option:
Difficult option:
Standing fold
Stand straight with your feet together or shoulder-width apart. Bend deeply down from your hips without rounding your back. Place your palms on the floor in front of you, as you exhale, clasp your legs and try to bring your head closer to your knees. The main thing is not to bend at the waist; when bending, feel how the back of your legs stretch. The fold is a key exercise, mastering which will help you do the splits at home, as it works the muscles of both legs and improves the flexibility of the hip joints.
Simple option:
Difficult option:
Bend forward with crossed legs
Stand straight and cross your legs so that your right is in front of your left. Lean forward with your back straight and place your palms on the floor. Feel the muscles in your front leg stretch. Be sure to repeat for the other one. When performing, do not round your back, otherwise your legs will not be used to the maximum. The exercise deeply works the muscles of the back of the legs, improves the flexibility of the hips and increases the elasticity of the ligaments, which is a necessary condition for the splits.
Downward facing dog
Stand in a lying position and from this position lift your pelvis up, arching your back and straightening your legs. Your arms should be straight, your head should be lowered between them. Maintain a slight arch in your lower back to avoid rounding your back. Try to stand on your full foot and straighten your legs. If this does not work, then it is permissible to bend your knees slightly and stand on your toes. A yoga exercise improves the flexibility of the whole body, but especially stretches the back of the thighs, which will definitely help you do the longitudinal splits from scratch at home if you train regularly.
Simple option:
Difficult option:
Downward facing dog splits
Remaining in the downward-facing dog asana, lift your right leg up, stretching it as much as possible and trying not to bend the knee. In this case, you can rise on your toes if it is difficult to stand with your full foot. In this position, do not round your back or raise your head, only your leg works. Don't forget to repeat the exercise for your left leg. Downward facing dog splits not only develop hip flexibility, but also open the hip joints and improve body strength and endurance.
Simple option:
Difficult option:
Dancer pose
Stand straight, bend your right leg at the knee and take it back. Grasp your foot with your right hand and lean your body forward, lifting your leg as high as possible. Stretch your free arm forward for balance, do not bend your supporting leg at the knee. To maintain balance, look ahead. Repeat for the left leg. The dancer's pose develops not only flexibility, but also a sense of balance, and is also one of the basic ones when learning vertical splits, but it will also be useful for ordinary longitudinal splits.
Longitudinal twine supported on a chair
Place your foot on a sofa or chair and step back as far as possible with your other foot. Now place your palms on the support and try to straighten your leg, lowering it almost completely down. Repeat for the other leg. The exercise is almost comparable in load to a full longitudinal split, but due to the elevation it stretches the muscles and ligaments more gently. As a result, the hip joint receives a greater range of motion, its flexibility increases, which will help in the future to sit on the longitudinal splits.
Deep Lunge
Stand up straight and step your right foot back as far as possible. The front leg should be bent at a right angle, and the back leg should be fully straightened. Get as low as possible while maintaining balance, but you can raise your arms up to increase the stretch. If you want to increase the load, lower your arms down, placing your palms on the floor. Keep your back straight, do not round your lower back. Perform a lunge on your left leg. An excellent exercise for hip flexibility and hamstring stretching that will help you do the splits at home in no time.
First, do it with your arms overhead to further stretch your back, whose flexibility is also important for the splits:
Then lower your hands to the floor:
Lizard pose
Stand in a lying position and from this position step forward with your right leg, placing your foot on the outside of your right shoulder. Lower your elbows to the floor and hold lizard pose, feeling the stretch in your inner and back thighs. You can rest your forearms on blocks rather than on the floor. The exercise develops flexibility of the hip joint, increases its mobility and range of motion, and also improves the elasticity of muscles and ligaments, which contributes to the development of longitudinal splits.
Simple option:
Difficult option:
Low lunge
Get into a high lunge and lower your back knee to the floor. Make sure that the front leg is bent at a right angle, rest your hands on your knee and fix the pose. To increase the load, you can place blocks under your palms, raise your arms up, or place them on the thigh of your front leg. Repeat for the other side. Lunges stretch the muscles of the back of the thighs well and increase the elasticity of ligaments and tendons, bringing you closer to the longitudinal splits.
Choose a position that is comfortable for you or perform different types of lunges one by one:
Low lunge with twist
Get into a straight-arm plank position, step your right foot toward your right shoulder and lower your elbows down. Lower the knee of your left leg to the floor as well. Rotate your torso to the right, placing your hand on your right knee and applying slight pressure to open the hip joint more and feel a deeper load on the muscles and ligaments. Don't forget to do this for your left leg. Doing a deep split stretch at home will help you increase your hip range of motion and prepare you for further stress.
Low lunge with shin grab
Step into a high lunge with your right foot in front, then lower your left knee down. Lift the shin of your back leg and grab it with your left hand. Place your right hand on the knee of your supporting leg. Pull your left leg toward you, stretching your quadriceps. Do the same for your right leg. The exercise stretches the quadriceps, the antagonist muscles of the hamstrings, and is therefore included in the at-home splits stretch for beginners, helping to improve leg flexibility.
Low lunge with chair
While remaining in a low lunge, release your shin, but do not lower it down, but place your foot on the chair. Place your palms on your waist and bend your back knee as much as possible, stretching your quadriceps. To intensify the stretch, place your palms on the floor on either side of your front leg. Repeat for the other side. The exercise stretches the front of the thighs well, which makes the muscles elastic and more pliable for deep stretching.
Simple option:
Difficult option:
Lizard Pose with Knee Support
Stand in a plank position on your elbows, place yoga blocks under your arms (you can do without them). Step your right foot toward your right shoulder, placing your foot on the outside of your body. Lower the knee of your left leg to the floor. Try to place your leg in front of your body to maximize the stretch. Repeat for the left leg. The lizard pose is useful in any version for opening the hip joints, working the back of the thighs and adductor muscles, which will help you do the splits from scratch at home without preparation.
Simple option:
Difficult option:
Bend to a straight leg with support on the knee
Stand in a low lunge with your right foot in front. Now straighten your right leg and lean towards it with your whole body, without rounding your lower back. Bend from your hips to feel the stretch in the back of your legs. For convenience, place your palms on the floor. Try to lie on your leg with your stomach. Repeat for the left leg. This complex exercise helps to deeply stretch the back of the legs, develops the elasticity of the ligamentous-tendon system and increases the range of motion of the hip joint.
Simple option:
Difficult option:
Bend to a straight leg with support on a chair
Staying in a low lunge, straighten your front leg and lift your back shin off the floor and place your foot on the chair. Now lean towards your front leg with your whole body, without lowering your back leg down. Repeat for the other side. This exercise simultaneously engages the back of the legs and the front, which stretches the muscles as deeply as possible, increasing the flexibility of the legs and developing the hip joints, which will help you quickly do the splits, even if there is no stretching.
Simple option:
Difficult option:
Pigeon pose
Stand in a low lunge with your right foot in front. Lower the shin of your right leg in front of you, place your palms on the floor on the sides of your body. Keep your back straight, maintaining a slight arch in your lower back. Try to position your lower leg parallel to your body, stretching the back of your legs and buttocks. To intensify the stretch, lean forward, lowering your belly onto your shins and resting on your forearms. If you feel comfortable, you can fold your hands in front of you on the floor and lower your head on them. Repeat for the other leg. Pigeon pose stretches the gluteal muscles and opens the hip joints, increasing range of motion.
Simple option:
Difficult option:
Pigeon pose with shin grip
From pigeon pose, bend the knee of your back leg and grab and pull your foot towards you. Stay in this position or try increasing the stretch by leaning forward toward the shin of your front leg. Rest your head on your free hand and try to relax, feeling the thigh muscles of both legs stretch. Repeat for the other side. The more challenging calf pose increases the elasticity of the thigh muscles and stretches the gluteal muscles, which is useful if you want to do the splits at home.
Simple option:
Difficult option:
Tilt to straight leg while sitting
Sit on the floor, legs straight, arms hanging freely. Bend your right leg at the knee and pull your foot toward your body. Bend your whole body towards your straight left leg, trying to lie on your stomach. Grasp your foot with your hands, lengthening your spine and stretching the muscles in the back of your thighs. Repeat for the right leg. This simple exercise works the ligaments, tendons and muscles by stretching the back of your thighs and calves, which increases the flexibility of your legs.
Seated fold
Sitting on the floor, stretch your legs in front of you and lean towards them with your whole body, trying to lay your chest and stomach on your thighs. Bend from the hips without rounding your back, otherwise you won't feel the stretch in the back of your legs. Grasp your feet with your hands and hold in the most difficult position for you, lowering your body as low as possible to your legs. The exercise not only stretches the hamstrings well, but also stretches the spine, improving the flexibility of the back and the whole body.
Simple option:
Difficult option:
Tilt to raised leg while sitting
Sit on the floor opposite a low chair or table. Stretch your legs underneath and lift one in front of you without bending your knee. Place your raised leg on a chair and lean your whole body towards it. Once completed, change legs. Another exercise for stretching the back of the thighs will help you do the splits from scratch at home, subject to persistent training.
Lying leg grab
Lie on your back, bend your knees. Straighten your right leg and grab your foot with your hands, pulling your thigh as close to your body as possible. At the same time, do not bend your knee and do not lift your lower back and pelvis from the floor. To increase the load, straighten your left leg and continue to pull your right leg towards you. Do the same for your left leg. One of the most effective exercises for stretching the splits deeply works the muscles of the back of the thighs, improves the elasticity of the ligaments and increases the range of motion of the hip joint.
Simple option:
Difficult option:
Crossed Leg Stretch
Lying on your back with your legs straight, place your left foot on your right thigh. Then lift your right leg up, clasp your shin with your hands and pull it towards your body. Do not bend your right leg at the knee, try to pull it as close to your stomach as possible. Repeat for the other leg. The exercise not only stretches the gluteal muscles, but also engages the hamstrings and even the calves, giving the back of your legs a good stretch.
Longitudinal split sitting on blocks
Stand in a high lunge, then lower into a low lunge, first placing yoga blocks under your hips. Straighten your front leg, placing your hip comfortably on the block. Then straighten the back one, you can also put a block or rolled up rug under it. Place blocks on top of each other if one is not tall enough. Over time, replace the blocks with lower ones, which will help you do the splits at home without them in the shortest possible time. Instead of blocks, you can sit on cushions for comfort.
Longitudinal twine supported by blocks
Hold a low-height yoga block in each hand and step into a low lunge. From a low lunge, straighten each leg, trying to fully straighten them at the knees. Use blocks to support you and prevent you from overextending yourself. Lower yourself only to the height of the blocks and stay in this position. Over time, choose lower blocks, which will help you progress in mastering the splits.
Simple option:
Difficult version (without support on the back knee):
Vertical twine with wall support
Stand with your back to the wall and lean forward. Place your palms on the floor in front of you, and lift one leg up and straighten it, leaning on the wall. The supporting leg stands exactly close to the wall, the raised leg is straightened as much as possible, and the body is tilted forward. When performing the exercise, you can bend your back slightly to enhance the stretch. Repeat with the other leg. The exercise stretches the hamstrings and imitates a longitudinal split, but with support on one leg, which is easier for beginners.
Replacing the warm-up with a hot bath
They often suggest taking a hot bath instead of warming up. It sure is tempting to take a bath and be ready to stretch! However, during warm-up, completely different physiological processes occur! The joints are lubricated with synovial fluid, all tissues become elastic and protected from injury. By taking a bath, you will simply increase blood circulation, which will also warm up the muscles, only the nature of the warming will be completely different and the body will not truly prepare for stretching. In addition, the “validity” of such a warm-up is very short, unlike warm-up during a warm-up. I would recommend using a hot bath after training as a preventive measure against soreness, but nothing more.
In the splits - on the bike
Anastasia Volochkova on a motorcycle.
Photo: Instagram It’s unlikely that anyone will pay attention to the brand of the motorcycle, because all the qualities of a two-wheeled machine are completely obscured by Nastya sitting on it in the splits! I wonder if it is possible to ride an iron horse in this position for at least 100 meters? Volochkova herself claims that she was the driver of the bike and that’s how she came to the beach, but she’s joking...
more on the topic Anastasia Volochkova: “The main emphasis is on swimsuits, why hide a beautiful body?” Ballerina Anastasia Volochkova writes her own column on the Teleprogramma.pro portal.
Mini mini bikini
Anastasia Volochkova.
Photo: Instagram I wonder how long it took Anastasia to choose a risky intense pink swimsuit? One must think that the tiny accessory simply eclipsed everything else for the viewers of this photo - a piece of the bright blue sea, the side of a snow-white yacht, and green hills on the horizon...
more on the topic
Volochkova “flashed” her saggy breasts in a mini-dress with a neckline down to her navel. The ballerina impressed with her appearance at the yacht exhibition.
Twine on a motor boat
Anastasia Volochkova.
Photo: Instagram Nastya is all in motion, all in drive! Now on a bike, now on a yacht, now on a motorboat - and invariably in the splits! I wonder if it is comfortable to drive a vehicle in this position?
more on the topic
“This is cool!”: the slimmer Volochkova posed topless in a micro bikini. The ballerina continues to excite fans with pictures from her vacation.