The shoulder stand (“birch”) is a useful acrobatic element that every person encounters at least once in their life. This simple gymnastics is included in the compulsory program of physical education lessons at school, is used in the athletics training program, and is even found in body-oriented spiritual practices, such as yoga. What is the reason for such popularity?
Shoulder stand: benefits
The benefits of standing on your shoulder blades can hardly be overestimated. Thanks to the inverted position of the body during the “birch tree” exercise, the entire body is healed and rejuvenated. Such gymnastics is recommended as a panacea for diseases of the upper respiratory tract, headaches and menstrual pain, and digestive problems. The shoulder blade stand is a good remedy for the treatment and prevention of varicose veins. Gymnastic exercise has a beneficial effect on the functioning of the human nervous and endocrine systems, improving and stimulating the endocrine glands.
Thanks to regular exercises, blood circulation is activated, the saturation of internal organs with oxygen is improved, and the cells and tissues of the body are renewed. Exercise has a beneficial effect on the functioning of the human gastrointestinal tract, stimulating blood flow and the processes of removing waste and toxins. “Berezka” is an excellent remedy for restoring the flexibility of the spine, training the muscles of the legs, back and abs.
Recommendations for performing the exercise
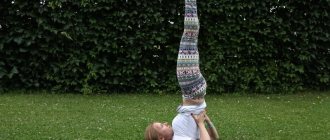
To hone a technique, it will be useful to “look” at yourself from the outside while performing it. You can ask someone close to you to take a photo, and then compare the body positions with what is shown in the photo. This will give you a visual representation of your ideal position.
To get the most useful and effective results from performing the Birch exercise, you should adhere to the following recommendations:
What time of day to perform birch tree
It is important to note that the result of practicing the Birch exercise directly depends on the regularity of its implementation: the more often, the better. For maximum benefits, scapular stand should be included in your daily routine and performed every day.
The best time for training is the morning, however, evening yoga classes are also welcome.
How much do you need to study
Birch has a number of useful properties, but you can experience them all for yourself only after a certain duration of implementation. Beginners to practice Berezka will benefit from starting with one minute and gradually increasing the time. Optimal for professionals is 30 minutes.
However, it is important to remember that the benefits of the shoulder blade stand are determined not only by its duration - much also depends on the correct execution of the Birch. Initially, you should select and correctly develop the most suitable shoulder blade stand technique, and then focus on the duration of execution. After all, staying in an incorrect position for a long time can cause serious harm to the body and aggravate existing diseases.
Reps and sets
When performing both the Birch exercise and other yoga poses, it is very important to learn to feel your body and in no case exceed its natural capabilities, depending on your physical fitness. This is when the Birch pose will bring maximum benefits.
The main thing is to listen sensitively to your body, perceive the appearance or increase in feelings of discomfort as signals that need to be responded to wisely.
Effect
Regular shoulder stand helps:
- reduce the load in the circulatory system;
- restore vascular patency and elasticity;
- improve spinal mobility;
- strengthen ligaments and joints;
- activate the renewal of cells and tissues of internal organs;
- stabilize general hormonal levels;
- relax the nervous system;
- use deep abdominal breathing;
- stimulate the thyroid gland;
- develop the vestibular apparatus;
- speed up metabolism and activate many other processes in the body.
What kind of exercise is this
Many people perceive it as an ordinary stretching pose, without even realizing what valuable and beneficial properties Sarvangasana has.
The birthplace of the shoulder blade stand is considered to be India and Tibet, where it was used in the system of hatha yoga practice and its first name was Sarvangasana, or translated from Sanskrit as “a pose of all parts of the body.” In Europe it is usually called a “candle”, and in the Russian version it is the Berezka exercise, known from school.
It is believed that Berezka is included in preparatory programs for acrobatics, gymnastics, dancing, wrestling and other sports where spinal flexibility is important. In yoga, this basic place of Sarvangasana is explained by its ability to influence the chakra system and have a wide range of effects on the organ systems of the body. It captivates with its accessibility and ease of implementation, and its regular practice can have a complex therapeutic effect.
The Birch exercise consists of a shoulder stand with straight legs extended upward. At the initial stages of performing a shoulder stand, a person supports the body with his hands in the lumbar and pelvic area. However, after regular training, you can simply stretch your arms on the floor - the body will be able to be held in an upright position by strengthening muscle groups.
“Pose of all organs” got its name for a reason: during the Berezka exercise, blood circulation in the body accelerates, blood flow to the occipital region through the vertebral artery improves, which in turn helps to optimize the functioning of all organ systems.
Indications
Gymnastics is prescribed for the treatment and prevention of diseases:
- respiratory tract: runny nose, colds, bronchitis, asthma, difficulty breathing;
- cardiovascular system: endarteritis, atherosclerosis, varicose veins;
- Gastrointestinal tract: constipation, hemorrhoids, intestinal ulcers;
- nervous system: neurosis, neuralgia, migraine, vegetative-vascular dystonia.
“Birch” is recommended to be practiced to restore weakened immunity and generally strengthen the body after long-term illnesses. Standing on the shoulder blades is a good remedy for insomnia, chronic fatigue and depression, increased excitability of the nervous system as a result of intense physical and psychological stress. This kind of gymnastics is good for relaxing after a tense stressful situation and helps restore inner harmony and balance.
How can you replace the birch exercise?
If performing the Berezka is contraindicated, do not despair - this exercise has several worthy analogues, which involve almost all the same muscles. However, before you include them in your practice, you need to carefully familiarize yourself with the implementation techniques and possible contraindications.
Halasana (plow pose) is an asana with legs thrown behind the head.
This analogue of the Birch exercise has a number of beneficial properties for the body: the plow pose helps to stretch the back and neck, develop mobility of the spine, has a positive effect on the thyroid gland, and is also indicated for prolapse of internal organs. Thanks to its implementation, the muscles of the abdomen, thighs, and pelvic area are strengthened. Exercise can remove excess body fat, speed up metabolism and improve appetite.
Karnapidasana (Ears to Knees Pose)
This is a kind of continuation of the Birch, if you put your legs behind your head from a straight position. During this exercise, the knees compress the ears, drowning out external noise and drawing the person's attention to his inner world.
Exercise helps increase blood circulation in the spine, relieves back pain, is a good prevention of osteochondrosis and flatulence, and normalizes the functioning of the cardiovascular system. It is considered one of the most difficult inverted poses of hatha yoga.
Niralamba-Sarvangsana (shoulderstand without support)
This exercise is considered the most difficult variation of the Birch exercise.
Niralamba-Sarvangsana tones and stimulates, and benefits from spinal traction. When performed daily, you can improve blood supply to the brain, develop a sense of balance in the body, strengthen the muscles of the neck, abs and back, and get rid of toxins and waste in the body. The exercise is especially recommended for people with neuralgia, cardiac arrhythmia, cystitis, stomach ulcers, and hypertension.
Contraindications
The “birch” stand is contraindicated for injuries to any part of the spine (cervical, thoracic, lumbar), displacement of intervertebral discs, hernias, radiculitis and other back diseases. It is not recommended to practice the exercise for people prone to hypertension and related heart diseases: coronary artery disease, angina pectoris, heart failure. Gymnastics is prohibited during acute infectious diseases of the upper respiratory tract or exacerbation of chronic diseases. It is not recommended to practice standing during periods of menstruation or pregnancy.
Preparing for the exercise
Before the “birch tree” exercise, you need to warm up your muscles and joints. If you are in excellent physical shape and regularly exercise, then a small cardio workout will be enough for you. Before standing, do a small set of exercises to warm up your muscles: swinging your arms and legs in different directions, bending your body, squats, push-ups on the floor or an inclined surface. After warming up, begin performing the inverted pose.
For beginners who do not regularly engage in sports and lead a sedentary, mostly sedentary lifestyle, doing the “birch tree” exercise without prior physical training is strictly prohibited. Untrained muscles and joints may not be able to cope with the load during the scapular stand. As a result, the likelihood of injury increases several times. We recommend that you first carry out several general strengthening workouts that will prepare the muscles and joints for physical activity, and then do the “birch exercise” with the obligatory preliminary warm-up.
Harm of exercise
If you are unsure about your health, we strongly recommend that you consult a doctor before mastering this asana. Make sure you are not one of those people who should not do shoulderstands. So, contraindications for Sarvangasana:
- increased intracranial pressure
- increased intraocular pressure
- retinal detachment
- hernias, protrusions in the cervical spine (there is a possibility of worsening the condition by entering and leaving the asana)
- cervical vertebrae injury
- traumatic brain injuries
- diseases of the heart, liver and spleen
- previous strokes
Photo: yoga_mat_minsk, maiya_fox
There are also time restrictions:
- pain in the neck and shoulder
- full stomach and intestines
- stomach upset
- Strong headache
- otitis media, sinusitis
- physical fatigue
- unprepared body
- pregnancy (only possible under the supervision of a competent instructor)
- period of menstruation in women
show more
Safety precautions
The scapular stand is a simple but effective exercise, the implementation of which perfectly trains the main muscle groups of the body.
During the class, the muscles of the back and abdomen, buttocks, front and back of the legs are involved. The weight of the body must necessarily fall on the shoulders. If during the exercise you feel that the cervical spine is straining, then in order to avoid injury it is necessary to correct the inverted position. Any discomfort is a reason to pay attention to the technique of performing a stand on the shoulder blades, up to complete cessation of the exercise. If you find it difficult to breathe during an inverted pose, try to pull your chest up rather than turning your head or neck in different directions. If a cough or back pain occurs, it is recommended to do lighter versions of the stand and special exercises that develop the mobility of the thoracic and cervical spine. When performing the inverted pose for the first time, ask someone to back you up, supporting your body in a strictly vertical position.
Levator scapulae muscle
Levator scapulae muscle
The muscle that is responsible for raising the scapula is very weak and is susceptible to various lesions and injuries. When this area is damaged, a person experiences a sharp, even aching pain, which can intensify over time. Hurts:
- in the area of the scapula;
- in the neck area;
- in the area of the shoulder girdle;
- in the shoulder area;
- in the chest area.
If the muscle that is responsible for raising the scapula is damaged, it becomes almost impossible to turn the neck, raise or spread the arms. Occasionally lean back or forward. Due to such lesions, breathing may be impaired (in rare cases). That's why it's so important to train this muscle. The shoulder blade stand exercise comes in handy here. This is a simple, quick, equipment-free method of strengthening the muscles that elevate the shoulder blades.
Sport equipment
In the classic version, the “birch tree” exercise is performed without special sports equipment. During such a workout, you may only need a small mat to soften the load on the cervical vertebrae. If you are just starting to practice or have been practicing standing for a long time, place a folded towel or small blanket under your shoulders. Thanks to this, the vertebrae will not experience pressure from contact with the hard floor. To perform a lighter version of the exercise, you will additionally need a folding chair.
Stand without support
A gymnastic exercise without support - a classic stand on the shoulder blades. The technique of execution does not cause difficulties for trained people with movable joints, a flexible spine, and developed muscles. Before starting the lesson, prepare and spread a soft mat on the floor. It is advisable to train in tight-fitting sportswear to make it easier to control your body posture, making the necessary adjustments in time. Technique:
- we lie with our backs on the mat - our arms are located along the body, palms on the floor, legs straightened, knees and feet touching each other;
- we throw our legs behind our heads as much as possible;
- bend our arms at the elbows, place our palms on the lower back;
- straighten your legs up.
If the stance is performed correctly, then your body, from shoulders to feet, should be straightened and extended upward. We keep our feet and knees together, our hips and buttocks tense, our neck straightened, our chin touching our chest, our palms on our lower back, our elbows brought together as much as possible. Breathing during exercise is deep, even, and calm. You need to finish the stance in reverse order, slowly, without jerking, supporting your back with your hands.
Step-by-step execution technique
Step 1
We lie down on our backs. We move our hands behind our heads, place our legs behind our heads and lower our feet into our palms (Halasana - Plow pose).
Photo: Pavel Yakovlev
Step 2
We try to round our back, pointing our tailbone towards the floor. We feel how the body weight shifts from the cervical region closer to the lumbar region. We remain in this position for some time, letting our back get used to it.
Attention! The legs may be slightly bent at the knees. But then gradually try to straighten them.
Photo: Pavel Yakovlev
Step 3
When you're ready for the next step, move your hands behind your back and clasp them tightly together. Direct your stomach and chest toward your chin and forward, and move your legs closer to your head, pointing your tailbone up. These two opposing movements stretch the spine upward.
ATTENTION! We try not to pinch the neck, but rather lengthen it, following the crown forward.
IMPORTANT! Since in this position there is a strong impact on the cervical spine, under no circumstances do we turn our heads from side to side. If you find it difficult to breathe, in this case try to pull your chest up!
Photo: Pavel Yakovlev
Step 4
Further. We move our hands behind our backs, rest our elbows on the floor, and, helping ourselves with our palms, raise our legs up (one at a time - it’s easier). At the same time, we push our shoulders off the floor with force. We again direct the stomach and chest towards the chin. And we move our legs back a little - so that one straight line is formed from the shoulders to the feet.
We fix this position and hold it for three to five minutes.
ATTENTION! For beginners in yoga, one minute, even 30 seconds, will be enough. But each time increase the time spent in the asana.
Photo: Pavel Yakovlev
Step 5
We come out of the asana. We do this in stages. First, we very slowly lower our legs behind our heads.
Photo: Pavel Yakovlev
Step 6
Then we spread our palms the width of the mat and slowly, vertebra by vertebra, lower our back down. We try to keep our legs straight with our abdominal muscles.
ATTENTION! Slow is the key word. We are not in a hurry, we exit the birch tree smoothly and carefully.
Photo: Pavel Yakovlev
Step 7
When the lower back is pressed to the mat, we fix it in this position and continue to lower our legs down to the floor. When we feel that the lower back is starting to come off, we bend our knees and only then stretch them. This is how we compensate for the impact on the cervical spine.
Photo: Pavel Yakovlev
Pose adjustment:
- The body weight is only on the shoulders!
- The throat should not be compressed (cough, discomfort in the neck and head indicate that the body weight is placed not on the shoulders, but on the neck)
- Chin touches chest
- Elbows are as close to each other as possible
- Shoulders pulled away from ears
- Feet together
- Breathing slow and deep
- We take the pose smoothly, without jerking. And we also come out of it
- Neck and lower back pain is unacceptable. If you feel any discomfort, we leave Berezka
How to Make Shoulderstands Easier
A very important point! To avoid the following conditions when you
- breathe heavily
- there was severe pain in the neck
- feet do not reach the floor (in Halasan)
We advise you to use a regular blanket. For beginners, this is generally a mandatory recommendation. So, we fold the blanket in four so that when we are light, our shoulder blades lie on the edge of the blanket and our head is on the floor. This way the neck will hang from the mat and will not “break.” If one blanket is not enough, take another blanket, and another. Until you feel comfortable. We find the edge of the mat with our shoulders, make sure that our neck is stretched (you can even help yourself with this: stretch your neck) and throw your legs behind your head. And then everything is as described above, in a step-by-step execution technique.
Compensating asana for Berezka
To relieve the cervical spine and relax it, we recommend doing a compensating asana immediately after the shoulder stand. This is the Pisces pose - Matsiasana.
"Birch" with support
Exercise with support - lightweight stand on the shoulder blades. The technique differs from the classic version. The support is usually a wall that you can lean on at any time. This option is ideal for beginners starting to master gymnastics. While performing the “birch” exercise, you have the opportunity to study all the elements of the exercise in detail and deeply feel all the working muscles. In addition, if you feel very tired or in pain while standing, you can relieve physical tension by leaning on the wall. Technique:
- lie down on the mat - legs raised up, buttocks pressed as much as possible against the wall, arms along the body, palms on the floor;
- we raise the lower part of the body, resting our feet on the wall;
- We place our palms on the lower back, bending our elbows;
- straighten your legs up.
At the initial stages, we recommend training by alternately stretching one leg up and leaning on the wall with the other. Follow the basic requirements for the shoulder blade stand technique: the torso is perpendicular to the floor, the leading leg is straightened, the elbows are brought together as much as possible, the cervical vertebrae are straightened, the chin rests on the chest, the shoulders are pulled away from the ears. Breathing during exercise is even and calm. Complete the workout in reverse order slowly and smoothly. Having mastered this version of the birch tree, move on to a stand without support.
LiveInternetLiveInternet
Quote from wselennaj
Read in full In your quotation book or community!
What doctors are silent about.
How to stay healthy , https://yoga-club.com.ua
https://faceculture.ru
SALAMBA-SARVANGASANA (shoulderstand)
-
Sometimes, to achieve wonderful results, you can put in a minimum of effort to achieve them.For example, youth... Some people believe that with age a person must... no, even MUST grow old... Glory to the Almighty, there is another part of people who think differently...
One of these ways of moving forward into youth is... What should I call it? Pose? Gymnastics? OH RITUAL. Daily ritual - standing in VIPARITA KARANI asana
- (in the pose that we all know from childhood as “BIRCH”).
SOMETHING ABOUT THIS ASANA.
The term "viparita" means "inverted, reversed, inverted" and the term "karani" means "cause, means, principle." In general, the term can mean “a means (in the sense of posture) for the reverse flow of processes.”
- Yogis believe that a change in the position of the body relative to the movement of energy outside the body (earthly energy moves from earth to space, cosmic energy from space to earth), as well as inside the body, affects the change in the direction of the flow of time:
- when a person stands on his feet, he grows old.
- when a person stands in Viparita Karani, he becomes younger.
Smart books talk about the purpose of this pose:
- change the position of the body in the field of gravity to the opposite;
- temporarily change the direction of flow of internal energies of the body to the opposite.
In fact, the point, apparently, is not so much in changing the directions of the flow, but in changing the flows themselves. The fact is that when we are in a vertical position, all our systems work in the Great Circle - blood flows along the Great Circle from the heart to the legs, and from there back up to the head. The same thing happens with lymph.
When we stand in Viparita Karani, the blood can allow itself to circulate in the Small Circle - from the heart to the head,
- What is also important, standing in this position, we activate the Atlas - the first cervical vertebra, the one that holds the vault of the skull. Thanks to this, the entire cervical-collar area is developed, the neck is strengthened, the shoulders are straightened (after standing “bent” on the shoulders for a long time, even the weakest and stooped shoulders want to relax and take a natural straight, open posture.
- The thyroid gland is healed by being abundantly washed with blood;
- When carried out systematically, respiratory diseases are prevented and varicose veins go away;
- Hemorrhoids go away;
- Sore throats, tonsillitis and all colds go away;
- Wrinkles on the face and neck are smoothed out and eliminated and a good massage occurs, even if you do not do any gymnastics;
- Immunity increases;
- Eliminates organ prolapse in women (in particular, uterine prolapse);
- Prolapse of all internal organs, especially the kidneys, is cured;
- Cures dementia in children
- Mental abilities are restored
- Memory is enhanced;
- Relieves fatigue of legs and feet;
- Minor and even chronic headaches and insomnia are relieved;
- Reduces pain due to arthritis;
- Disturbances in urinary function are mitigated;
- Both frigidity is cured and sexual arousal is relieved;
- Digestive disorders and gastritis are cured;
- Viparita Karani also helps neutralize and destroy toxins in the body.
The “sleeping” thymus gland is activated (for information: the thymus gland is responsible for immunity, as well as for the growth and development of the body; when a person has reached maturity, it “falls asleep” as unnecessary. By activating it, we resume regeneration processes in our body).
Lymph drainage occurs
- promotes the flow of blood from the lower extremities to the head;
- improves cerebral blood supply;
enhances capillary blood circulation of facial muscles and facial skin;improves blood supply and neuromuscular activity of the eyes;
due to the chin lock (Japsshdhara bandha), it abundantly irrigates the thyroid gland, ear glands and lungs with blood;
trains the suspension of internal organs;
improves liver function and digestion;
develops hand strength;
promotes relaxation of the heart muscle;
improves metabolism;
rejuvenates the genitals;
strengthens and calms the central nervous system, helping to fight stress and insomnia;
straightens the spine;
strengthens the muscles of the back, hips, scruff and abdomen;
stimulates the functioning of the endocrine glands;
Lowers body temperature;
- Rules of execution (Iyengar, Yoga Deepika):
- Technique for beginners
1. Lie on your back on the mat, stretch your legs completely and tighten your knees. Place your hands along your body, palms down. Take a few deep breaths.
2. Exhale, bend your knees, bring your legs towards your stomach so that your hips press on it. Take two breaths.
3. Exhale, lift your pelvis off the floor and place your palms on it, bending your elbows. Take two breaths.
4. Exhale, lift your torso up perpendicular to the floor, supporting it with your hands so that your chest touches your chin.
5. Only the back of the head and neck, shoulders and back of the arms to the elbows are on the floor. The hands are located in the middle of the spine. Take two breaths.
6. Exhale, straighten your legs, point your toes up.
7. Stay in the pose for 5 minutes, breathe evenly.
8. Exhale, gradually lower yourself, release your hands, lie on your back and relax.
Technique for advanced students
1. Lie on the mat on your back.
2. Stretch your legs forward, straining your knees. Place your hands along your body, palms down.
3. Take a few deep breaths. Exhale slowly while raising your legs so that they form a right angle with your torso. Stay in this position, keep your legs firmly, take a breath.
4. Exhale, raise your legs higher, lifting your pelvis and back from the floor, gently pressing your palms onto the floor.
5. When your entire torso is raised, bend your elbows and place your palms behind your ribs, placing your shoulders completely on the floor.
6. Using pressure from your palms, lift your torso and legs vertically so that your chest bone presses against your chin and creates a strong chin lock. Squeezing the throat and pressing the chin into the sternum is called Jalandhara Bandha - chin lock. Remember that here the chest moves towards the chin, and not vice versa. If the chin moves towards the chest, the spine will not be fully extended and this asana will not give the full effect.
7. Only the back of the head and neck, shoulders and upper arms to the elbows should be on the floor. The rest of the body should be extended upward in one line, perpendicular to the floor. This is the final position.
8. In the initial stage, the legs deviate from the vertical. To correct this, you need to tense the back muscles of your thighs and stretch upward.
9. Elbows should not be wider than shoulders. You need to try to pull your shoulders away from your neck and move your elbows towards each other. If the elbows are too far apart, the torso cannot be properly extended upward and the pose appears imperfect. You should also ensure that the neck is straight and the center of the chin rests on the sternum. In the initial stage, the neck turns to the side and, if this is not corrected, it can cause pain or damage to it.
10. Stay in the pose for at least 5 minutes, gradually increasing the exposure time to 15 minutes. It will not have any harmful effects.
11. Free your hands, gently lower yourself to the floor, lie down and relax. Since the weight of the body rests on the shoulders and neck and the hands are used to support the torso, this asana is called Salamba Sarvangasana. In Sarvangasana there are various movements that can be performed in addition to the basic pose described above.
Subtleties of the exercise and safety rules
When mastering the asana, the legs and torso may deviate from the vertical. To correct this error, it is necessary to move the pelvis forward as much as possible and at the same time strain the posterior muscles of the back and hips, as if trying to bend in the lumbar spine.
Verticality and elongation of the spine with the chin maximally pressed to the sternum and relaxed neck muscles are the main key of this asana.
Elbows should not be spread wider than shoulders. When performing the asana, you should strive to pull your shoulders away from your neck and move your elbows towards each other, increasing the stretch of the cervical spine, being extremely careful. In this case, the center of the chin should rest against the sternum. Turning the head is prohibited.
The legs are pressed tightly together, the heels stretch upward.
- Effect:
promotes the flow of blood from the lower extremities to the head;
- improves cerebral blood supply;
enhances capillary blood circulation of facial muscles and facial skin;improves blood supply and neuromuscular activity of the eyes;
due to the chin lock (Japsshdhara bandha), it abundantly irrigates the thyroid gland, ear glands and lungs with blood;
trains the suspension of internal organs;
improves liver function and digestion;
develops hand strength;
promotes relaxation of the heart muscle;
increases intracranial pressure, training the body’s ability to lower overall blood pressure;
improves metabolism;
rejuvenates the genitals;
strengthens and calms the central nervous system, helping to fight stress and insomnia;
straightens the spine;
strengthens the muscles of the back, hips, scruff and abdomen;
stimulates the functioning of the endocrine glands;
Lowers body temperature;
Calms thoughts;
- Reduces depression and stress.
- Breath
The more mobile the shoulder blades (and, therefore, the less the muscles of the chest cavity are involved), the easier it is to breathe in this pose. This asana requires good stretching and strength of the muscles of the entire shoulder girdle. If the shoulder muscles are weak or stiff, then the entire body weight rests on the chest, which makes it difficult for the diaphragm to move.
If the chest is free from stress, then the diaphragm and abdominal organs move freely towards the head, which allows you to fully take advantage of the benefits of this pose.
Barriers and Notes
From the point of view of the back and abdominal muscles, it is easier to be in this pose than to take it. However, staying in the asana poses difficult tasks for the muscles that control the movements of the shoulder blades, since, while performing their direct functions, they also bear the static load of the whole body.
In order for this stand to be truly performed on the shoulders, the muscles that retract and elevate the shoulder blades must be strong enough to support the body's weight. If there is not enough strength and the shoulders spread to the sides, then the upper part of the thoracic spine and neck are subject to excessive load.
- Cannot be performed when:
- arteriosclerosis;
in case of damage to the cervical vertebrae or displacement of the intervertebral disc;
pain in the cervical spine and shoulder girdle;
otitis;
- ophthalmia;
migraines or severe headaches; - menstruation!!!!!
upset stomach,
- after eating - only 2 hours later, and even better in the morning - on an empty stomach!
- PS/ Girls and women…….I’ll add on my own – tested on myself
If you find it difficult to get pregnant, do this stand! — helps in 2-4 months!
- Every day from 2-5 minutes - the effect is 100% for me and several friends.
In addition, if there was a threat of miscarriage (weakness of the pelvic muscles, hormonal imbalances) - I personally did this stand until 6 months of pregnancy - there was no choice - either.. or.
And also – it’s important! - practically no weight gain - after childbirth at the same weight as before.
Lighter version of the exercise
People who find it difficult to hold a pose for a long time due to physical weakness of the body or lack of training are recommended to practice a lighter version of the exercise. Gymnastics is performed using a folding chair, which helps hold the body in the desired position. Technique:
- we sit on the edge of a chair with our legs thrown over the back;
- gently lower your upper back to the floor;
- we raise our legs up.
To make it comfortable for you to stay in the pose for a long time, place a soft mat on the seat of the chair and place a bolster or blanket under your shoulders. During the exercise, the main weight of the body should fall on the shoulder girdle, the head and neck should lie calmly on the floor. Breathing is calm, even and deep. We exit the stance in the reverse order without sudden movements or jerks. For added safety, support the chair legs with your hands.
Where to train
There are no special restrictions for the place where scapular stand can be trained. You can exercise both indoors and outdoors. The main requirement for the exercise is a small area of flat surface so that the technique can be performed correctly. The scapular stand also requires a clear space that is not cluttered with large or small objects that could interfere with your workout.
If you exercise at home, then free up enough space for the exercise from furniture and other interior items. If you train outdoors, choose an open area with a flat surface, away from trees, bushes, etc. These precautions will help you protect yourself from additional injuries and bruises while practicing the scapular stand technique.
Benefits of exercise
Birch pose in yoga refers to inverted asanas. And they have very healing effects on the entire human body.
- Shoulderstand gives fresh blood flow to the head. This means that brain cells are renewed, thinking ability is enhanced, the head becomes light and clear (goodbye drowsiness and apathy!).
- Blood flows to the pituitary gland and pineal gland - important glands in the brain, on which our health directly depends. Both physical and mental.
- Improves hormonal balance. And this is how it happens. The pituitary gland is responsible for the production of hormones (it produces hormones that affect growth, metabolism and reproductive function). But you and I walk on our feet, the blood in the body flows down all the time, and the pituitary gland may not receive an accurate picture of the amount of hormones we need. And when we go into a stance, the blood rushes to the head, and the pituitary gland receives all the necessary information. He “sees” what hormones we lack and begins the process of replenishing them.
- Reduces pressure on the walls of venous vessels. This is true for those who suffer from varicose veins. The asana helps eliminate the risk of varicose veins and prevents the development of the disease.
- Starts the rejuvenation process. Why does this happen? Shoulderstand, like all inverted asanas, changes the flow of energy in the human body. We are talking about prana and apana. Prana moves up, apana moves down. And when we stand in Sarvangasana, we redirect the flow of these energies and start the rejuvenation process.
- Clears away toxins. Lymph removes everything unnecessary from the body. And it flows only under the force of gravity or during muscle work. If a person leads an inactive lifestyle, his muscles are flabby and undeveloped - lymph, alas, stagnates. An amazing effect occurs when we stand in a shoulder stand. Lymph, under the force of gravity, begins to work again and rid the body of accumulated toxins.
- Improves metabolism.
- Very good for the female reproductive system. The asana restores health to the organs of the reproductive system in men (just remember the contraindications. We do Sarvangasana if there are no problems in the cervical or thoracic spine, etc.).
- Includes the parasympathetic nervous system, which is responsible for relaxation. After all, what happens when we do a stand? Intracranial pressure increases. This is where the body “wakes up” and starts the process of self-regulation. He begins to reassure us, saying that everything is fine, there is no danger. That is why, when we come out of this pose, such a pleasant feeling of bliss and relaxation appears. The parasympathetic nervous system is activated in the body.
- Relieves nervous tension, stress and anxiety.
- Strengthens the functioning of the lungs, which in turn protects us from coughs and sore throats.
- Sarvangasana is a good prevention of colds and ARVI, because during its implementation the blood supply to the neck, throat, and face increases, and the body's resistance increases.
- Fills with energy, relieves fatigue and insomnia.
When and how much to exercise
Exercising on a regular basis helps to significantly improve health, add strength, and lead to rejuvenation of the body. It is recommended to perform shoulder stand every morning or evening, 1-2 hours after eating. Start practicing the exercise by holding the position for 30 seconds to 1 minute. As your body muscles physically develop and you master the elements of the inverted pose, increase the duration to 25-30 minutes a day.
At first, place the main emphasis on the correct execution of the technique: control the position of the torso, the position of the arms and legs. Take your time, do not force the duration of the workout, so as not to damage the muscles of the back and neck. Pay attention to any discomfort during the exercise. Gymnastics is performed correctly if there is a complete absence of pain in any part of the spine, the muscles actively work to maintain the body in the desired position, breathing is even, deep and calm.
Possible difficulties and common mistakes
When performing the Birch exercise, difficulties may arise due to physical unpreparedness. In this case, Birch can be lightened: for this, the most ordinary chair is used. It must be placed behind your head and your legs thrown back. Your toes should touch the seat, after which you can smoothly align your body and get into a pose.
There is no need to strive to stand in Berezka for as long as possible: the body must get used to its position. You should start with 30 seconds, gradually increasing the duration to 3 minutes. It is important to remember that you need to increase the exercise time only when the body has maximally adapted to the position and the person does not feel discomfort.
It should also be remembered that standing in the Berezka stance without pre-warming can cause serious harm to the muscles and internal organs of the body.
There are several rules that will help you perform the exercise correctly and effectively:
- When performing Birch, you need to try to relax as much as possible;
- a feeling of discomfort is unacceptable - this is a sign that the stance is being performed incorrectly or for too long;
- While performing the stance, you are not allowed to turn your head or neck, this can lead to injury.
It is very important to correctly exit Berezka to the starting position. Many people consider this Sarvangasana to be a fairly easy and safe exercise and neglect the recommendations regarding the correct completion of the stance, which subsequently leads to injuries and health problems.
Upon completion of the exercise, you do not need to “collapse” to the floor or jump up sharply. To exit Berezka, you need to slowly lower your legs behind your head and then smoothly place them on the floor. After this, it is recommended to lie quietly for a while.
For optimal release and balancing the load on the spine in yoga, it is recommended to immediately perform the “fish pose”, or Matsiasana, immediately after Berezka. These two exercises create a kind of tandem that effectively works with myxedema, thyrotoxicosis and is used before the use of hormonal drugs indicated for these diseases.
The exercise is performed from the same starting position as in Berezka: lying on your back.
From the waist, you need to perform a maximum bend back, in which the pelvis and elbows will be supported. The legs need to be stretched out freely, in an advanced version they can be folded into the “lotus position”, and the feet can be grabbed with your hands. The shoulders are thrown back as much as possible. The back of your head should not touch the floor. The effect is achieved by stretching the throat. In this case, the thyroid gland is intensively saturated with blood and the hormones of this gland are released from the follicles. Signs of correct execution of the exercise will be an increase in body tremors and fever. The time in the pose is from 1 to 2 minutes, also with a gradual increase.
