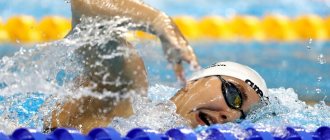
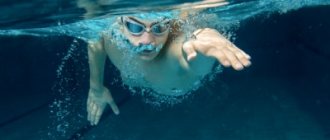
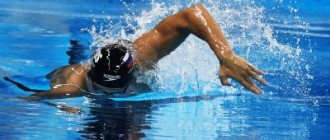
Front crawl is the fastest and most efficient swimming style. It is used as a base in freestyle, open water and triathlon swimming. The crawl swimming technique has its own characteristics that are worth paying attention to - and now, in winter, is the time to go to the pool to learn how to swim and improve your technique.
Danil Antonenkov , world record holder, two-time European record holder and multiple Russian record holder in swimming in the Masters category, founder of the SWIMLAB Swimming Laboratory, will help us figure it out
The benefits of swimming - what strengthens swimming in the pool and what muscles work, how many calories are burned from swimming
How to swim crawl correctly
In front crawl swimming, the swimmer is in a face-down position with the arms performing alternating stroke movements, pushing the water back and returning forward. At the same time, the legs make alternating wave-like movements. Breathing is carried out while rowing in one direction or in different directions.
Types of crawl are usually divided according to the criterion of footwork: there are two-, four- and six-hit crawls. The name reflects the number of kicks a swimmer makes in one cycle of movement. One cycle is two hand strokes, right and left. You can also distinguish between sprinting and staying techniques based on the criterion of changing hands.
At long distances (800-1500 meters), professional athletes use two- and four-strike techniques - it is more economical. Short distances are swam with a six-beat freestyle. But there are exceptions when long distance swimmers swim with a six-stroke technique or even change their style right during the swim.
Beginning swimmers are strongly advised to start with the basic two-stroke technique.
Crawl swimming technique (video):
What it is?
Crawl is a swimming style in which:
- hands make alternating strokes (from the outside somewhat similar to a “mill”),
- the legs are extended and take turns making blows (from the side somewhat similar to “scissors”),
- The head is lowered into the water and turns to the side to inhale during the stroke.
This technique looks like this:
This style is also clearly shown in this video:
How arms work in freestyle: we analyze the phases of movements
In freestyle swimming, the arms make alternating movements and go through several phases during the stroke.
Capture . The swimmer must cling to the water using the so-called high elbow, that is, first the downward and backward movement is made by the hand, wrist, forearm, and only then by the elbow and shoulder. The arm bends at the elbow joint, but not much. The angle must be obtuse, at least 90°. Thanks to this, the optimal vector for the further stroke is formed. In this phase, the deltoid muscle of the shoulder works.
Pull-up . The arm continues to bend at the elbow joint (up to 90°), the hand goes under the chest, stomach and down closer to the pelvis. The latissimus dorsi muscle is connected here. In the underwater phase, the palm breaks slightly relative to the forearm, creating an angle. The palm should look back and direct the water along itself.
The push-off or end of the stroke is the final underwater phase. The arm straightens at the elbow joint. This happens due to the triceps. The brush goes from under the pelvis to the thigh and along the thigh, thereby pushing the water back.
Hand coming out of the water . The surface phase of the stroke begins. The shoulder rises, the elbow, forearm, and hand come out.
Carrying . Due to the movement of the shoulder, the arm is brought forward. Good amplitude and rotation of the shoulder joint is important here. The deltoid muscle of the shoulder is working, and the forearm, biceps and triceps are relaxed.
Water attack . Entering the hand into the water and straightening the hand under water. The angle of attack of the water can vary, it can even be zero, but it should not be negative (when the elbow enters the water first). Usually the arm is fully straightened under water. The palm is a scapula - the fingers are gathered together.
Danil Antonenkov: “There is an open discussion among swimming coaches regarding fingers. Some people believe that there should be a slight gap between the fingers. I believe that the structure should be rigid so that water does not seep between the fingers. The palm should work like an oar. In this case, the thumb should be protruded to the side. This gives rigidity to the structure.”
How legs work
In crawl, the legs make alternating movements. In this case, the hips, legs and feet are included in the work. The movement comes from the hip in such a way as to create a wave effect - a wave-like movement like a fish tail or flippers. The hip movement should be done backwards (in the supine projection - upward), the legs bend at the knee joint, but not excessively. After bending the knee, the leg should straighten completely at the joint in antiphase.
Danil Antonenkov: “The main mistake of beginners is that they do not work with the hip, but only bend the knee and make movements with the shin. In this way, they often push the water forward, thereby minimizing progress and even remaining in place. We need to achieve wave-like movements. This happens precisely due to the work of the hips.”
The foot should work like a flipper, be flexible and bend in both directions - up and down under water pressure. These should not be muscle movements; the foot in the water is relaxed.
Danil Antonenkov: “Amateurs often have very hard feet, especially those who came to swimming from running. In such cases, you can tilt your foot slightly inward. Many people say “pull the toe”, but for a beginner this will be a problem. The foot will become tense, which can lead to a cramp. Also, trying to pull on the toe leads to stiffness in the foot, and it stops bending.”
Amateurs are advised to start with the two-beat crawl, and then move on to the four- and six-beat versions, because in the initial stages the legs are still too weak: in swimming, muscles are activated that are not much involved in normal life.
Work in coordination
Above, we looked at all the movements using the example of only one limb - now it’s time to explain how the movements of both hands are combined with each other.
The algorithm is quite simple: the supporting hand begins the rowing movement exactly at the moment when the other, after sweeping, begins to enter the water .
In general, the coordination work looks like this:
Breathing while swimming crawl
There are two options for breathing - every third stroke, then the sides change, or every second. In sports schools, children are taught to breathe every third for the following reasons:
- children stroke more often, so the time between breaths is short;
- They immediately teach symmetry - to breathe in both directions.
If we talk about amateurs and adults, it is recommended to breathe every second stroke in one direction. The main problem when breathing on the third stroke in adults is that the breaths are very rare, and the swimmer does not have enough air.
Danil Antonenkov: “When breathing on every second stroke, a skew occurs, so learn to breathe in both directions. To do this, simply change sides every 100 meters. First, inhale under your right hand, and for the next 100 meters – under your left.”
Breathing should be comfortable, as when walking or jogging, but with its own characteristics:
- inhalation is done through the mouth. The inhalation is sharp because the stroke time is limited;
- exhale through the nose, extended, 2-3 times longer in duration than inhalation.
It is recommended for beginners to exhale only through their nose (because it is easier to stretch out the exhalation time, and this will also prevent water from entering the nose), and for more advanced swimmers – through their mouth and nose. Exhalation begins immediately after the face is lowered into the water, or with a minimal delay.
Danil Antonenkov: “There is such a thing as a hitch.” This is when the face comes out of the water, but the mouth is not yet open. For professionals, the cool-down time tends to zero, but for amateurs, the cool-down can be long. All this is trained by practice in the water.”
You need to breathe shallowly, do not try to take a maximum breath, especially when swimming lightly. Then there will be no tension and it will be easy to breathe out everything. As the pace increases, the body itself will increase the volume of inhalation; this will happen naturally by reflex, because more oxygen will be required.
Correct breathing technique:
Body position
Danil Antonenkov: “Legs-hips-pelvis-back-head-crown - all together form a straight line in the horizontal plane. The top of the head is directed forward, and the gaze is downward. Under no circumstances should you look forward, because when you raise your head, you shift your center of gravity back, causing your legs to sink. As soon as you break the straight line, an angle immediately appears - the head is a little higher, the legs are a little lower. Because of this, frontal resistance increases and speed decreases. Your job is to keep your hips high.”
Rotation from one style to another
As we have already understood, alternating styles will bring the most effective results, but few people know that you can change one for another not only by starting a new swim from the side.
You can change one style to another right in the middle of the “path” of the pool - usually this is done for relaxation, when the muscles are tired from the same type of work.
How to transition from belly crawl to breaststroke: Complete the stroke and position yourself so that your body is in a straight line and your arms are in front. From there you can start breaststroke movements - a stroke with your arms and a push with your legs.
If, on the contrary, you want to make a breaststroke turn into crawl , then after a whole cycle of movements (stroke with arms, inhalation and push with legs), you need to take the same straight pose with your hands in front of you and begin the transition to crawl with an arm stroke.
Common Mistakes
Both beginners and experienced swimmers make mistakes, since perfecting the perfect freestyle swimming technique takes years. Among the most common mistakes, Danil Antonenkov notes the following.
1. Balance error is the main mistake made by beginners. The swimmer lifts his head and thereby drowns his feet. Although our body has good buoyancy, it is unevenly distributed. The upper part of the body - head, lungs, abdominal cavity - have good buoyancy, but the legs have poor buoyancy, so they always sink.
What to do to fix the error
You need to use the effect of a swing/scale - press on the front of the body, shift the center of gravity slightly forward and unload the legs. This is called "laying down on the water."
Advanced amateurs also encounter balance errors when they cannot move the results. The main problem is streamlining: the athlete adds power, but water resistance prevents him from increasing speed. Balance must be worked on at all stages of learning and improvement.
2. High breath - fear of putting your head in the water. Beginners, when inhaling, raise their head up and lift the top of their head, which is why they shift the center of gravity back and trample their legs, that is, they upset their balance.
What to do to fix the error
Learn the “flat” inhalation technique:
- along with the stroke there is a turn of the body, a slight movement of the chin to the shoulder of the rowing arm;
- the top of the head continues to look forward;
- the gaze is now directed not downwards, but diagonally back and up.
With this technique, you do not throw off balance or lift the front of your body.
Flat breath training:
3. Change of hands . Beginners often float like a river - one hand rows, the other rushes through. A lot of effort is spent, a person gets tired quickly.
What to do to fix the error
If you want to swim correctly and for a long time (long distances), then you need to change hands at the very last moment.
More experienced swimmers also make the mistake of changing hands. Many people also ignore the recovery phase of the arm swing. Swimming is a cyclical sport in which you cannot work all the time. There must be a rest phase. During this short interval of time, when the swimmer carries his arm, it is necessary to relax the arm muscles (biceps, triceps, forearm), except for the shoulder muscles, which are directly responsible for the lift. The hand also rests while sliding in front. It is necessary to learn to straighten your arm at this time without unnecessary effort - not “stretch”, but “straighten”. Good carrying technique also helps prevent injuries.
4. Coordination of arm and leg movements . Often, advanced and even experienced athletes may experience desynchronization in the movements of the arms and legs, especially in the four- and six-beat crawl.
What to do to fix the error
Start with the two-beat crawl and only then move on to other variations. It's like a car transmission. You start at low revs and then move up to higher revs. All movements are synchronized and consciously controlled by you at will. You must learn to coordinate the movement of your arms and legs and not allow your legs to move spontaneously.
5. Underwater part of the stroke . It is extremely important to properly grip the water and set the correct stroke trajectory. You can develop strength, but if you apply it incorrectly, nothing good will come of it. The underwater part of the stroke consists of three phases - capture, pull-up and push-off. And these elements need to be worked on, especially by advanced athletes.
Three indicators of a good swimmer
What qualities should a good swimmer have and how to evaluate them?
Arm strength
Try wide-grip, close-grip, and reverse-grip pushups. An indicator of 25 - 30 times means that the muscles of the shoulder girdle and upper limbs are strong enough for proper swimming technique.
Joint flexibility
Join your hands behind your back like a lock and try to tilt them above your head in front of your body.
If your arms form an obtuse angle with your back, your flexibility is good.
Buoyancy
Immerse yourself in the water while inhaling, raise your arms above your head. If your elbows remain above the surface of the water, your buoyancy is low. Immersion to wrist level is a good result.
The indicators are relevant for any technique, no matter what swimming methods you practice. The first two indicators can be developed through physical exercise. The latter is a feature of the body.
Pro Tips
Danil Antonenkov: “Just as a house is built from the foundation, so equipment is built in order. You cannot move on to learning to carry and grab until a person has learned to lie on the water.
In my methodology, I divide all elements into several levels:
- The initial one is to lie down on the water (learn to keep balance), learn to change hands correctly like a stayer, breathe correctly (be sure to exhale the air), and turn your body. It is important not to rush here.
- Advanced . When the initial elements have taken root, only then do we move on to carrying, coordination of arms and legs.
- Effective - underwater part of the stroke, variations of 4-6 kick crawl, variations of stayer, sprint change of hands.
The initial elements can be completed in 6-12 workouts, and the underwater part of the stroke can be practiced for a very long time.
The first priority is balance. How do you know if you're doing everything right? At the initial stage, speed is not important, ease is important. You must lie on the water, calmly stroke, exhale, and not accumulate oxygen debt. There should be no muscle fatigue or acidification. The water holds you, and you move forward. When you can swim for an hour without stopping or getting tired, then you can say that the basic elements have been learned. Here you can add and move on.
The second point: we must strive to do everything well at once, and not fix unfinished elements. You have to strive for perfect execution, otherwise it will be more difficult to retrain muscle memory later.”
Cultivation - advanced level
Main article: How to swim crawl faster
After you have mastered all the basic elements, at some point you will stop developing - and then the question will arise about further improving the crawl technique .
Here you will need to contact a trainer or film yourself on video (which can also be shown to the trainer, at least via the Internet remotely) and then work on correcting the shortcomings. Read our article about what points you should especially pay attention to.
How not to get tired when swimming crawl
Now there are many competitions for amateurs - open water swims, triathlons. We asked Danil to give some advice to those planning to swim long distances outside the pool.
Danil Antonenkov:
"1. Learn to lie on the water. Without this, all swimming will proceed from strength: while a person is swimming, he does not drown; if he slows down a little, he immediately begins to sink.
2. Change hands later. Beginners can even take turns working with their hands.
3. In a triathlon, since there is still cycling and running ahead, use only the two-beat crawl.
4. Learn to navigate in space. There is no path in open water and there are no underwater markings, so you need to raise your head to look at the buoys. This can be done in different ways:
- look forward every few strokes, for example, every 10 strokes, to align the trajectory of movement;
- make the so-called “crocodile eyes” - raise your head so that your eyes are above the water and swim like this for some time until you see a buoy; then return to normal style.
5. Breathe every second stroke. In open water and over long distances, the stroke rate is usually low, so you should not breathe on the third stroke.
6. Learn to alternate between work and relaxation. Swimming is a cyclical activity, strokes come one after another. It is important to tense your arm muscles during the stroke to move forward, and relax during the swing phase, as well as during the glide. This skill must be brought to automaticity so that swimming is fast, easy and without tightness. Over long distances this is extremely important.”
Photo: Gettyimages.ru/Elsa; personal archive of Danil Antonenkov
FAST STROKES AND LONG STROKES – THE PERFECT PAIR!
It's not enough to just move your hands quickly. When you do too many strokes, you tire too quickly, so that in the last 20 meters of your 100m dash you feel like you're pulling a semi-trailer. You can't win medals with a trailer on your back.
Long strokes are also not a solution to the problem. A long, relaxed stroke can look great, but without the right speed, the most you'll win is a prize for the most beautiful stroke.
