A good treadmill costs good money. It is not surprising that craftsmen, accustomed to doing everything with their own hands, are trying to build it themselves.
People often look for instructions and drawings on how to build a treadmill at home - and find nothing.
Search engines, in response to such a request, most often provide links to articles about how to make not a simulator, but an ordinary sports track.
There are reasons for the lack of reference information of this kind; we will discuss them below. But first, let’s give some brief instructions.
How to make a treadmill with your own hands at home
Assembling the model in DIY style is quite simple, as is the circuit diagram. Here's how to make the device.
Mechanical type
- We create a frame (support) in the form of legs or small runners, as well as a support for the canvas (deck). Can be made of wood, legs - of wood or metal.
- We connect it with horizontally located (at different heights) axes (shafts).
- We stretch an elastic, dense fabric over the shafts (like a caterpillar on a bulldozer).
That's it, essentially the “simulator” is ready. A homemade treadmill is a modest imitation of the real thing - in all its glory.
Electric type
If you want the belt to move on its own, like a real electric treadmill, then one of the shafts (axes) needs to be connected to an electric motor (an exotic option is a gasoline engine), since this axis needs to rotate.
The instructions, as you can see, are simple. However, few people follow them. In general, the most common answer to the question on some forum is “How can I build a treadmill?” is an ironic suggestion to steal a tank or bulldozer, turn it over and enjoy the movement of the tracks.
What is the problem?
- It is difficult (extremely difficult!) to decide what to make a simulator from, especially to find a suitable material for the canvas. It should be elastic and at the same time strong enough. Finding an adequate replacement for industrial solutions is almost impossible.
- The simulator assembled in this way will be very bulky. It will take a lot of skill to make it compact in size. And if there is plenty of space around (for example, in a country house, it’s better to just run outside).
- A homemade system with an electric motor will be extremely unreliable.
Now the tracks are equipped with small computers with cardiac sensors and even special training programs.
In short, it is more profitable to pay for a store-bought version than to suffer with homemade products.
Buy a normal treadmill in a store (it’s quite possible to find cheap options) and don’t waste your time.
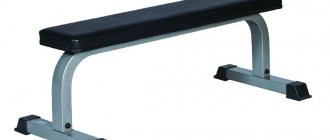
About wooden athletic benches
You cannot train with barbells on wooden sports equipment; their design will not hold up. But in situations that arise as a result of the awkwardness of the trainee, wood “radiates” through the body much less sensitively than metal. Therefore, it is preferable for beginners and minors to use wooden benches for bench press and abs. In addition, wooden sports benches and exercise equipment can be built at the dacha or in a country house from leftover building materials.
Drawings of an inclined wooden bench for the press
The design of an inclined wooden bench for the press and the specifications for it are shown in Fig., and on the next. rice. – drawings of a wooden exercise machine with an inclined bench and a lever for leg exercises with a load. In order for the tree to support operational loads, a block system for hanging loads is used: they hang on the descending branches of cable A. Cross beams B are rubber-coated steel.
Wooden home exercise machine
What are the benefits of a treadmill?
This simulator is in demand among athletes and ordinary people. Exercises on it can bring considerable effect and benefit.
The treadmill has many advantages:
- muscles are trained;
- heart function improves, tone remains normal;
- respiration develops, helping cells enrich themselves with oxygen;
- excess weight is lost - fat is burned throughout the body;
- relieves stress - intense movements help a person calm down;
- psychological and mental fatigue disappears;
- performance improves.
These effects will be achieved only with regular exercise on a high-quality simulator in compliance with the rules.
How to make a treadmill with your own hands
The simulator can be made of two types - mechanical and electrical.
- For the first type, you must first create a support (preferably metal) in the form of legs. Next, select a massive tree trunk that will serve as a support for the canvas. Connect the frame with axes that are located horizontally. Stretch a wooden sheet over them (the principle will resemble a tank caterpillar). The track with a mechanical type of action is ready. This option is worth choosing if your health is normal. Such a simulator will be used not only at home, but also in places where there is no electricity.
- For the electric version, the assembly diagram is slightly different. An electric motor should be connected to one axis - the shaft will rotate. A gasoline engine is suitable for this purpose.
- Another option for a running track is a metal ring with a durable steel mesh. The ring must be larger than the person's height. The structure must be hung on 2 axes.
During the manufacture of the simulator, many problems can arise. The main thing is the selection of suitable material. The canvas must be strong and elastic.
The simulator, made independently, has large dimensions. To make a compact version, special skills are required. Knowledge of cutting materials and welding is also required.
Making a treadmill at home is no longer a problem. The process of its manufacture does not require much effort. The main thing is to follow the instructions and observe safety precautions.
This is interesting: How to Become the Soul of the Company
Which option is better: mechanical or electric tracks
The cost of a treadmill is high, so people are increasingly assembling the structure themselves. Before purchasing parts and components, you must select the drive option - mechanical or electric. The advantages and disadvantages of each of them are formed taking into account the preferences of the trainee.
The choice of a mechanical engine is relevant in several cases:
- If there are no serious health problems.
- If it is not possible to spend a large sum of money on assembling the structure at a time.
- If the assembled treadmill acts as additional equipment for home workouts.
- If you need a compact treadmill, arrange a home gym in limited conditions.
- If you plan to use the equipment not only at home, frequent moves and transportation are provided.
- If you are trying to avoid injury.
An electric treadmill is chosen if you want to diversify your training process to quickly achieve results.
How to make a treadmill at home
Movement is life. Unfortunately, office work and constant driving or public transport make it impossible to move sufficiently. To solve this problem, many people think about purchasing a treadmill.
Thanks to the exercise machine, you can go for morning or evening runs without leaving the door of your apartment or house. As a result, physical health is strengthened, mood improves and excess weight is burned.
However, when choosing a treadmill, another difficulty arises - the high cost of the device. The price of a good simulator ranges from 10 thousand to 1.5 million rubles. To avoid such expenses, you can do everything yourself.
Design
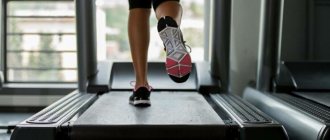
Any treadmill consists of several parts. They allow you to maintain the stability of the structure during training, maintain balance for the user and maintain the necessary dynamism of the canvas.
- The basis of the simulator is the frame. Its dimensions and strength must withstand heavy loads. It connects all other parts into a single structure. In factories, the frame is made of aluminum. This material is durable, has excellent shock-absorbing properties and is light in weight.
- Most designs include racks. They come in various shapes and designs. The main purpose of the stands is to mount the display and sensor on them. The user will benefit from having additional support during exercise.
- The running belt is the main element of the simulator. The convenience of training and the useful life of the entire product depend on its physical characteristics. The convenient width of the covering is 0.4 m, the average length is 1.25 m. The service life depends on the thickness of the material; it should not be less than 1.8 cm. The entire canvas rests on the deck - a durable sheet material that takes on all the loads. The optimal thickness of the deck is 2.5 cm.
- For ease of running, the simulator is equipped with shock absorbers. They can be made of elastomers (elastic material, similar to rubber) or dynamic cushions. Depending on the material of the shock absorbers, they are installed under the struts or under the deck.
- The electric motor allows you to rotate the running belt without human intervention. This makes training more convenient. Usually 2 hp is enough, but for intense workouts you will need a 3 hp engine.
This section did not touch upon the topic of the display and electrical sensors, since they are difficult to assemble at home.
Like any mechanism, this machine can break down, which will require repairing the treadmill and purchasing spare parts.
In addition to repairs, regular maintenance will be required - treating the deck with silicone grease. Having assembled it yourself, you will know all the details and how to troubleshoot.
What kind of simulator is this and how does it work?
The basis of the design is the connection of the pedals and the flywheel. The flywheel, in turn, determines the load and can make pedaling more difficult or easier. Next, we will briefly consider the main differences in applying load to the flywheel.
In addition, the upright exercise bike uses an on-board computer and heart rate monitors. These devices allow you to perform systematic, planned training, the effectiveness of which will increase even more if you become familiar with the training programs. In addition, other additional devices and options can be used. To do this, you need to know 8 basic rules for using an exercise bike and its functions.
Assembly option
You can assemble a treadmill with your own hands, but you will have to make an effort and buy additional spare parts.
The first step is to assemble a reliable frame. It can be made of metal or wood. If you decide to make a metal frame, then a profile or tubing pipe will do. Their profile pipe can be purchased at a specialized store, and tubing can be purchased at a metal collection point at a low price. Key points to pay attention to when making a frame:
- The width of the frame should allow unhindered movement of the running belt.
- The entire structure is designed for stability.
- In addition, you can weld handrails with a non-slip coating.
- The lower frame on which the shafts will be mounted must be inclined.
- It is worthwhile to provide a mount for the deck.
- After making the base of the simulator, the shafts are installed. They should turn easily. To achieve this goal, shafts can be connected to bearings.
A deck is installed between the shafts. A durable sheet material with a smooth surface is required. To ensure that the running surface glides smoothly across the top of the deck, you will need treadmill lubricant, usually silicone. It is worth noting that this part of the structure must withstand not only the static mass of a person, but also the dynamic one.
You can make an additional sheet under the deck and attach it to the frame. And in the space between this sheet and the deck, place an elastic material for shock absorption.
The final stage will be the selection and installation of the running surface. It is difficult to find a replacement for a professional solution. The price for specialized material starts from 6 thousand rubles. Requirements for the canvas:
- Strength. Constant loads should not tear the material.
- Abrasion resistance. The longer the thickness of the fabric remains unchanged, the longer the machine will last.
- Good grip. The user should not slip while running, so you should choose a blade with a grooved surface.
- Recommendations for making a treadmill at home are simple, but difficult to implement. The task becomes even more complicated when it is necessary to install an electric motor.
If you decide to take this step, then it is best to choose a DC motor. It produces less noise, which is important for an apartment.
Simple track without drive
Homemade simple mechanical walkways are easy to assemble and inexpensive. You will need profile and round pipes, bolts and nuts, bearings, and a running belt.
The size of the track depends on the width of the canvas (usually 60-70 cm). Round pipes of suitable length are cut, all parts are connected together with bolts, nuts and bearings according to a pre-prepared drawing. The bearings are pressed into round tubes on both sides.
To make the frame you will need a profile pipe. Blanks of the required length are made and welded together. Holes for bolts are drilled in the side walls. Next, you need to install the pipes between the two side walls of the support platform and paint the frame.
See also: Making panels with your own hands for the interior
Troubleshooting
If a problem occurs, you will not be able to send the device to a specialized treadmill repair, so you will have to do everything yourself.
The main breakdowns of the simulator are related to the running surface and the engine. How to extend the service life of mechanisms?
If you have assembled a mechanism using an electric motor, then the first thing you need to do is turn off the power. Then find out the cause of the breakdown.
If the running surface glides poorly, there may be the following reasons:
- Insufficient glide. To fix the problem, you will need silicone treadmill lubricant.
- Ingress of debris. Just clean the space under the canvas.
- Moved out. With frequent loads, the running belt may change its position, and you have to adjust it regularly.
- If the breakdown is related to another mechanism, you can buy the necessary spare parts and find information on the Internet on how to repair treadmills.
This is interesting: Personalized T-shirts with custom inscriptions
Lubricating the Treadmill
In order for the running belt to continue to slide smoothly, you need to regularly lubricate the deck.
This operation is performed every 30 hours of use of the simulator or after 300 km have been covered. Otherwise, the lubricant will evaporate and the load on the running belt and electric motor will increase significantly, which will lead to breakdown.
The need for silicone lubricant can be checked manually. Run your finger under the running belt, if the surface of the deck is dry, then it is time to apply lubrication.
Step-by-step instructions on how to lubricate:
- disconnect the simulator from the electrical network;
- release the tension of the canvas. To do this, you can remove the shafts or unscrew the adjusting screws;
- lifting the canvas, you need to apply silicone grease to the surface of the deck;
- return the running belt to its original tension;
- let the engine run for a few minutes so that the product is evenly distributed;
- Remove excess grease with a rag.
Before training, you need to slowly walk on the treadmill.
Safety precautions when operating the track
There are several rules for successful operation of the simulator:
- Walking/running on the outdoor path is prohibited.
- Installation of the structure on a bare floor or a special rubber covering. Soft carpets cannot be used.
- All working mechanisms must be covered with protective covers or covers. It is not recommended to touch them.
- Do not operate the track if the insulation of the network wires and plugs is damaged.
- After training, we set all functions to the zero position and only after that we disconnect the mechanism from the network.
- Various sensors are not medical devices - the indicators have significant errors.
- You should walk on the canvas in sports shoes. This will reduce the impact load on the joints.
How to make a treadmill with your own hands?
join the discussion
Share with your friends
If you are an inventor at heart, have the beginnings of an engineer, or simply like to create something with your own hands, and at the same time you are tired of running on the spot at home, then why not try to make such a useful attribute of a healthy lifestyle as a treadmill. Such a homemade product may well perform its functions fully, helping to bring your body and life to the desired result. How you can build a treadmill for your home at home - we will look in detail in this article.
A few banal truths
At the same time, not everyone is lucky enough to work out in the gym. One doesn’t have enough time, another doesn’t have enough money, the third can’t force himself to get out of the house. Now, if the exercise machine stood next to the sofa...
It is now fashionable to purchase sports equipment for various purposes at home. Especially when finances and square meters allow. But what should those who have a small apartment do and there is absolutely no way to allocate a separate room for a home gym?
There is only one way out - decide which equipment is most important to you, reserve a corner for them (for example, in the bedroom) and start practicing. But what exactly should you choose?
In addition to the classic horizontal bar and a set of weights, we advise you to purchase a treadmill and start running at home.
Device Basics
The initial element, without which any such sports attribute cannot do, is the fastening and holding frame. This, in essence, is the fastener, frame and skeleton of the entire mechanism, and everything else cannot do without this component. It is important that it can withstand a lot of weight, which is why it is better to use durable metals.
If you need a monitor that will also serve as a performance indicator, then you will definitely need a stand that can hold it all. It goes without saying that you also need a canvas, that is, in fact, a path along which you can run.
Let's not forget about the convenience elements. At first glance, it may seem that you can do without a good shock absorber. However, not everything is so simple, because the knees are a very vulnerable place in terms of running, and sometimes they, unable to withstand heavy loads, begin to hurt. It is in order to avoid this unpleasant symptom that it is recommended to jog not on asphalt and closer to a country road.
The best option is a forest path. It provides excellent shock absorption. And our treadmill should be as minimally hazardous to the user as an ideal grassy path.
Options
It is very important to make the treadmill comfortable, but at the same time compact. That is why there are recommended parameters that will be the best option.
- The width of the treadmill should not be less than half a meter. Some instructions consider a model with a width of 0.4 meters to be optimal, but here the wider the better, because everyone’s foot width is different.
- The length is not so important in terms of convenience, but it is better not to make the track less than one and a half meters long, because at high speeds the legs can be placed quite far forward, and in order to avoid injury it is better for it to be longer.
- As for the thickness of the working cloth, do not take less than 2 centimeters , since the material is quickly subject to wear. In addition, this canvas needs to be secured to something, and for this a multi-layer base called a “deck” is used. It should also be chosen with thick layers and not take a layer less than 2.5 cm.
Please note that if you are going to install such a structure you have assembled at home, then you should understand a few important things. The work surface itself occupies height and width in space, but there is also a frame around it - it is even wider, higher and larger than any work surface. This should be taken into account when selecting the parameters of the simulator.
First and last failure
The decks began to fly away like hot cakes at the market. The downside, as mentioned above, was the labor intensity of the process and production time. It took a couple of hours to apply the coating, but the process of drying and complete crystallization of the material took about a week.
But the price! The price saved us! The first decks cost 1000 UAH. per square, double-sided professional - about 1500 for both sides. And then everyone who had been involved in this matter before became SERIOUSLY angry with us. We received greetings and threats through mutual colleagues in the shop, with enviable consistency. But other than this, there were no particularly serious actions. Until the moment when they themselves “pumped up”.
We got a little carried away and missed the point that all treadmill instructions write about - DO NOT USE YOUR HOME TREADMILL IN THE GYM!
A client approached us and asked us to make a deck for a home treadmill in the gym. With a thickness of 19 mm, the old deck simply could not withstand the loads and burst, as a result of which they ordered a new one.
As a result, our deck also delaminated within a week and specific charges were brought against us! “You are scoundrels, swindlers, SUCH MONEY, I called Kiev, they laughed at home, saying how could you even contact them!!! I will complain to the prosecutor!” Yes, our “colleagues” had a blast here! Of course, we returned the money and apologized, but our reputation was already damaged.
After working on the errors, we came to the conclusion that we ended up with low-quality material, although there were also assumptions about not complete drying, because the customer was in a hurry as best he could and we released the deck a couple of days earlier than allowed.
In order not to take risks in the future, it was decided to completely change the technology.
Assembly
So, first you need to buy the necessary parts. In particular, you will need to make a frame, and the best solution would be to weld it from some pipes made of durable metals. The best option in this case is aluminum.
When making a frame, take into account its dimensions so that the canvas can move freely inside this frame. In addition, an excellent solution would be to weld the handles to suit your own height; they should be covered with some kind of non-slip material.
The lowest frame on which the shafts will subsequently be installed should have a slight slope. Some fastenings are also needed to hold the deck. The movement of the canvas and comfortable running along it is ultimately provided by the shafts, and in order for them to work smoothly, combine their design with bearings.
This is interesting: How to make a money tree
The most essential equipment for your home gym
It is worth giving your preference to free weights. If your goals are to build a harmoniously developed, strong body, then, undoubtedly, your choice should fall on the queen of strength sports.
Exercise equipment
- Barbell _ The bar can be made from a variety of materials; we will come to this issue later. For serious training, you will need plates for the barbell, it is advisable to have them in pairs, for at least 150 kilograms. Also, the barbell set requires a W-shaped bar. This type of bar is necessary for pumping up the arms and relieving stress on the joints.
- Dumbbells, it is advisable that they be collapsible, as they will take up less space.
- Bench for bench press , preferably with an adjustable backrest. This bench is necessary for performing presses at different angles, flyes, pullovers and other exercises.
- The horizontal bar and parallel bars are one of the most easily accessible exercise equipment. They are distinguished by ease of manufacture and availability of materials. The range of exercises is wide, so this exercise machine will perfectly complement the gym.
- The power rack will ensure your safety while performing squats, deadlifts and presses. A universal simulator that has a simple design and is distinguished by increased safety.
- Roller simulator for performing various deadlifts. With the help of such a machine you can develop your lats and triceps well.
- For cardio training you will need a punching bag and a jump rope .
Here is the most necessary set for bodybuilding and maintaining physical fitness in general.
Operating the device
To assemble a track according to the drawings, you need certain skills, but not all assembly features can be indicated in the diagram. Some elements, for example, silicone ointment, are no less important, but are often not indicated in the diagrams. But in order for the canvas to slide correctly over the surface of the deck, it will need to be lubricated with a special substance - ointment for treadmills.
Canvas
In order to use the treadmill successfully for a long time, it will not be enough to assemble it according to the diagram. You will also need to pay close attention to materials, especially those that quickly deteriorate. In the case of a moving canvas, it will be quite difficult to choose such a material . The fact is that such a canvas is made in a special way, which allows it to maintain good adhesion to the deck.
However, modern trade can offer anything. Therefore, you can find durable material that lasts a long time, but you should keep in mind that its cost starts from 5-6 thousand rubles and above.
Mechanical or electrical
It is clear that to put the track into action, some kind of trigger is needed. In this case we are talking about an electric motor, which varies from 2 to 3 horsepower. This is quite enough to carry out even intense training.
But it is more important to choose the engine correctly and be able to not only connect the mechanism to electricity, but also safely direct its driving force to rotate one of the shaft axes . At this stage, you can make mistakes in many matters, so it is better to carefully follow the instructions in order to do everything correctly and safely.
There is a mechanical version of the treadmill - it does not require power, it works solely by pushing the legs away from the belt. This is, of course, easier, but less effective than training on an electric model.
If you plan to use a walkway without a motor, then a properly assembled frame into which the shafts, decks and canvas will be installed is a ready-made and final option. In this case, it is important to do everything carefully and correctly so that the mechanism is actually activated as simply as in a purchased simulator.
Things are a little more complicated in the case of assembly when using a motor. There really is a more complex scheme and mechanism. In order for the entire system to work smoothly and without interference, you will have to connect one of the shafts to an electric motor. And in order to do this correctly, you need to have some skills, abilities and, accordingly, the motor itself.
In addition, it is necessary to provide for the installation of the motor in the structure itself, and its shape does not resemble any of the elements of the treadmill. This means that you will either have to install it separately, or increase the area of the frame upward.
What is a trainer?
The “Weight Loss” simulator was created by Nikolai Dolinov. The man was overweight and could not get rid of it. With the help of this device, he managed to lose 20 kg in two months.
Today, people use “Weight Loss” during sports training, to strengthen muscles and improve health. The device has proven itself in the treatment of joints. It is used in the post- and postoperative period to restore and develop limb mobility.
The device is compact and does not take up much space. Attached to the wall. Consists of belts and cables that connect loops. Helps not only get rid of excess weight, but also strengthen major muscle groups. Can be used to obtain additional stress during sports. A session lasting more than 20 minutes is considered effective.
Possible problems
Such an ambiguous decision as assembling a simulator with your own hands at home is a rather controversial option. First of all, you need to know where you can buy metal with suitable parameters. If you cannot order a set of pipes specifically for your parameters, then you will also have to deal with the problem of accurate and careful cutting yourself.
But it doesn’t matter where and in what form you purchase the materials. In any case , you will have to fasten these pipes together yourself. Most likely, and what will be the most convenient solution, you will choose soldering. After the structure is assembled, you will have to install bearings and shafts there, and it is important to do this in such a way that the deck is installed level.
Problems that can arise with the canvas are its price and availability. After all, only a solution designed specifically for these tasks is suitable for this, and therefore it will be quite difficult to find such sheets on the open market. And one more thing: the assembly process itself implies the presence of free time and interest in the process.
Where to start
Any mechanism, simulator or device begins with a plan, drawings and layout. A detailed plan is needed in order not to miss anything, and the DIY treadmill turned out to be, if not beautiful, then effective and safe. It should include a list of necessary tools and materials, and the correct sequence of processes.
To visualize the idea, accurately calculate dimensions and costs, you will need drawings, and in order not to break the capital structure, you first need to make a model. In this case, the main benefit of a full-size model is the ability to try on the simulator and the room where it will be located. Very often, it is difficult for beginners to adequately perceive the dimensions of the “machine”, mentally comparing them with the actual footage and features of the room.